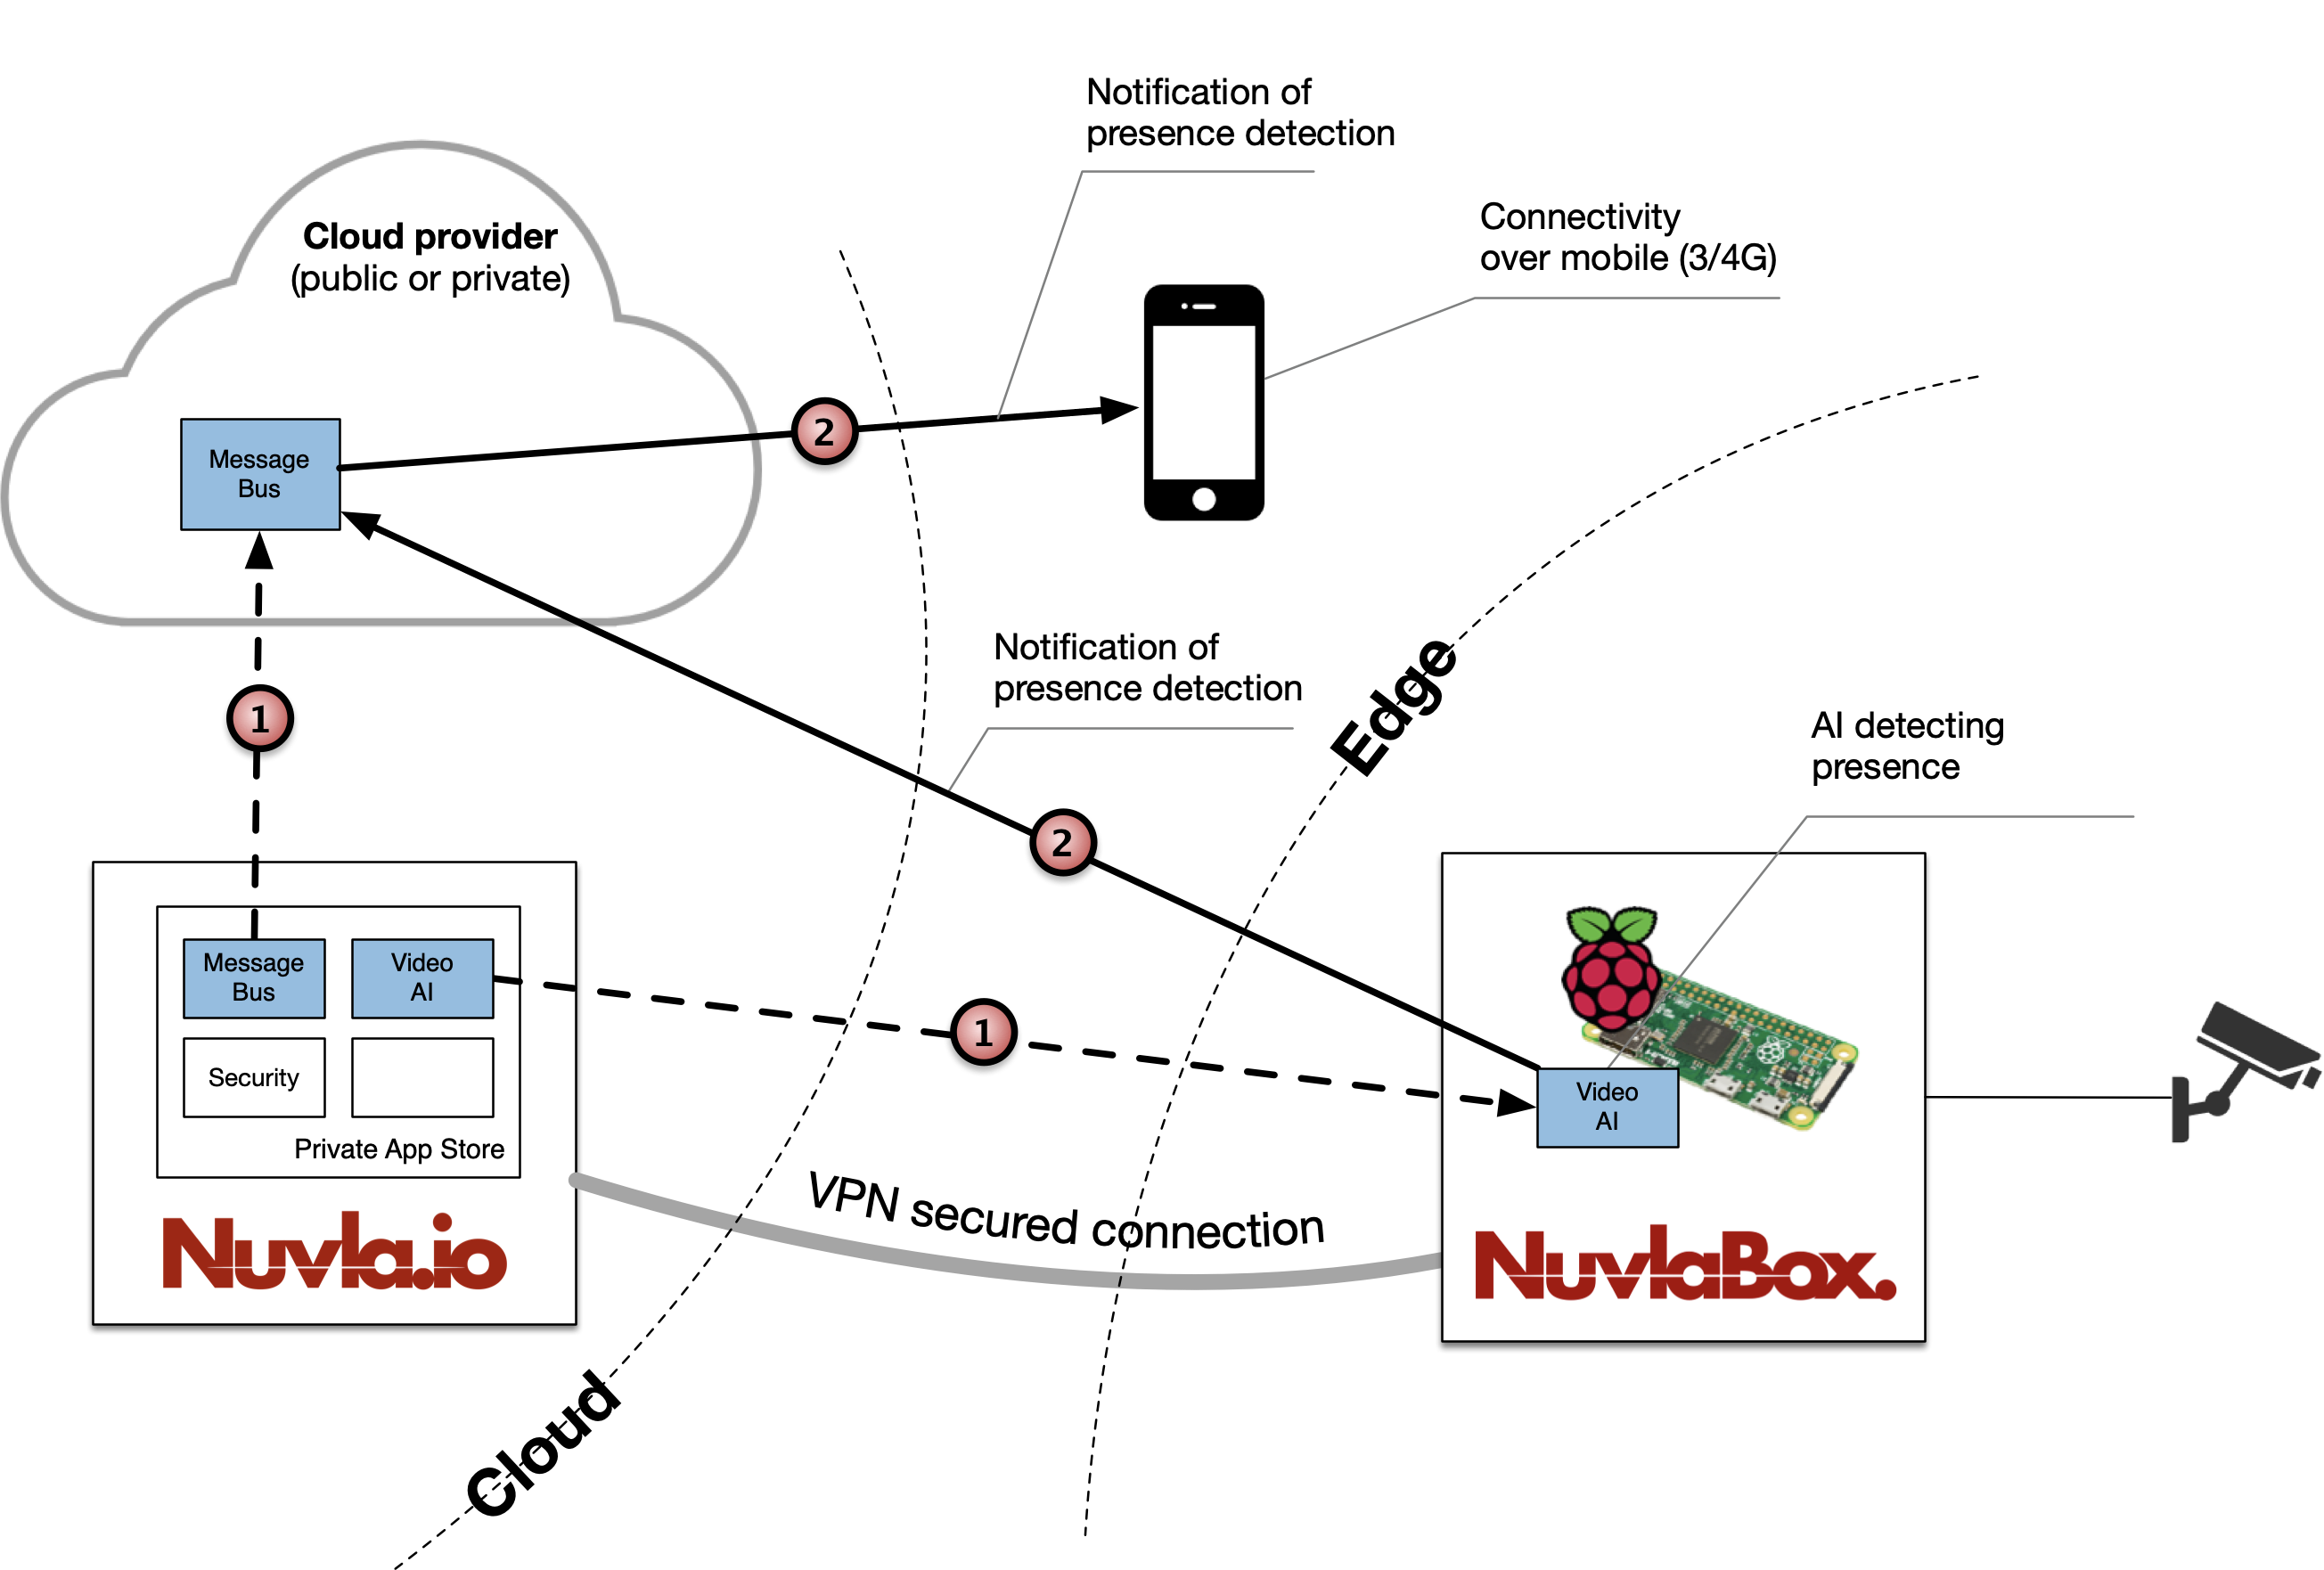
Demo: person detection system at the edge, with notifications to the cloud
Scenario
Let’s setup a scenario for an edge device (NuvlaEdge) with a USB camera attached, and a VM running in the cloud.
We’ll deploy, from Nuvla:
- a message broker application to the cloud VM, and
- a video analysis app to the NuvlaEdge, that publishes notifications to the message broker running in the cloud.
Finally, we can even install an app in our phone, to subscribe to the message broker running in the cloud, so that we receive the notifications from the NuvlaEdge, no matter where we are.
This scenario is pictured in the image below.
DIY: Step by step guide
You can run this demo by yourself. Simply go through the following steps:
1: You’ll need
- one or more Linux VMs, with a public IP, running Docker in Swarm mode
- an edge device (RaspberryPi, Laptop, etc.) with Docker and Docker Compose installed, and Swarm mode enabled
- an internet connection
- a Nuvla.io account
- one USB webcam
2: Setup your Cloud infrastructure
- SSH into a master node (VM) from your Docker Swarm cluster. Take note of the IP of that node
- To secure the connection with Nuvla, we need to set/get some TLS credentials for your Docker socket in that cluster. Check
systemctl status dockerand see if there are any--tls*arguments in thedockerdprocess- IF YOU HAVE THOSE, then please make note of CERT (as –tlscert), KEY (as –tlskey) and CA (as –tlscacert). Also make a note of the TCP PORT being used (by default it should be 2376)
- IF YOU DON’T HAVE TLS SETUP, then please:
- run
docker run -d --rm -p 5000:5000 -v /var/run/docker.sock:/var/run/docker.sock -e HOST=${HOSTNAME} --name ne-compute-api --entrypoint api sixsq/nuvlaedge:2.12.2 - Wait about 60sec, or until the command
docker logs ne-compute-apishows:mode of ‘/opt/nuvlaedge/cert.pem’ changed to 0444 (r–r–r–)
- take note of:
CERT - from
docker exec ne-compute-api cat /srv/nuvlaedge/shared/cert.pem
KEY - fromdocker exec ne-compute-api cat /srv/nuvlaedge/shared/key.pem
CA - fromdocker exec ne-compute-api cat /srv/nuvlaedge/shared/ca.pem - also take note of PORT=5000
- run
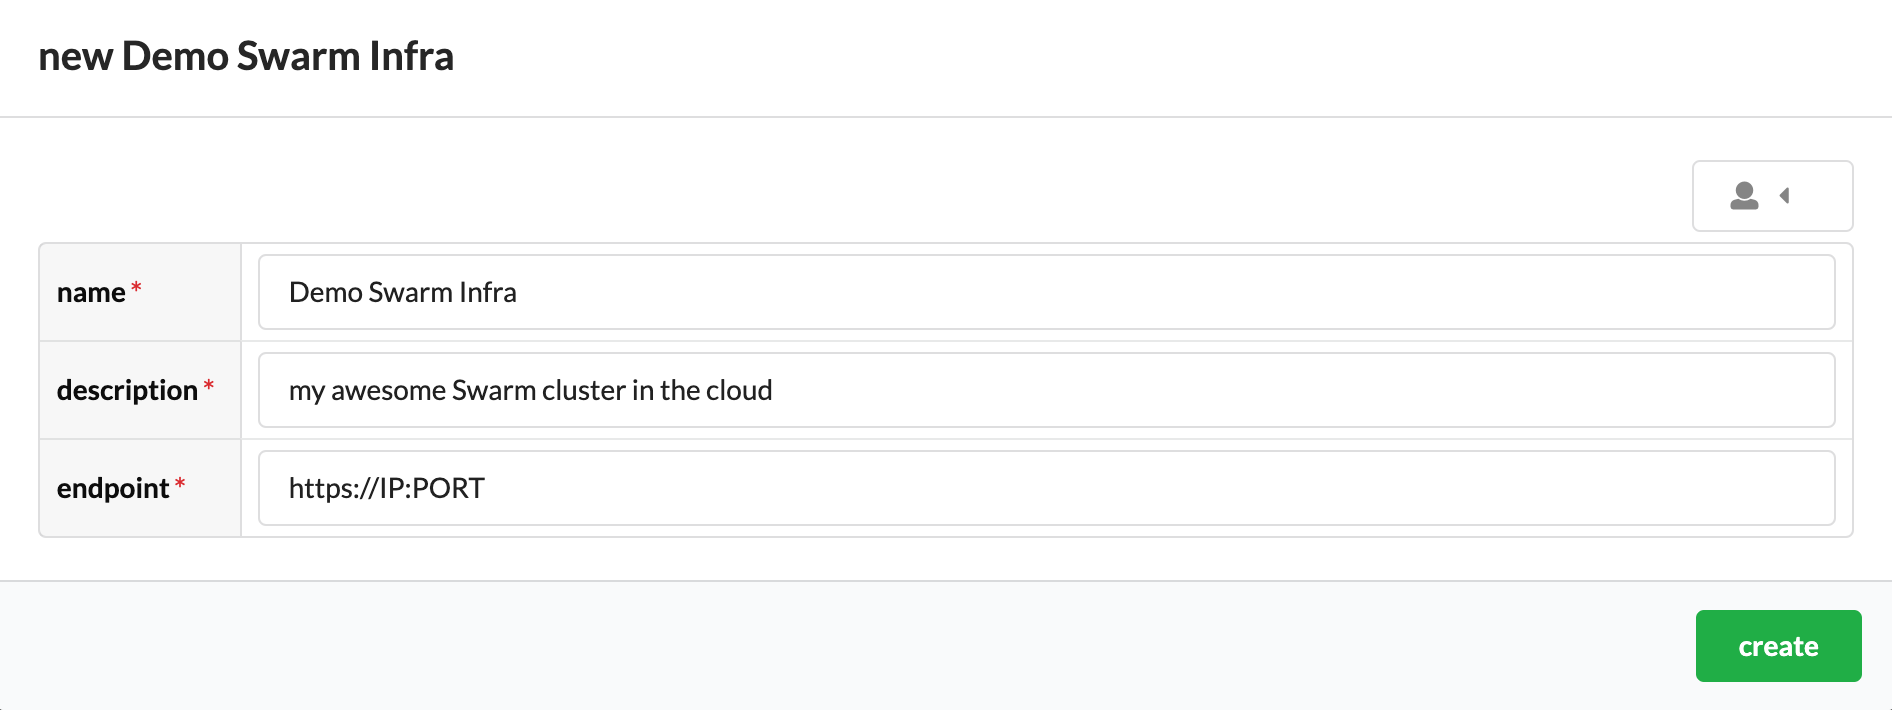
- go to Nuvla.io, login, and select Infrastructures, on the left sidebar
- click “+add” (top left), and select Swarm
-
fill in the form and click “create” (replace the IP and PORT with the values from steps 1. and 2. above)
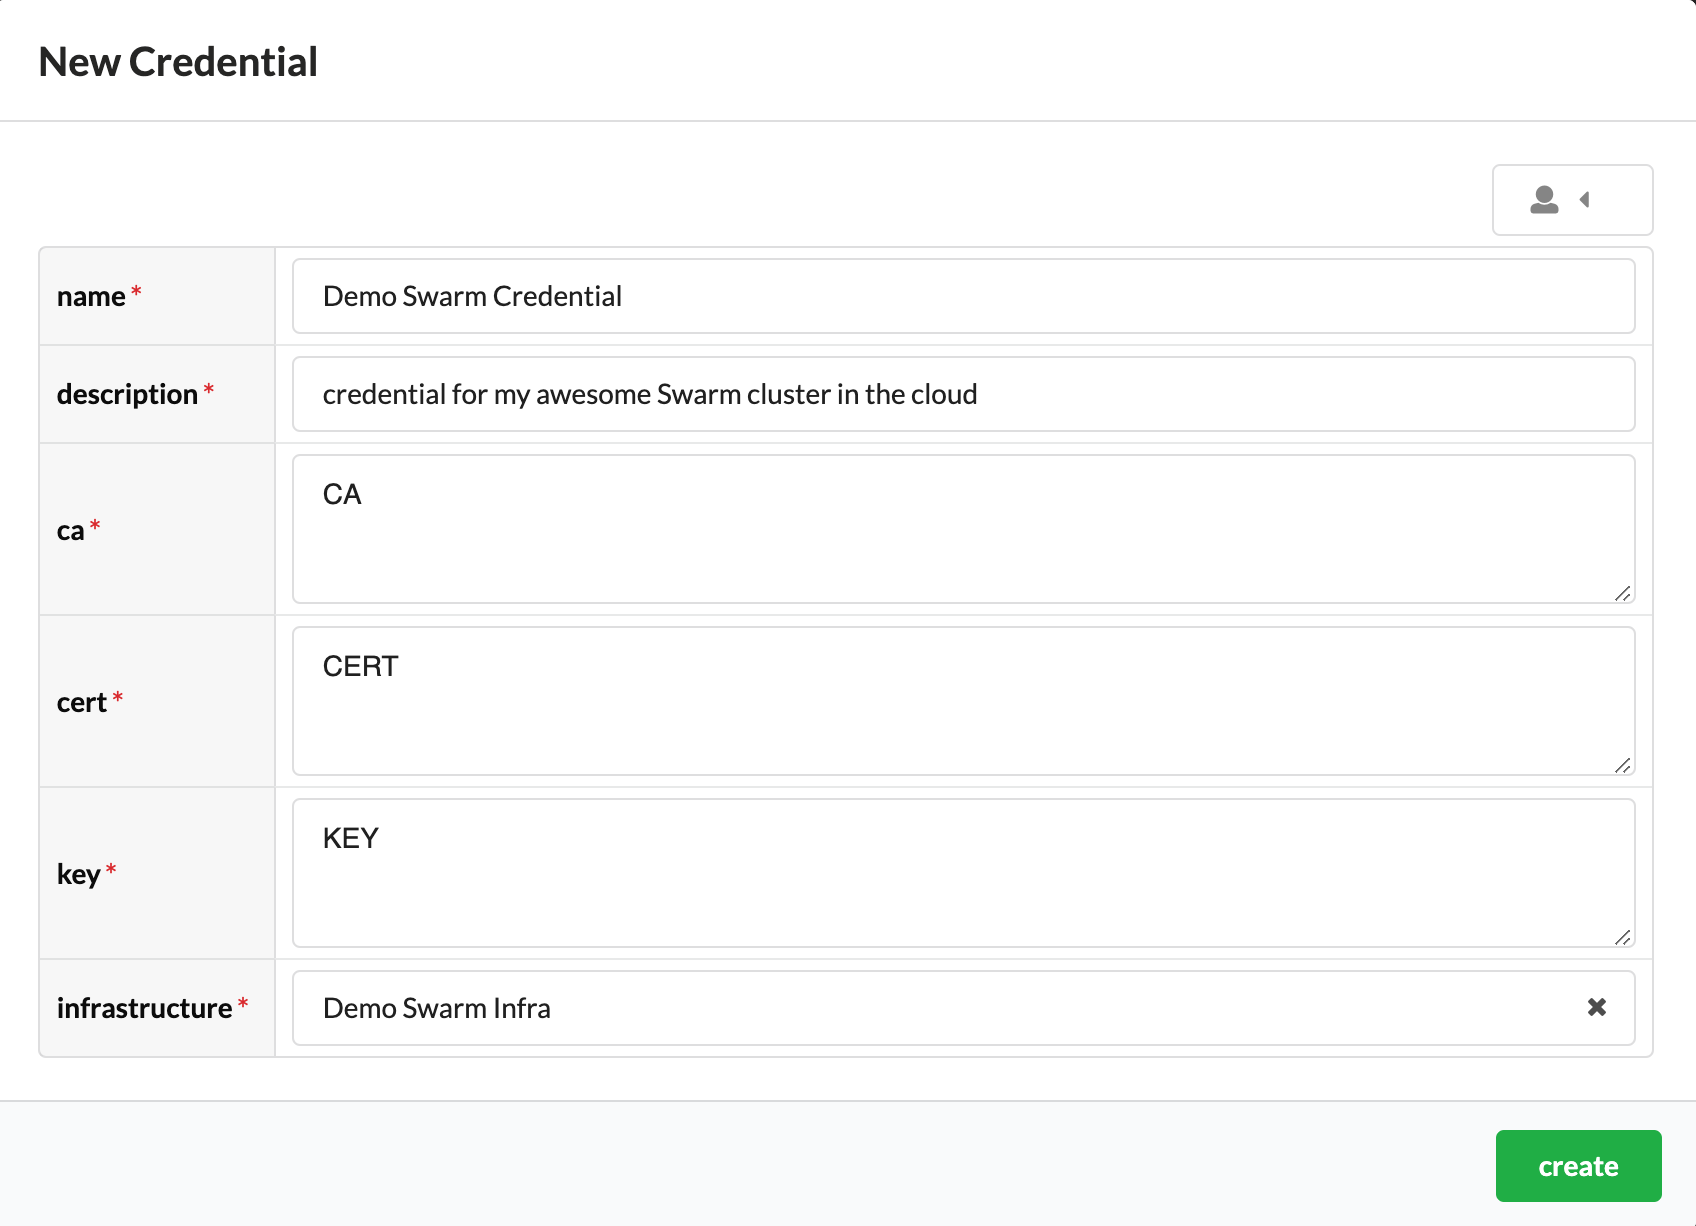
- now that you see your infrastructure listed, go to Credentials on the left sidebar
- we need to tell Nuvla how to authenticate with your cluster, so click “+add” and select Swarm/Kubernetes
-
fill in the form and click “create” (replace the CA, CERT, and KEY with the saved values from step 2. above)
3: Launching your Message Broker
- go to the Nuvla Marketplace (Apps on the left sidebar)
- let’s deploy an MQTT broker to your Swarm cluster…find the app “RabbitMQ”
- click “launch”
- select the credential you’ve created before, and click “launch”
-
you’ll be redirected to your dashboard…wait until the app has “STARTED” and you can see a green button on the app card (this can take a few minutes the 1st time you do it, cause your Docker Swarm cluster will have to download this Docker image)
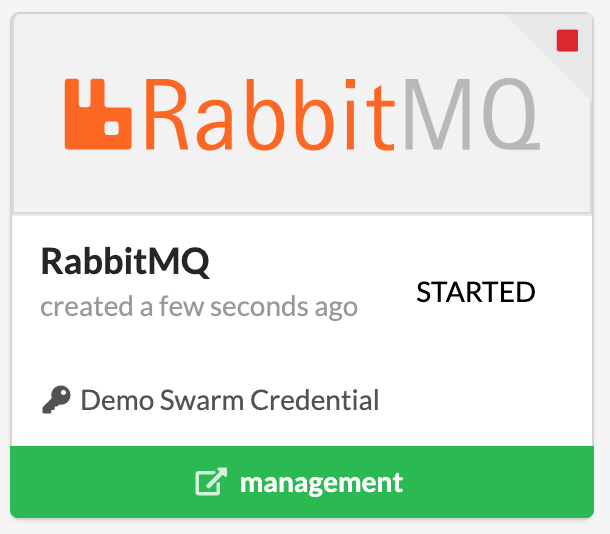
- click on the card, and you’ll see a detailed page with information about your deployment. Make note of the URL called “mqtt”
4: Get the NuvlaEdge into your edge device
- in Nuvla.io, go the Edge panel (left sidebar)
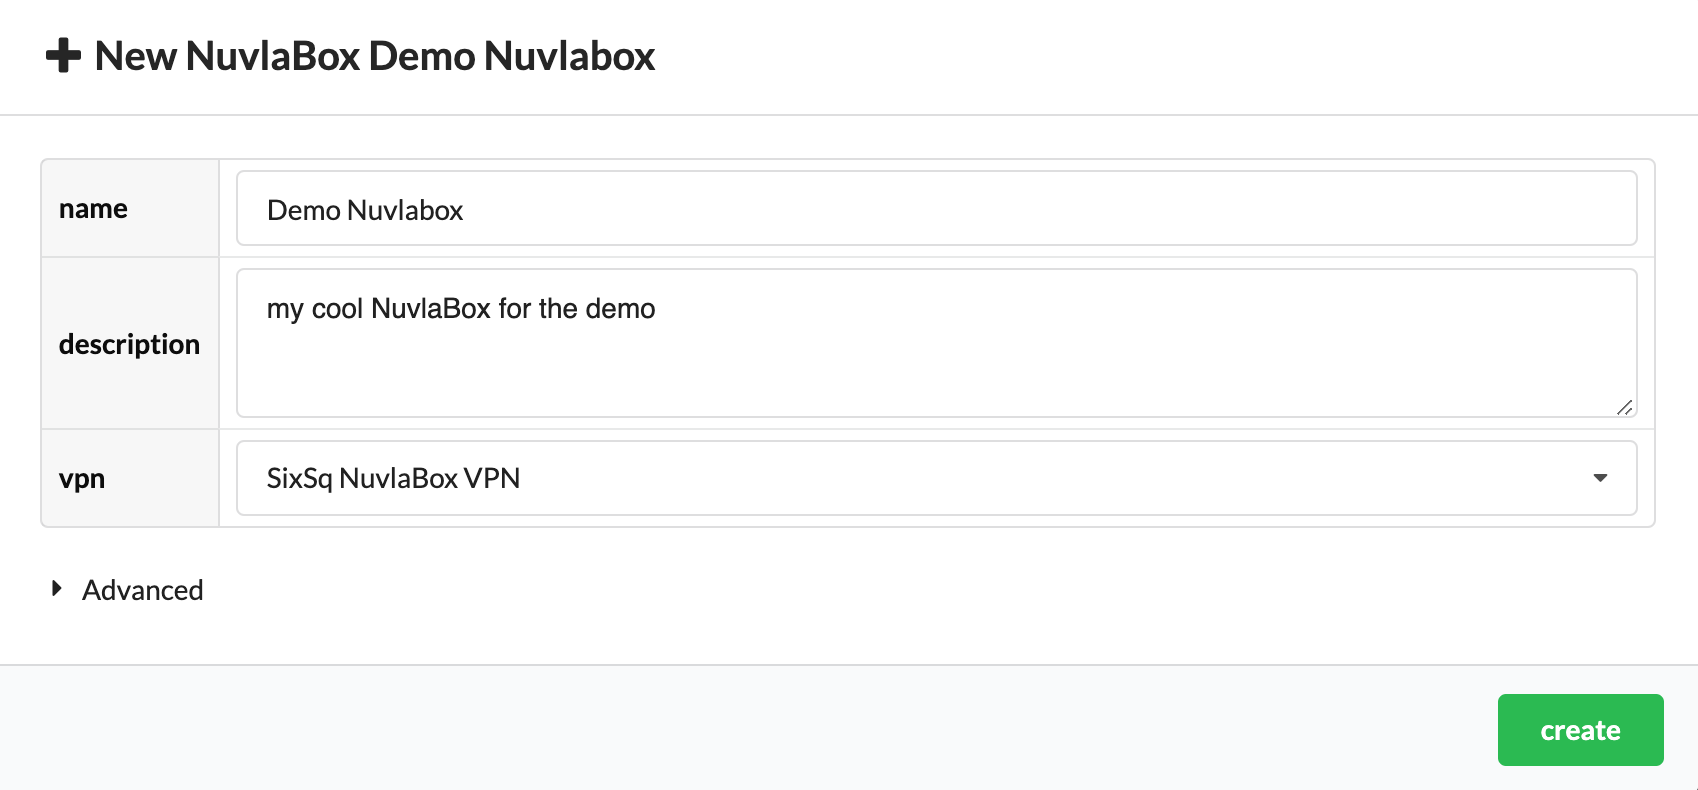
- let’s create a NuvlaEdge. Click “+add”
-
fill in the form and click “create”
- you’ll be given a NuvlaEdgeID, please take note
- SSH into your edge device
- make sure you’re logged in with a user that can manage Docker - test it by running
docker ps
- make sure you’re logged in with a user that can manage Docker - test it by running
- setup the environment by running
export NUVLAEDGE_UUID=NuvlaEdgeIDwhereNuvlaEdgeIDis the NuvlaEdgeID from step 4. - download the NuvlaEdge Engine software installer. Run
wget https://github.com/nuvlaedge/deployment/releases/download/2.12.2/docker-compose.yml - now just execute
docker compose up -d- it will just take a few seconds for you to see your NuvlaEdge become green (online) in Nuvla.io. You can follow the installation and lifecycle process by running
docker compose logs - after a couple of minutes, you’ll also see a new infrastructure (of the type NuvlaEdge) and credential appear in Nuvla.io
- it will just take a few seconds for you to see your NuvlaEdge become green (online) in Nuvla.io. You can follow the installation and lifecycle process by running
- if not yet plugged in, plug your USB camera into the NuvlaEdge (edge device)
- in Nuvla.io, if you go to Edge and select your NuvlaEdge, you’ll see the USB camera automatically listed as a peripheral
5: Deploy the AI app to the edge
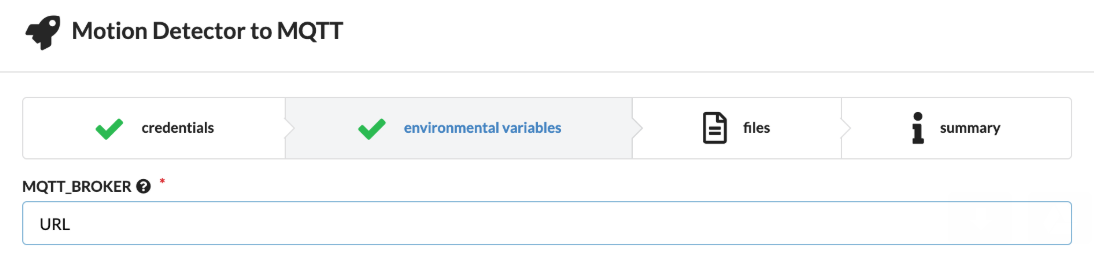
- in Nuvla.io, go to the Marketplace and find the app called “Motion Detector to MQTT”. Click “launch”
- a panel with appear - select your NuvlaEdge credential from there
-
click on the environment tab and paste the “mqtt” URL that you saved above
- click “launch” and wait
- once the deployment is ready, you’ll the the green button with the link to your Motion Detector endpoint - click on it
- you’ll be redirected to a new tab on your browser, pointing to your NuvlaEdge via a SixSq VPN IP that has been assigned automatically to your NuvlaEdge
- PLEASE note that you’ll only be able to access your NuvlaEdge via this IP if you have a SixSq VPN client configuration running on your computer. If you don’t have one, please drop us an email at Support
- if you don’t want to use SixSq’s VPN service, you can also access the Motion Detector endpoint directly via the NuvlaEdge’s IP (check
ifconfigin your NuvlaEdge to get the IP)
- you are now be able to see the video feed, coming from your webcam. If you move, you’ll see some video processing happening
- connect to the MQTT broker running in your Docker Swarm cluster in the cloud, you’ll get a notification every time there’s movement! You can use whatever MQTT client you prefer (mosquitto_sub or even an Android/iPhone app)
- for example, if using mosquitto_sub, you can simply execute
mosquitto_sub -h URL.IP -p URL.PORT -t video_analysis/message, where URL.IP and URL.PORT are the URL and port number taken from your “mqtt” URL in step 3. above
- for example, if using mosquitto_sub, you can simply execute