Deploy an app or a bouquet of apps
Let’s deploy apps. You can deploy apps from:
The workflow is the same, with one exception we’ll see later on.
To deploy apps, Nuvla.io needs the following information:
- which apps to deploy, and
- where to deploy them (i.e. NuvlaEdges, Kubernetes or Docker Swarm)
So depending on which page you start from, you’ll be asked to define these, but in a different order.
You always deploy an app on a NuvlaEdge or in the cloud. We’ll assume here that you want to deploy an app at the edge. For this, you need access to a NuvlaEdge. If you don’t have one available yet, you can create a new NuvlaEdge here. Make sure you have at least one online NuvlaEdge. You can check that on the Edges page by looking for an online NuvlaEdge.
Starting from the Edges page
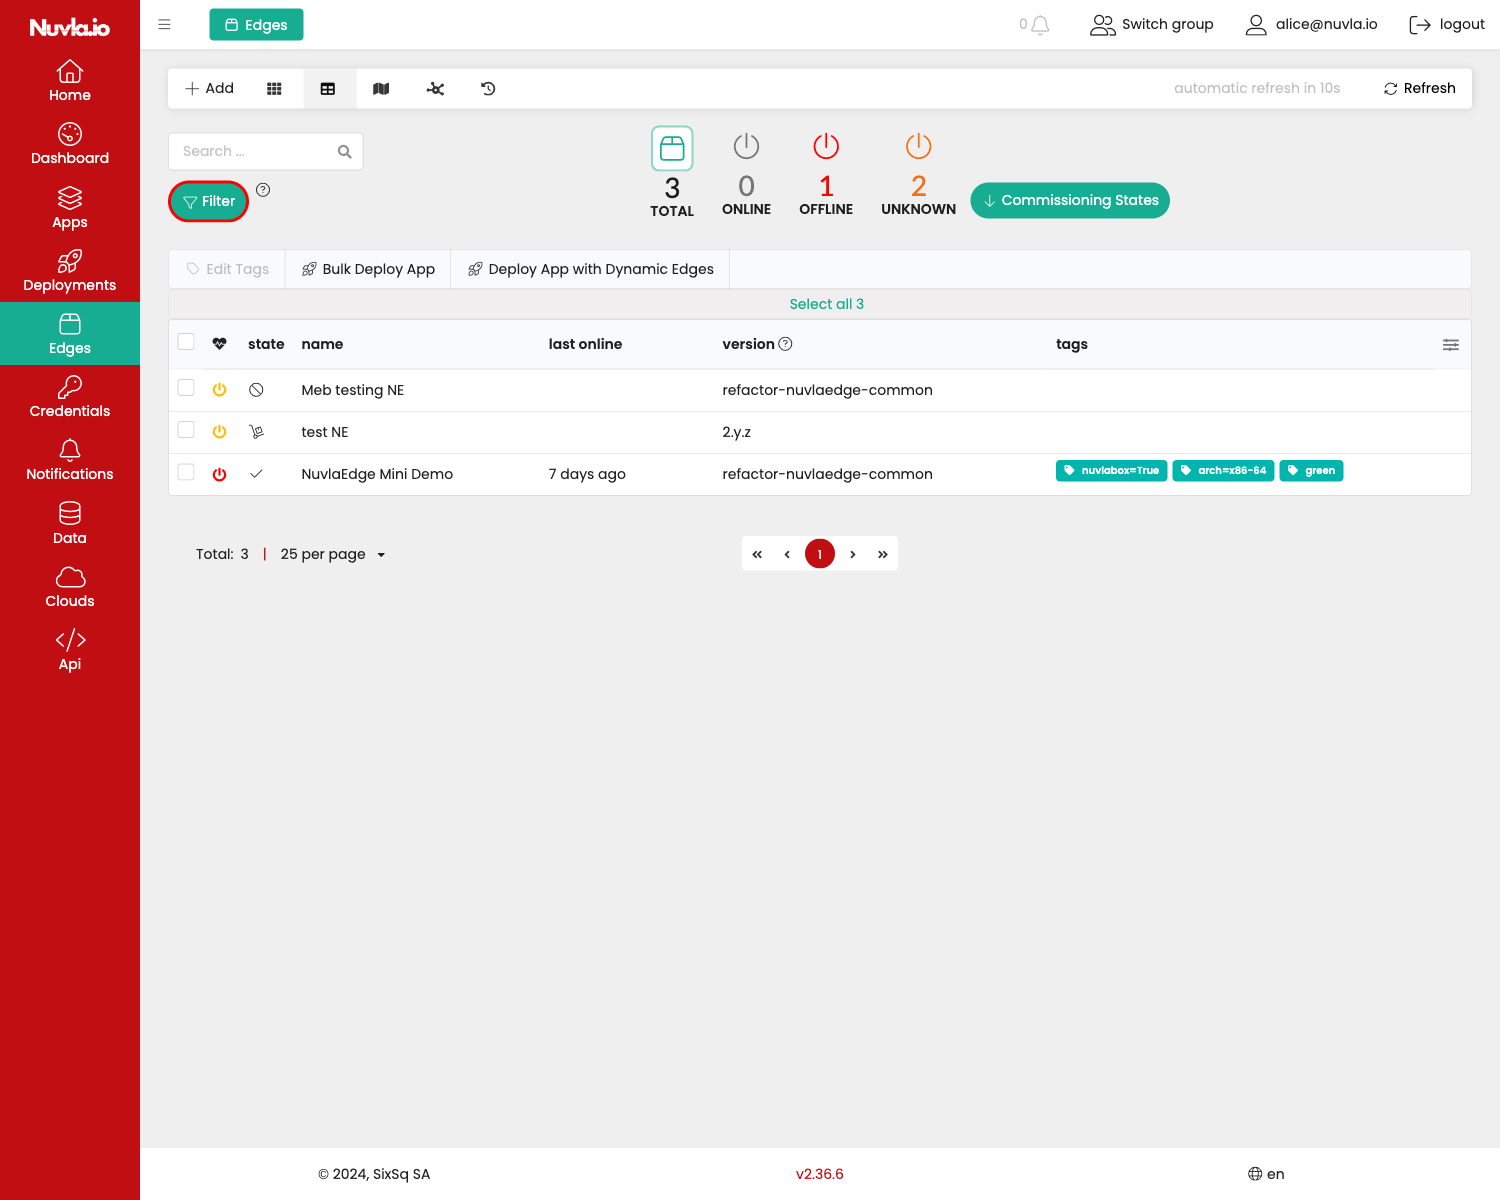
From the Edges page, you can define a fleet of edge devices to deploy to. This fleet can either be:
- Explicit: an explicit list of edge devices, which can be updated manually over time
- Dynamic: a dynamic list of edge devices defined by a filter, which automatically updates as the filter returns more or less edge devices.
Let’s cover both cases, starting with the simplest explicit case.
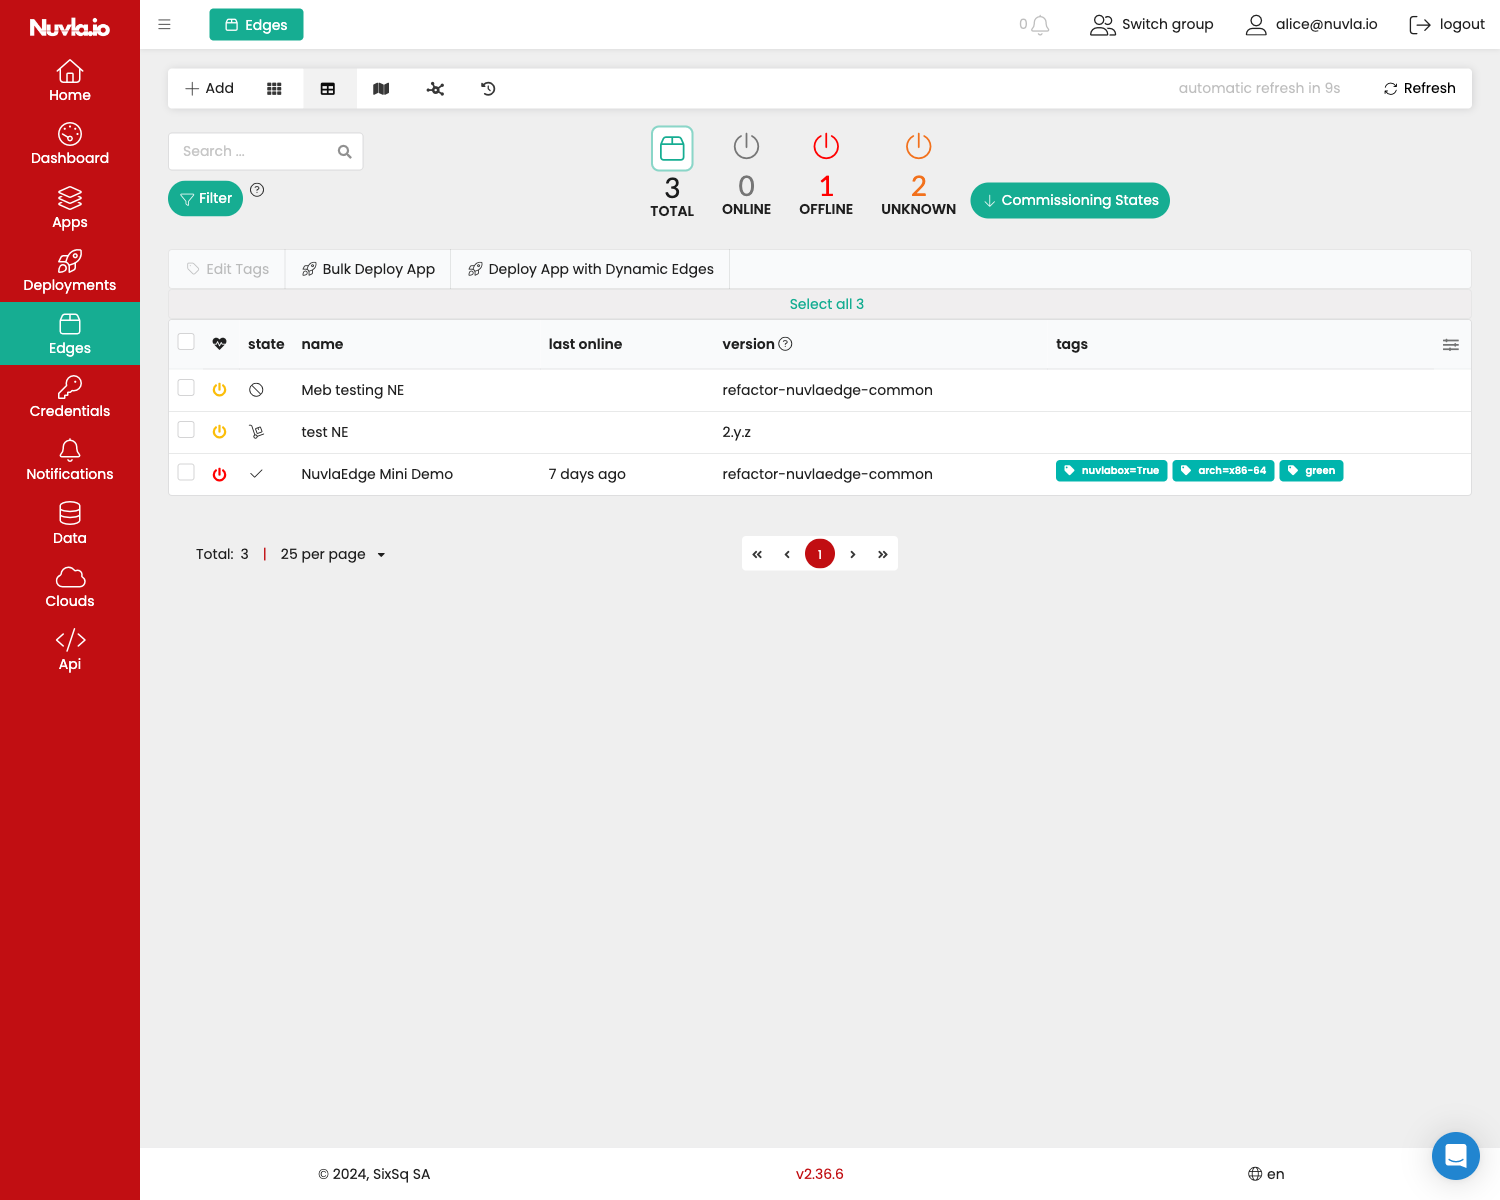
Using a simple fleet of edge devices (static fleet)
From the edges page, select the NuvlaEdges you want to deploy to. You will be able to update this list later.
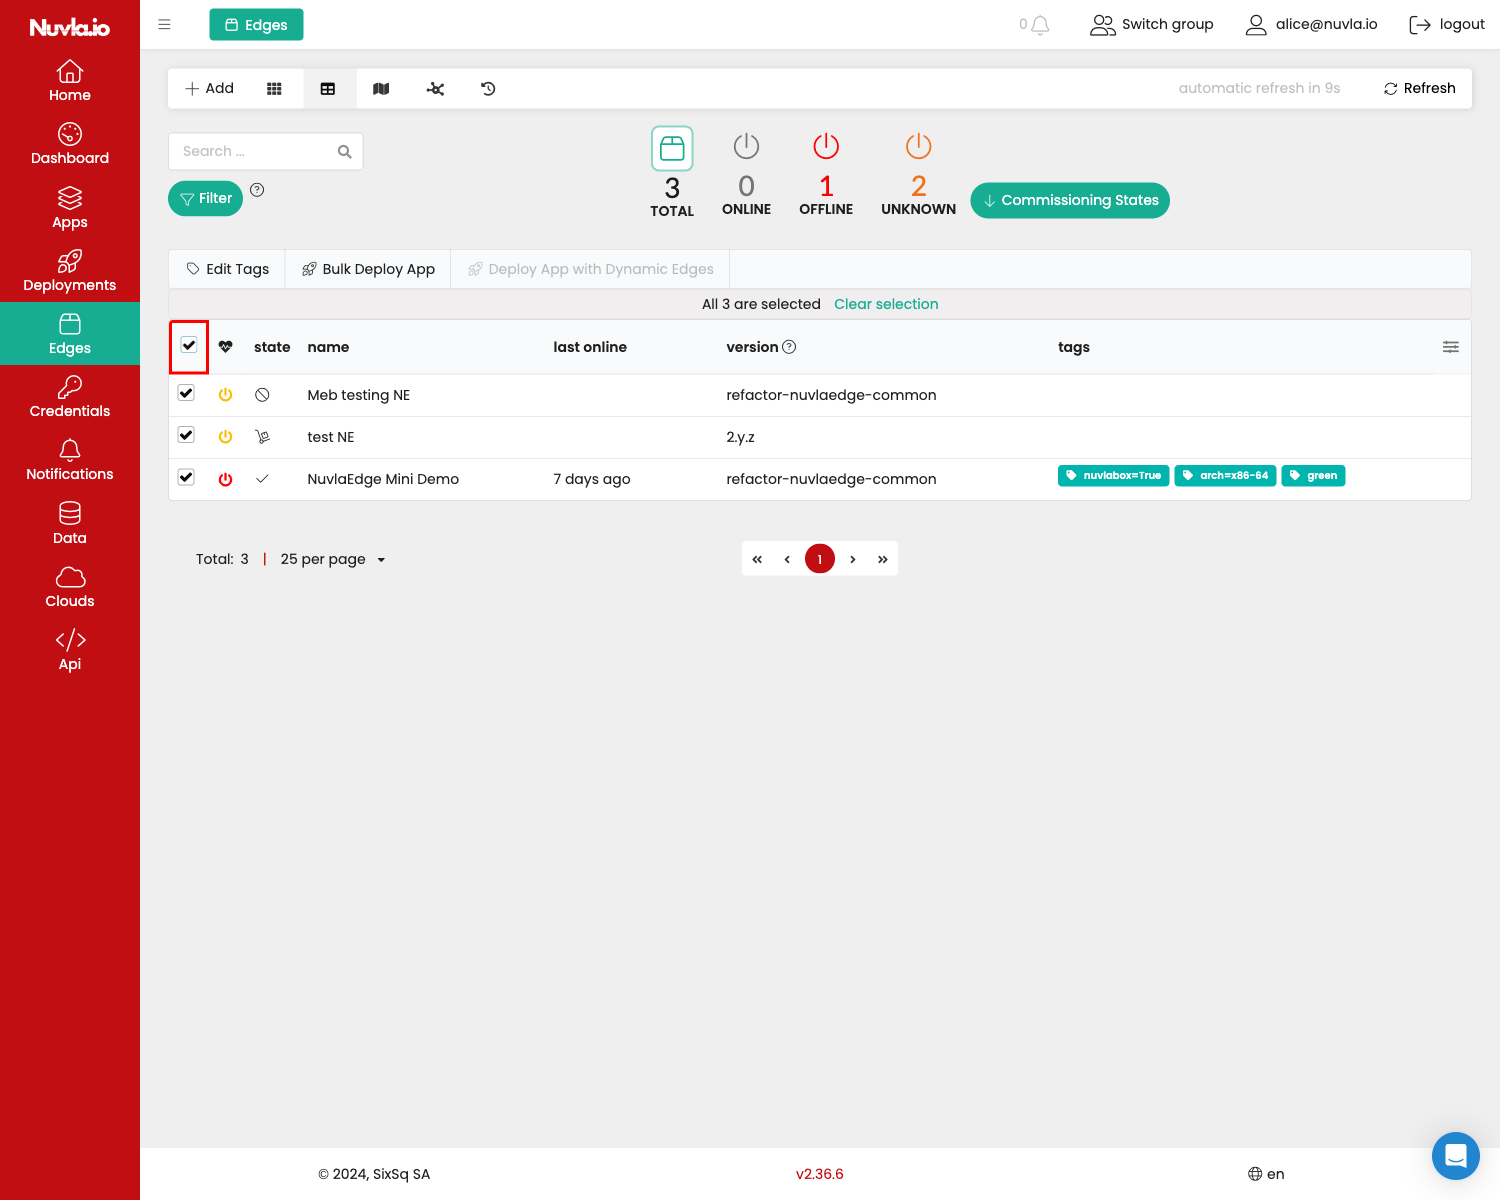
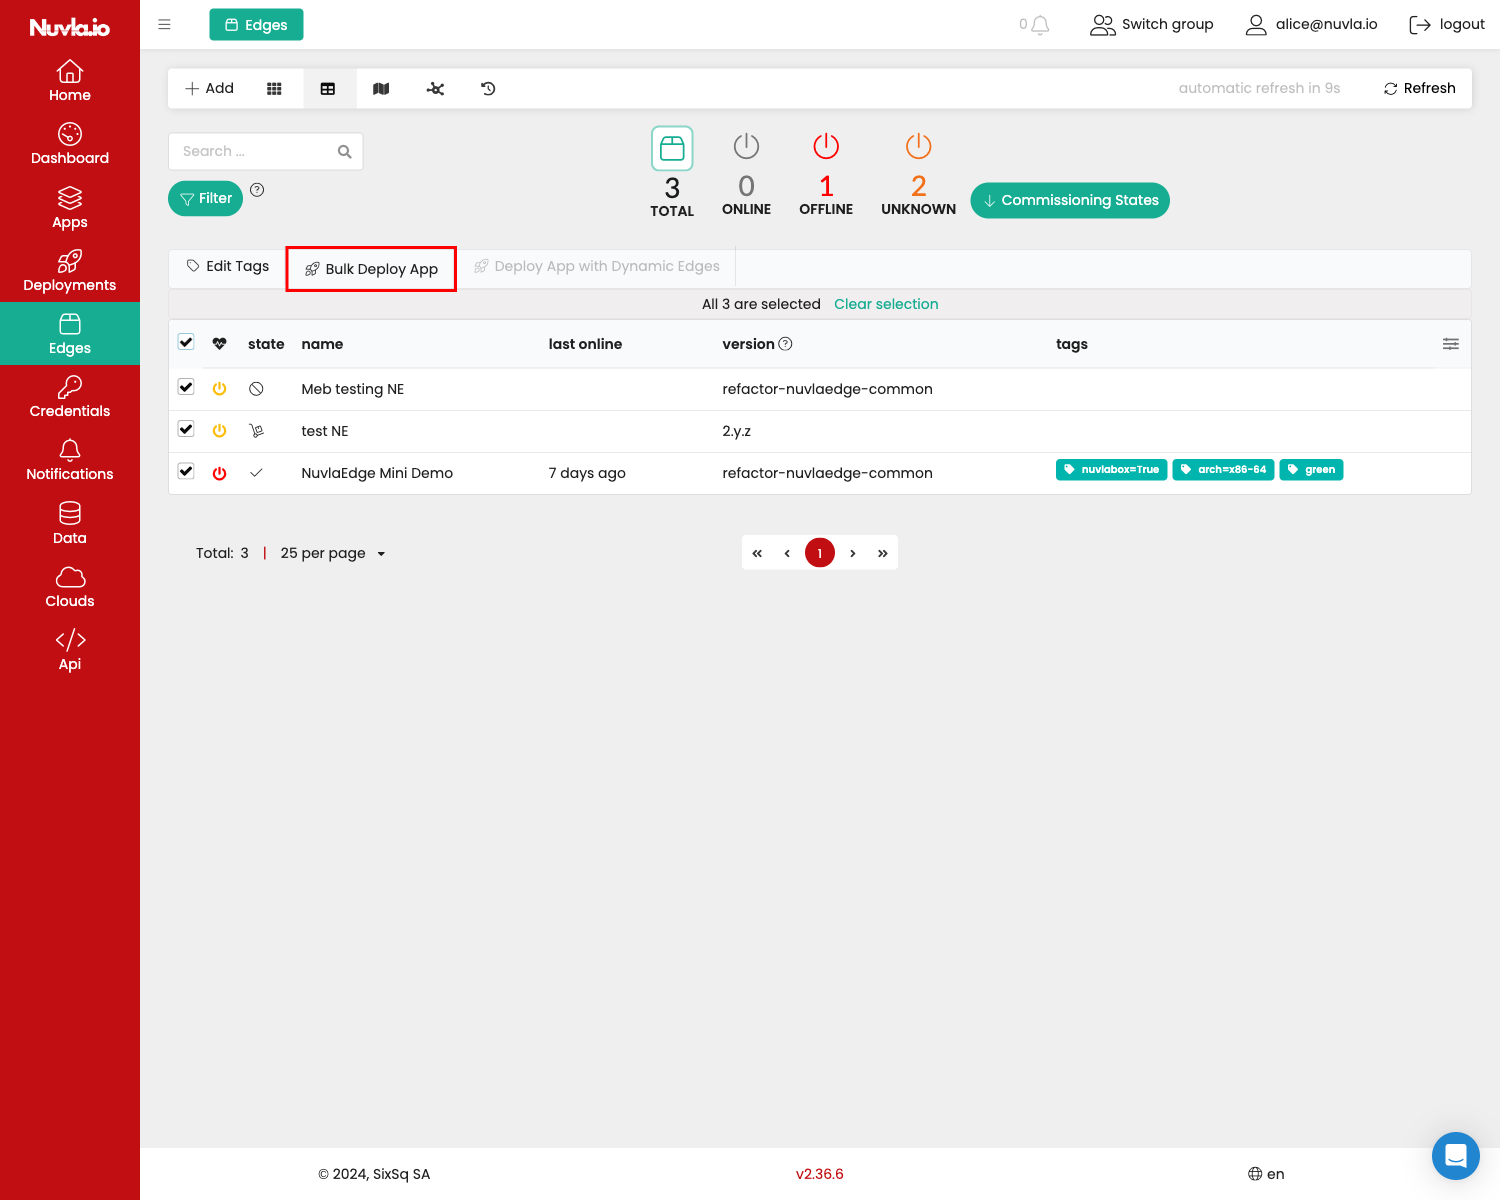
Click on Bulk Deploy App button.
Here you can now define a deployment group.
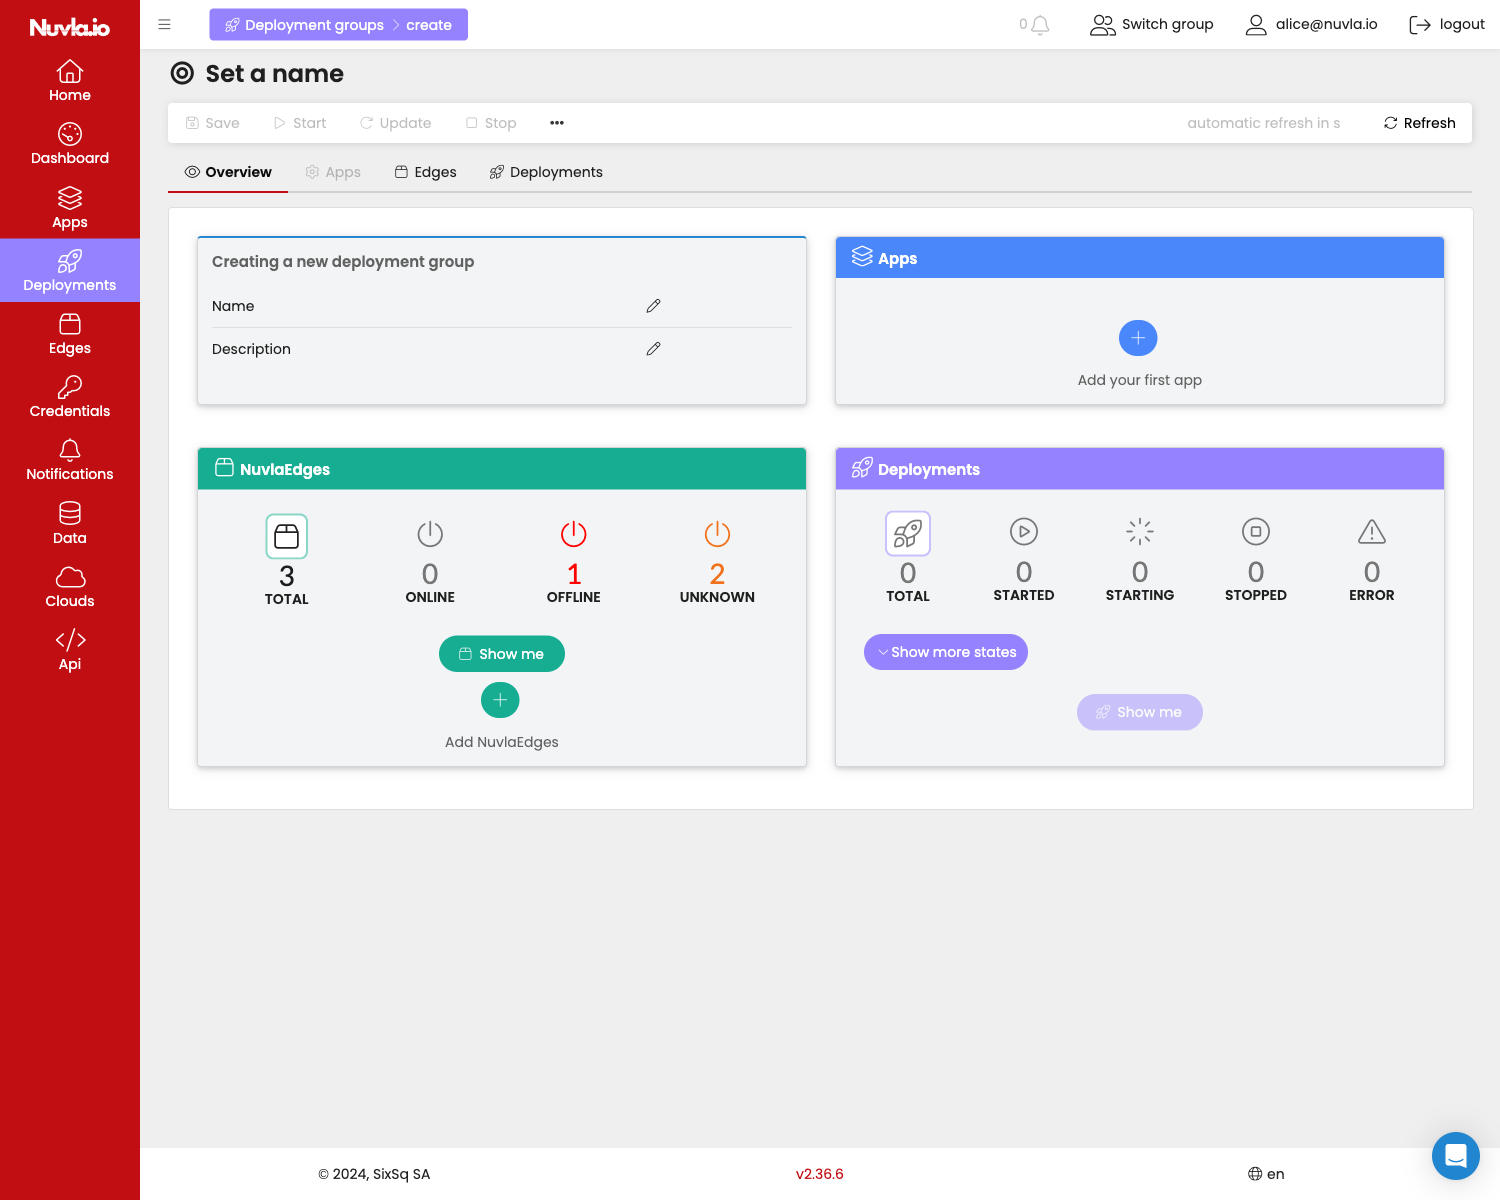
First set the name and description of your new deployment group.
NOTE: once you’ve entered a name or description, press enter to confirm the value.

Now set the name and description of your new deployment group.
NOTE: once you’ve entered a name or description, press enter to confirm the value.
The NuvlaEdges section is already filled from the selection you made on the edges page before clicking the Bulk Deploy App.
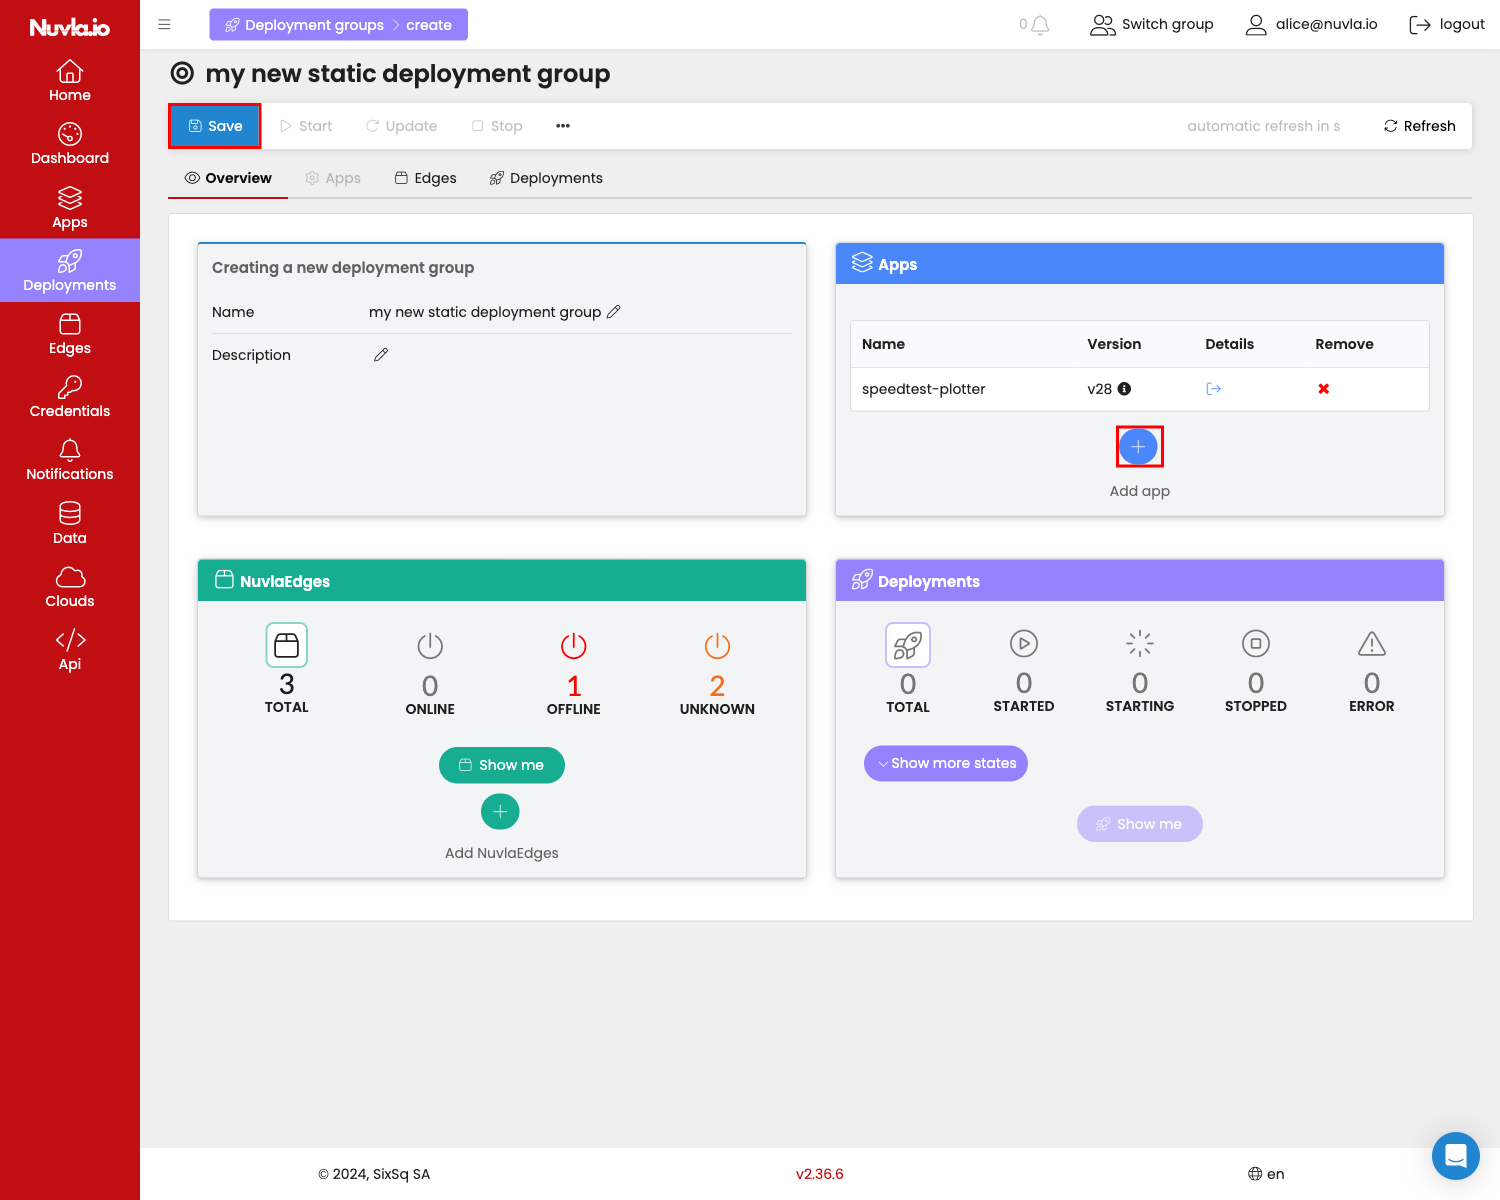
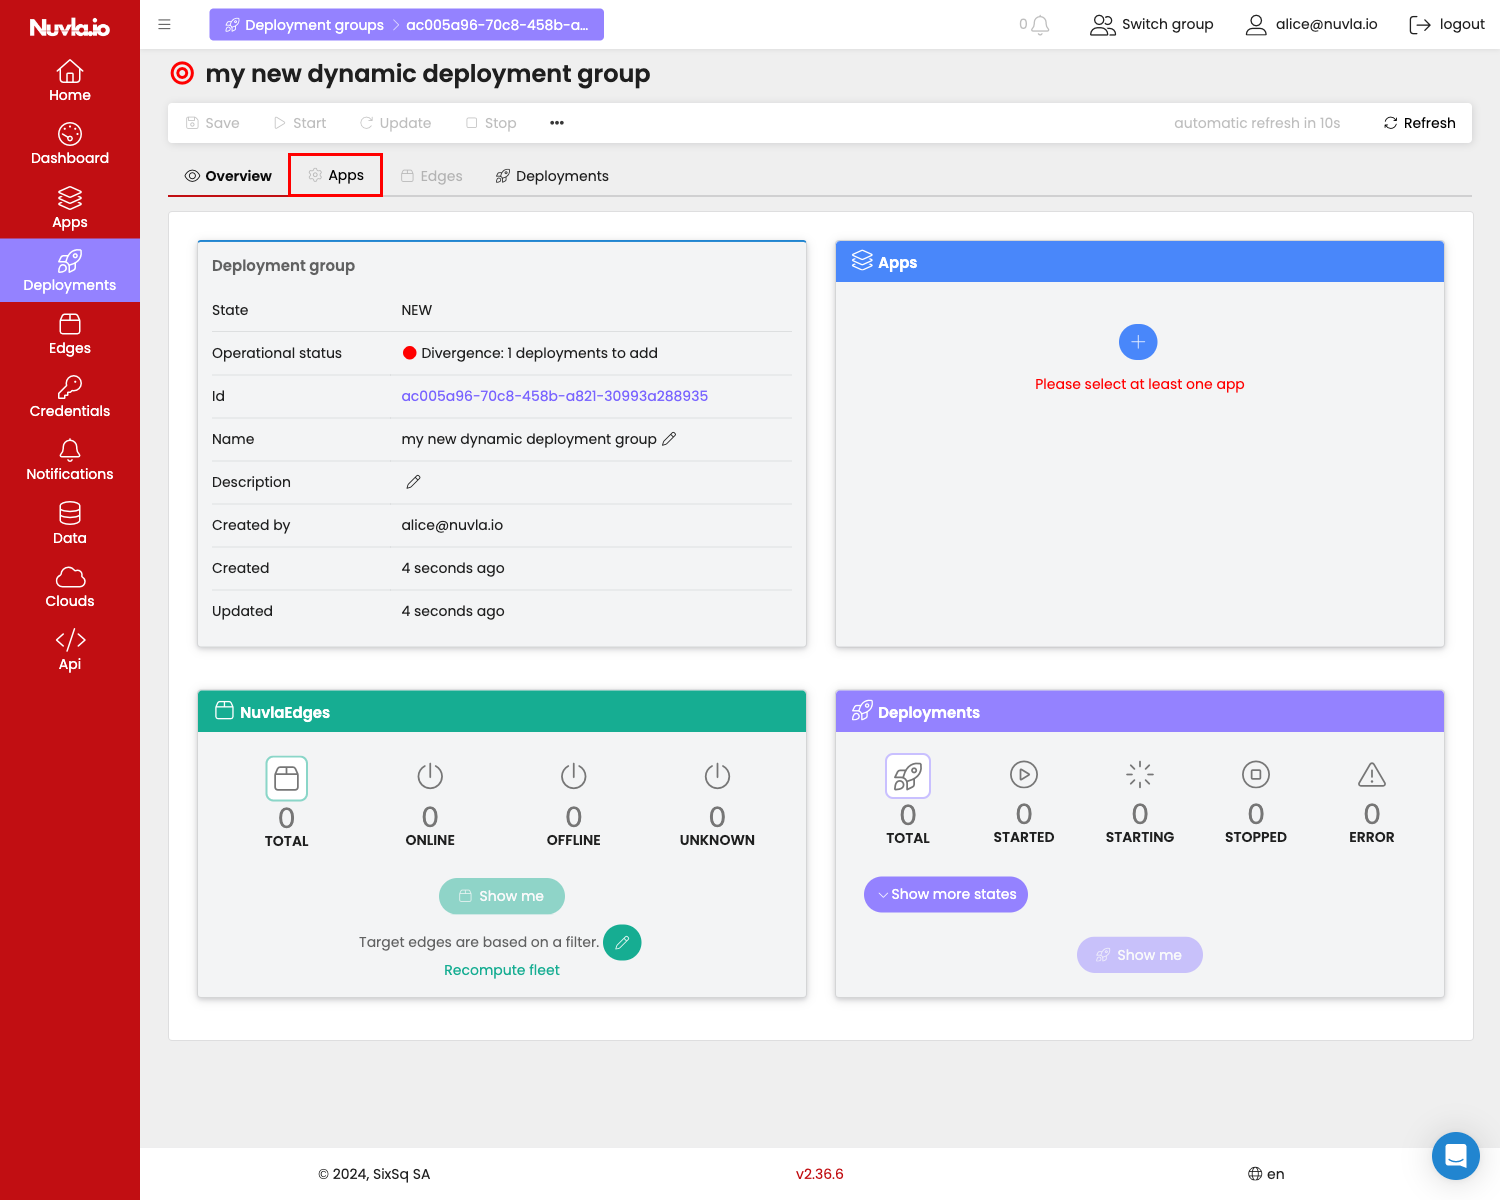
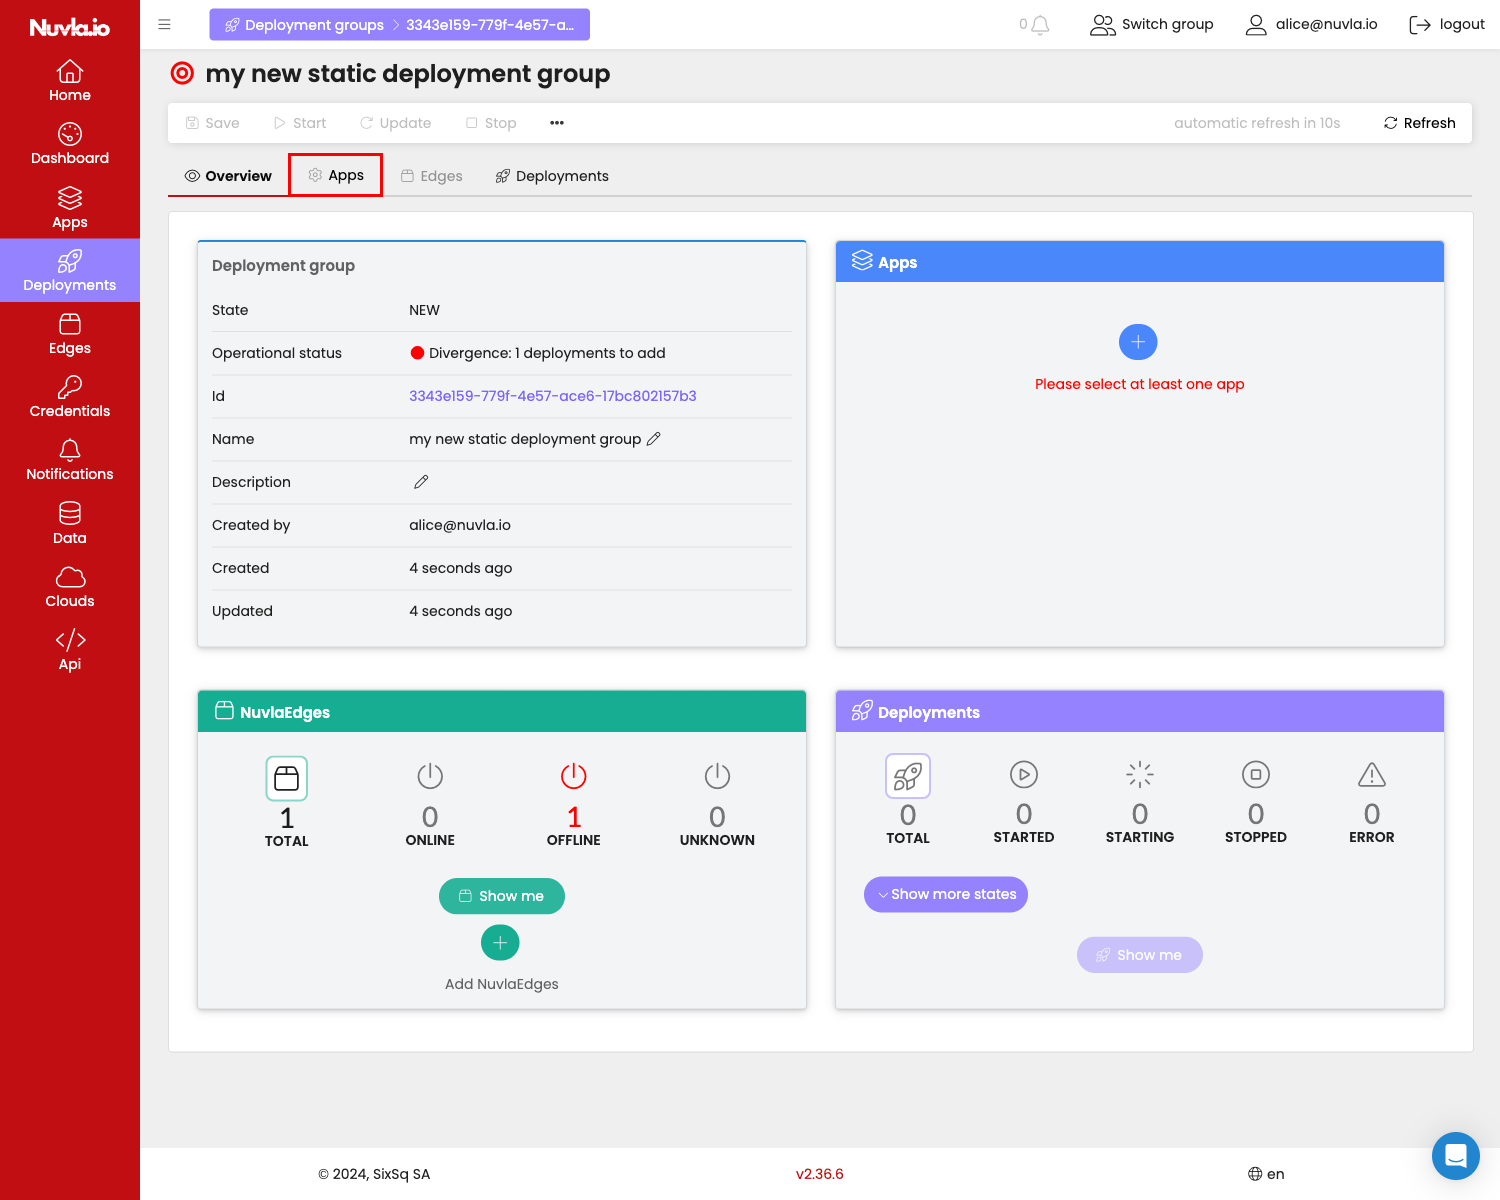
Now you need to select an app or apps to deploy on the fleet of edge devices. For this click on the + button in the Apps card.

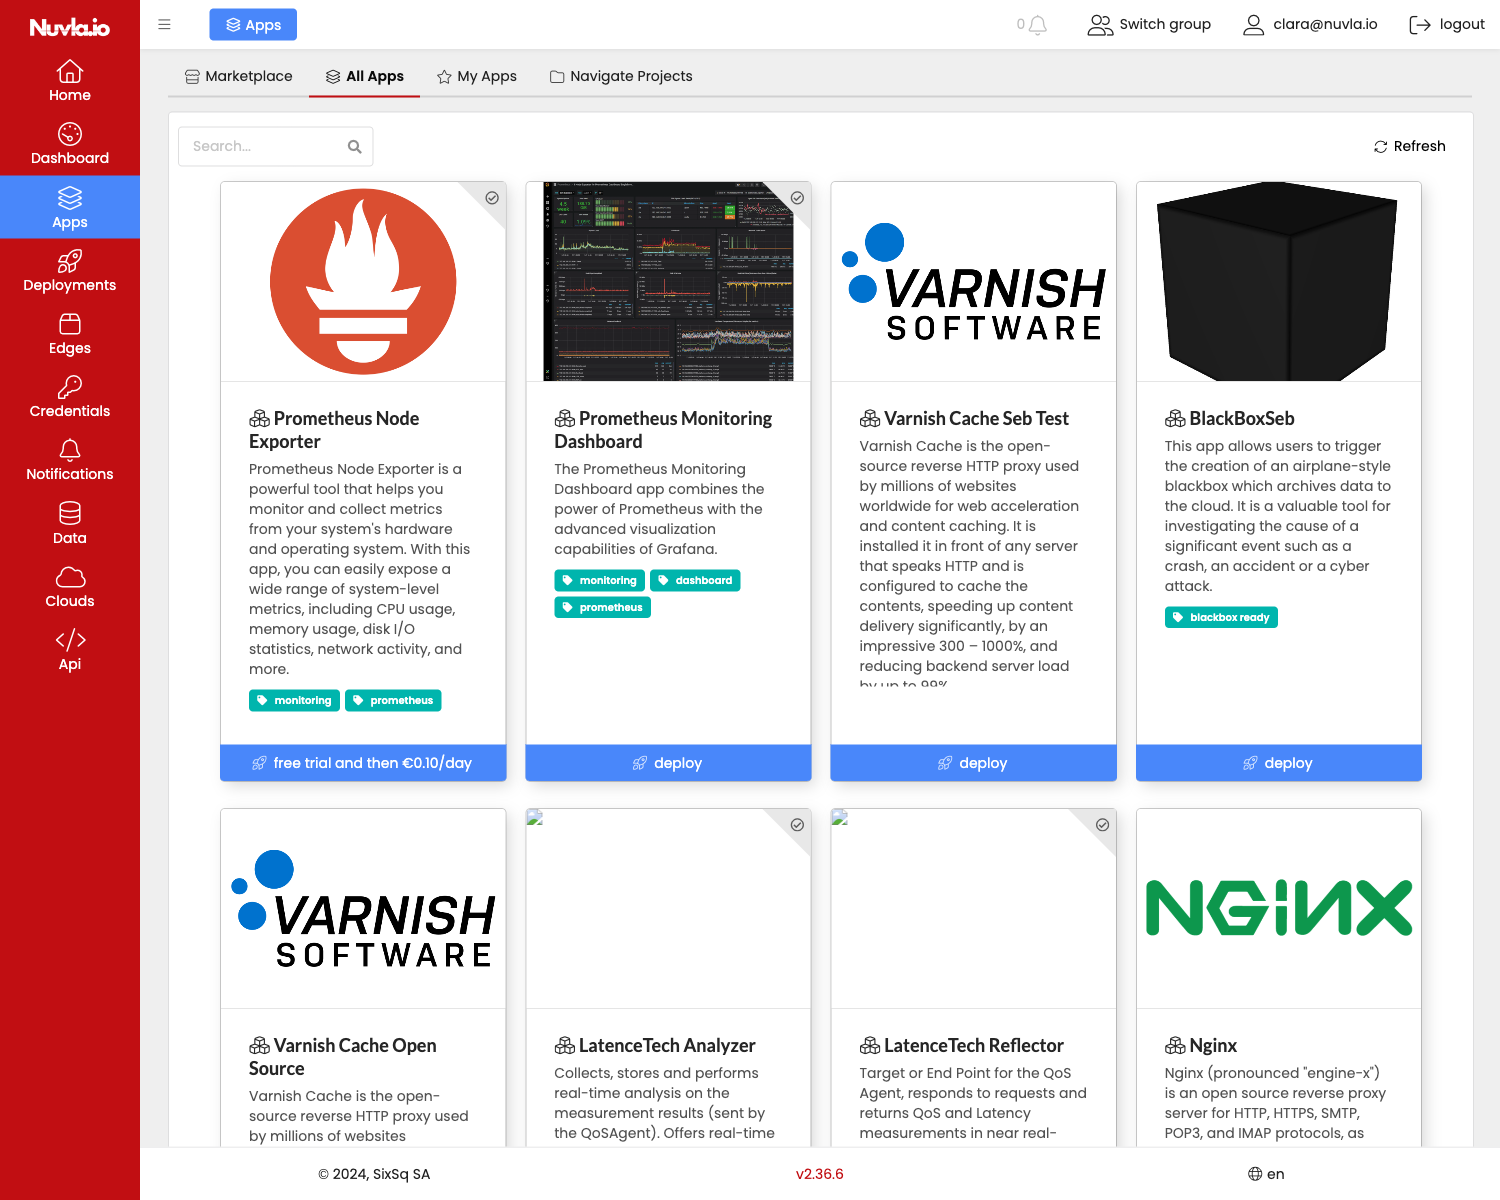
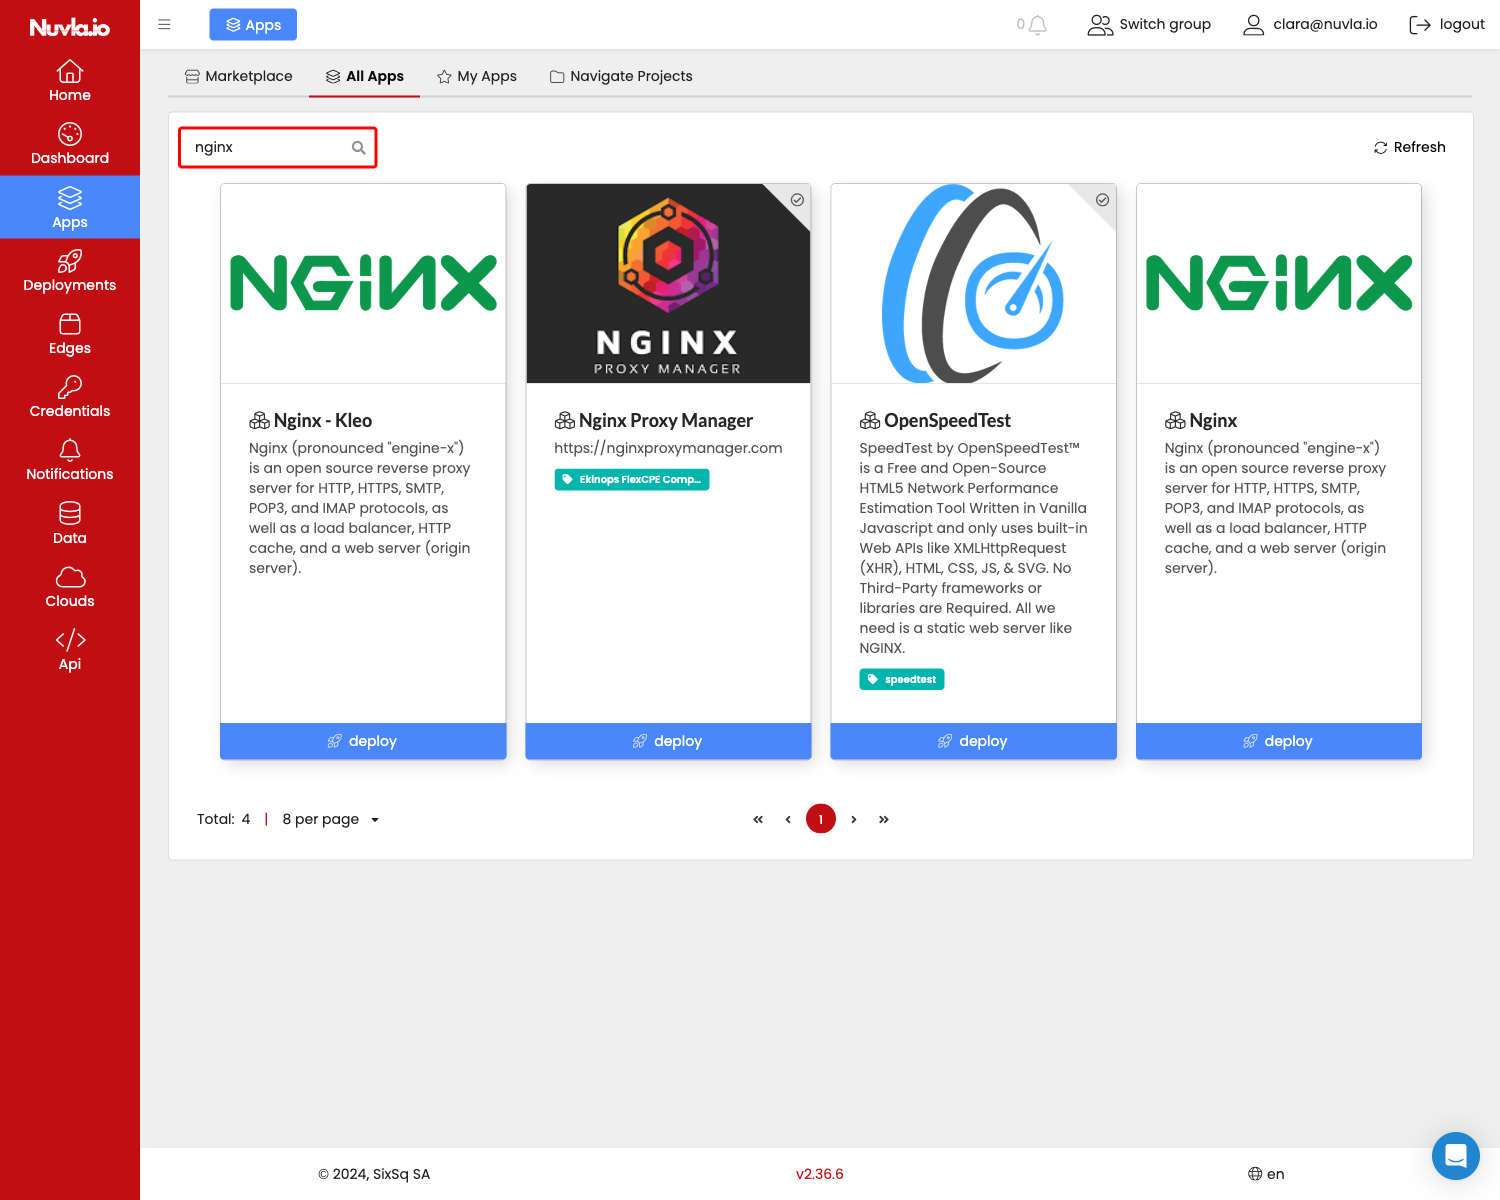
Then select an app. You can use the search input field to find the app you are looking for. Once you have found the right app, simply click on the corresponding Add to selection button.
NOTE: that you can either select a single app bouquet, or several single apps.

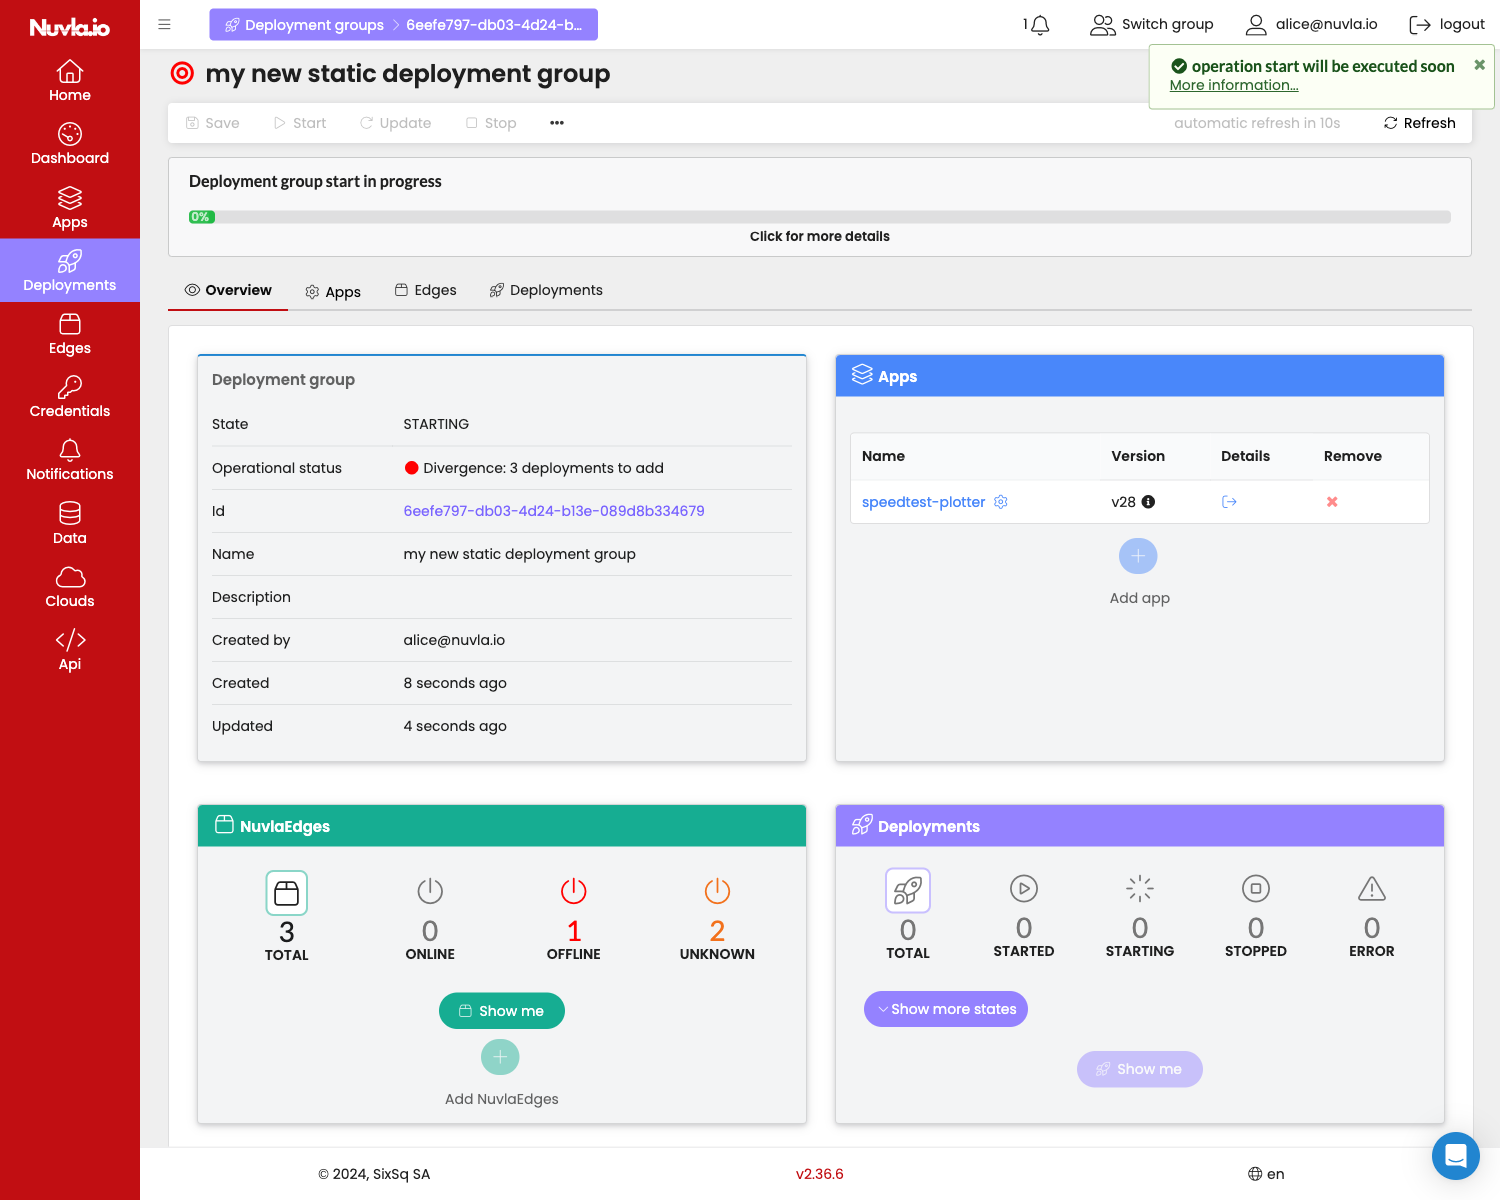
Now the save button is active and can save your new deployment group.
NOTE: Once the deployment group is saved, before you can start it, you must ensure all mandatory app input parameters are provided. A validation error message will show and the relevant tabs will be highlighted in red.
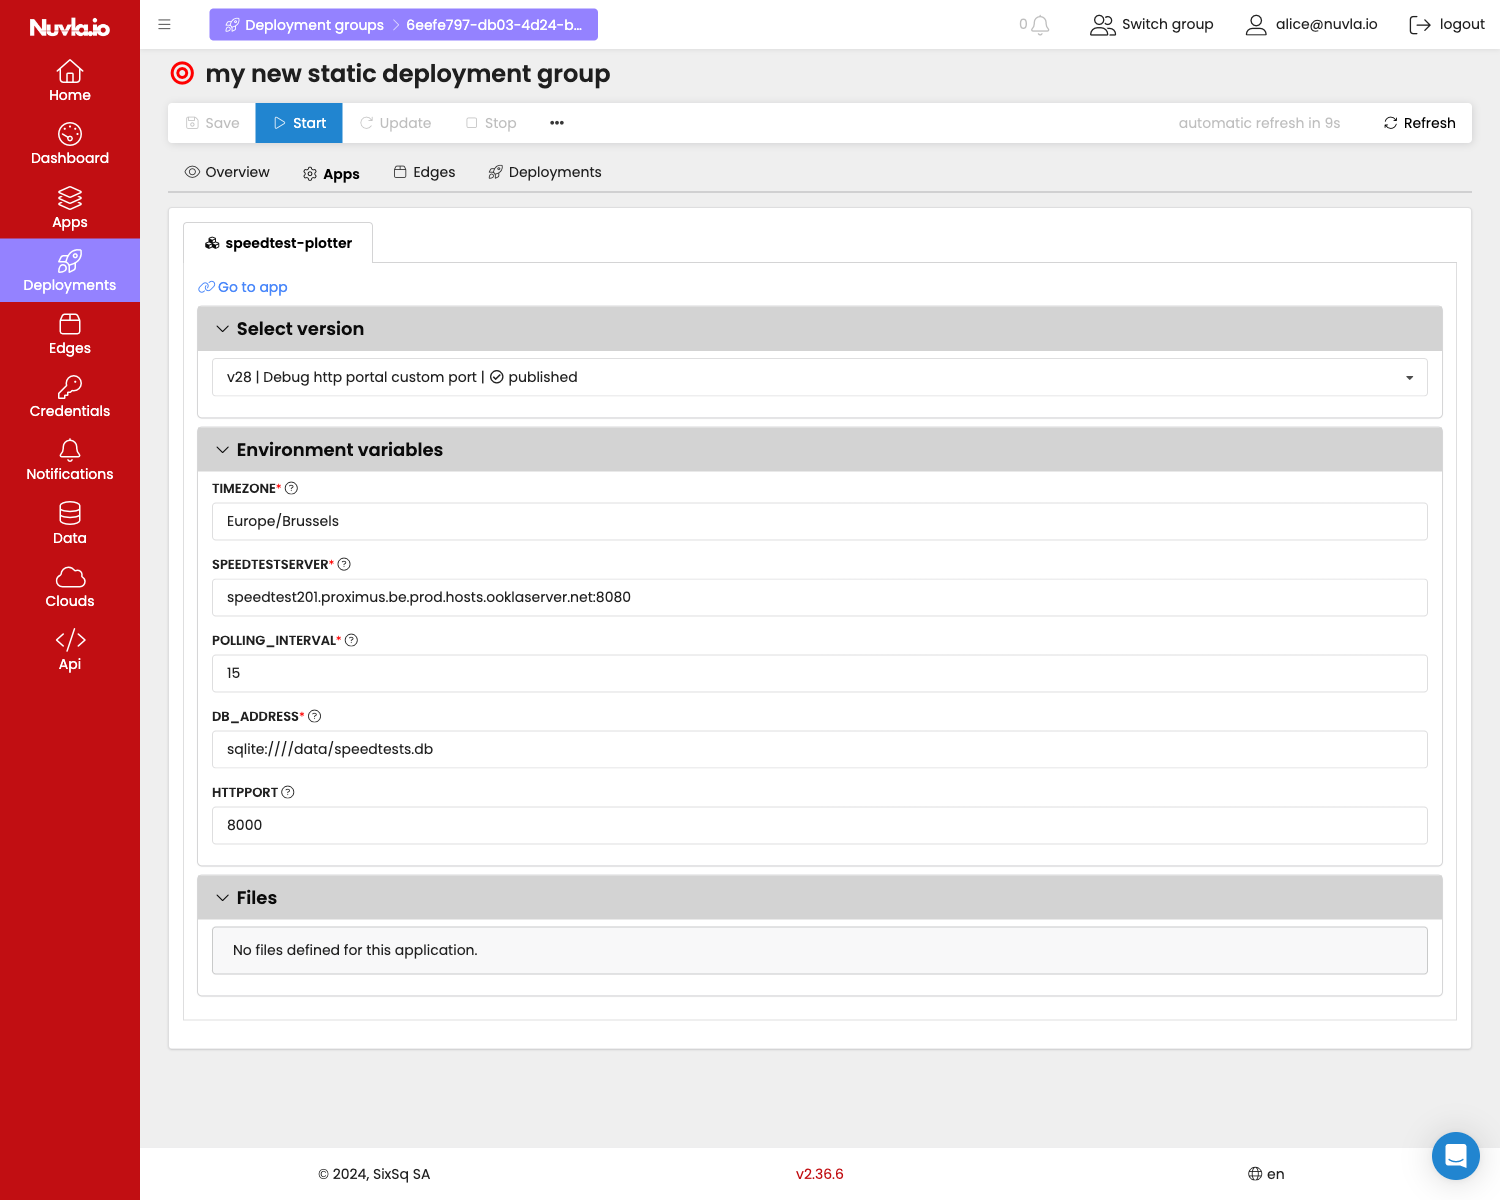
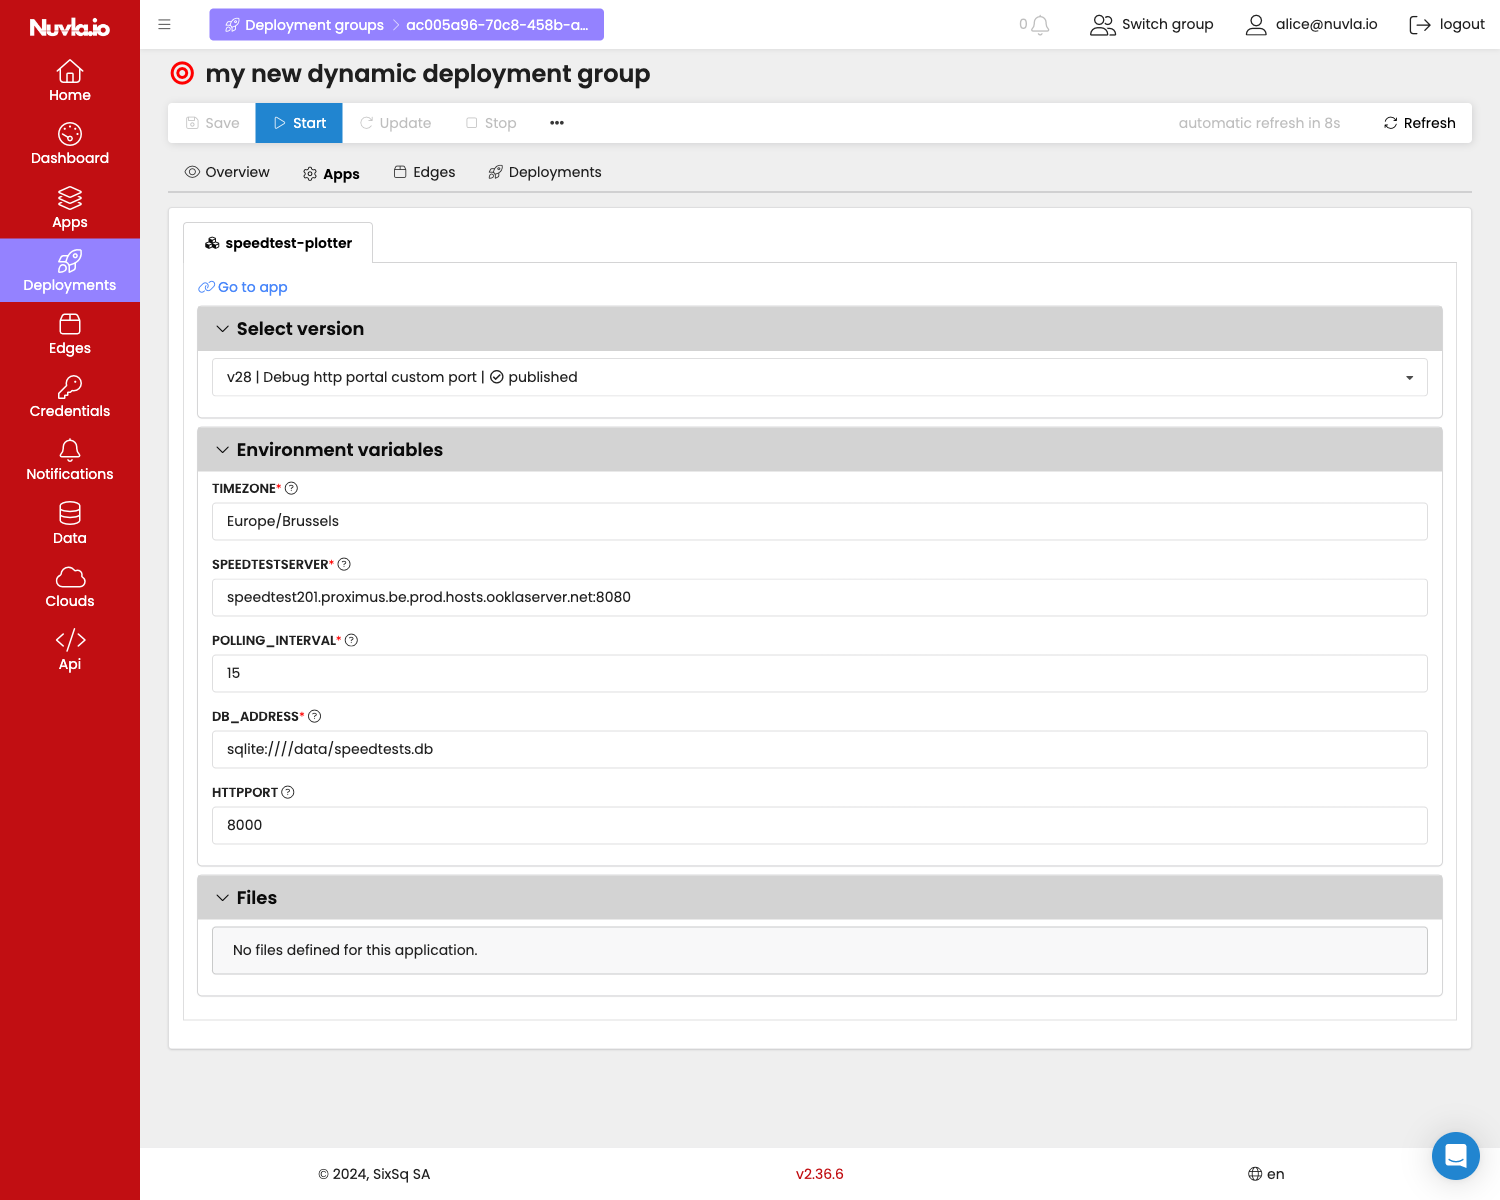
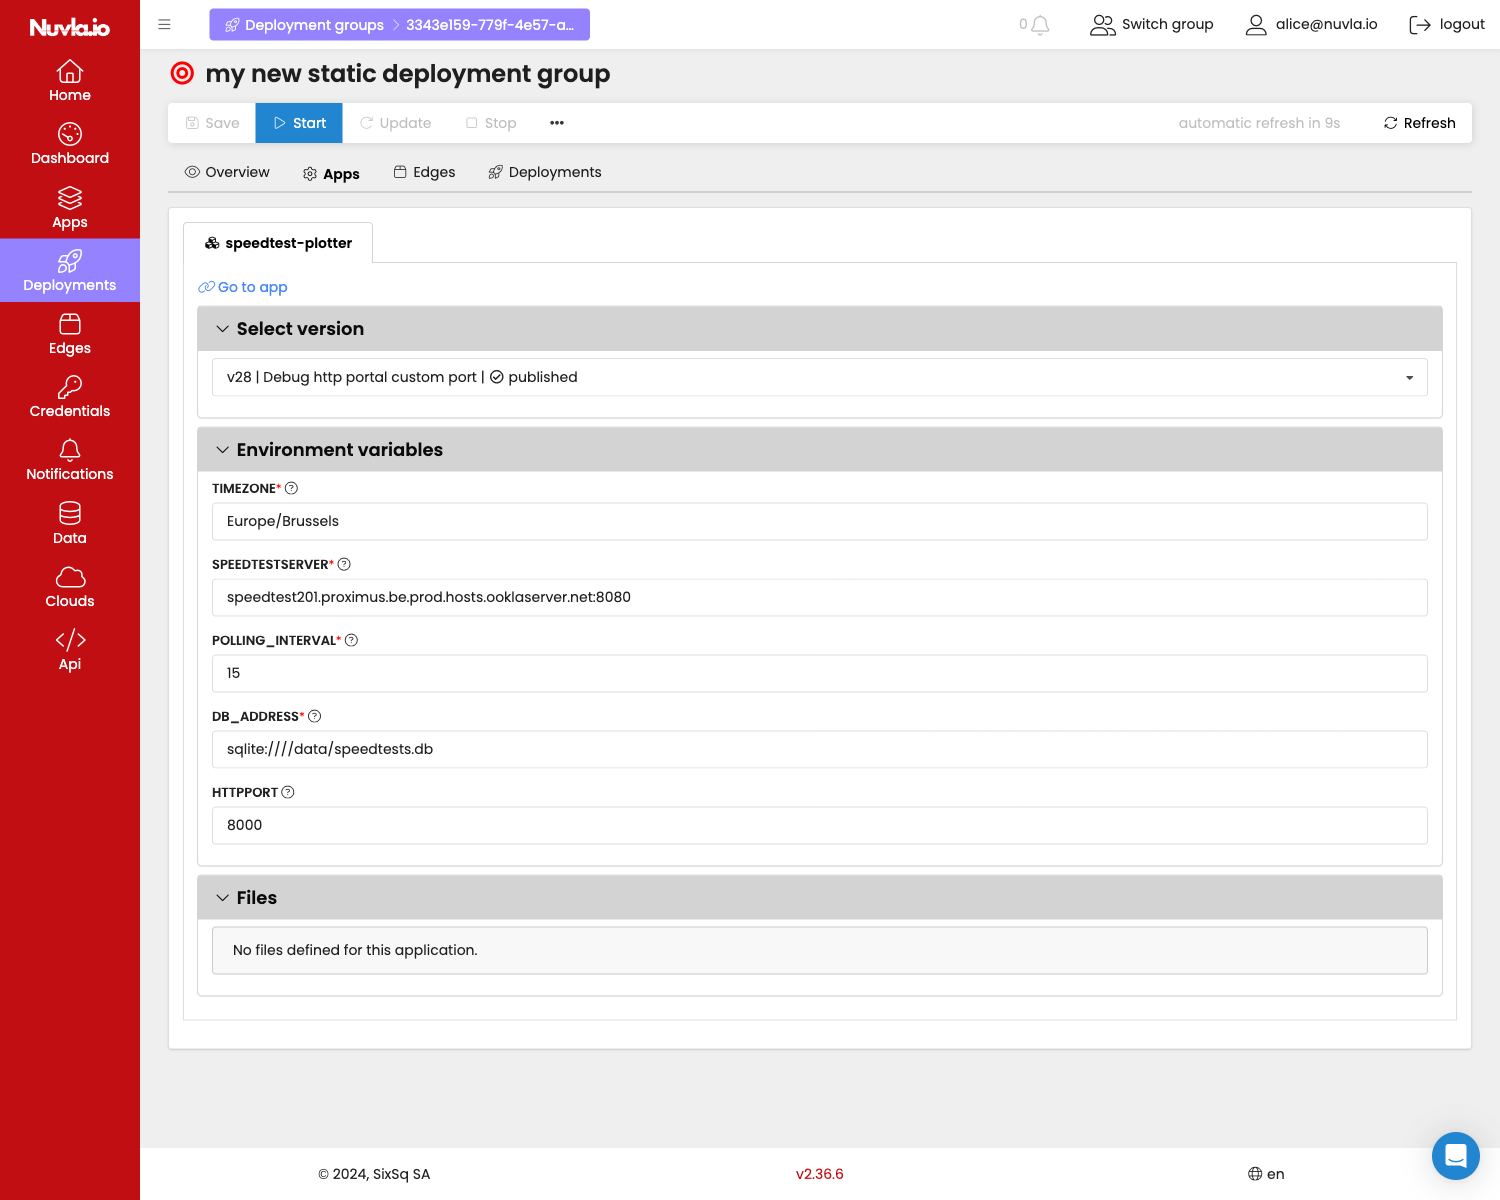
Now it’s a good idea to review the input parameters for the apps. You can access them by clicking on the Apps tab.
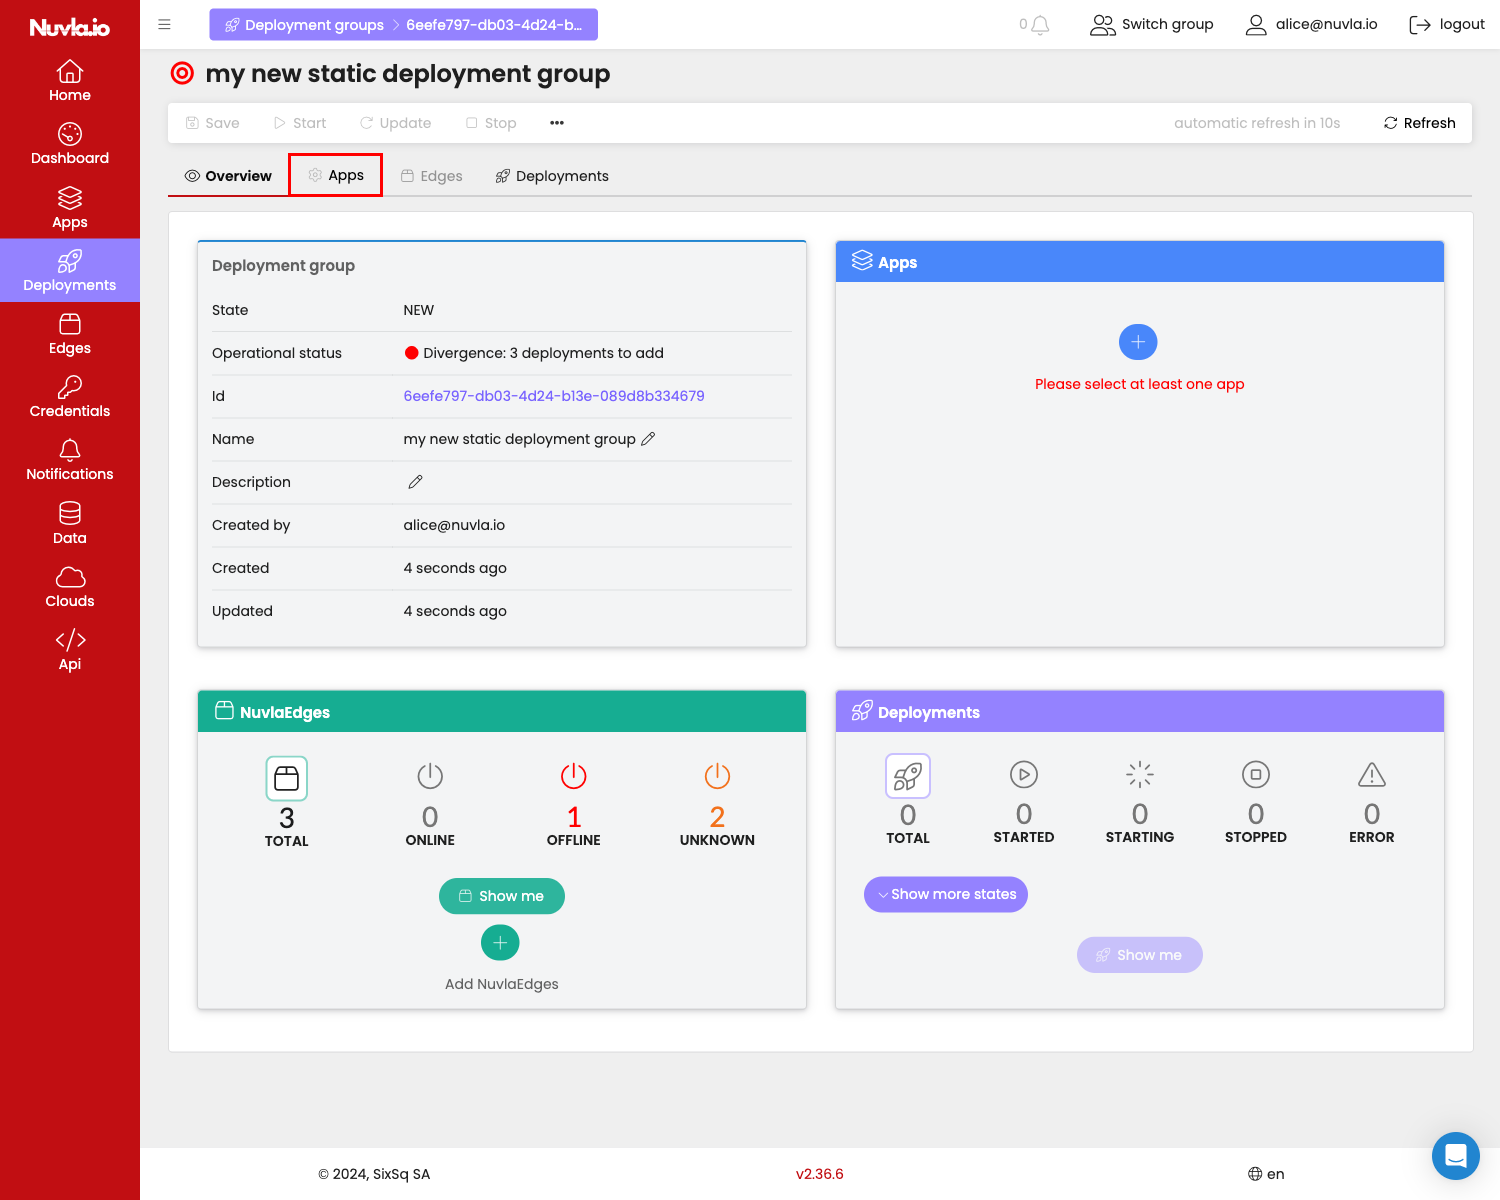
All mandatory input parameters, for each app, must be filled.
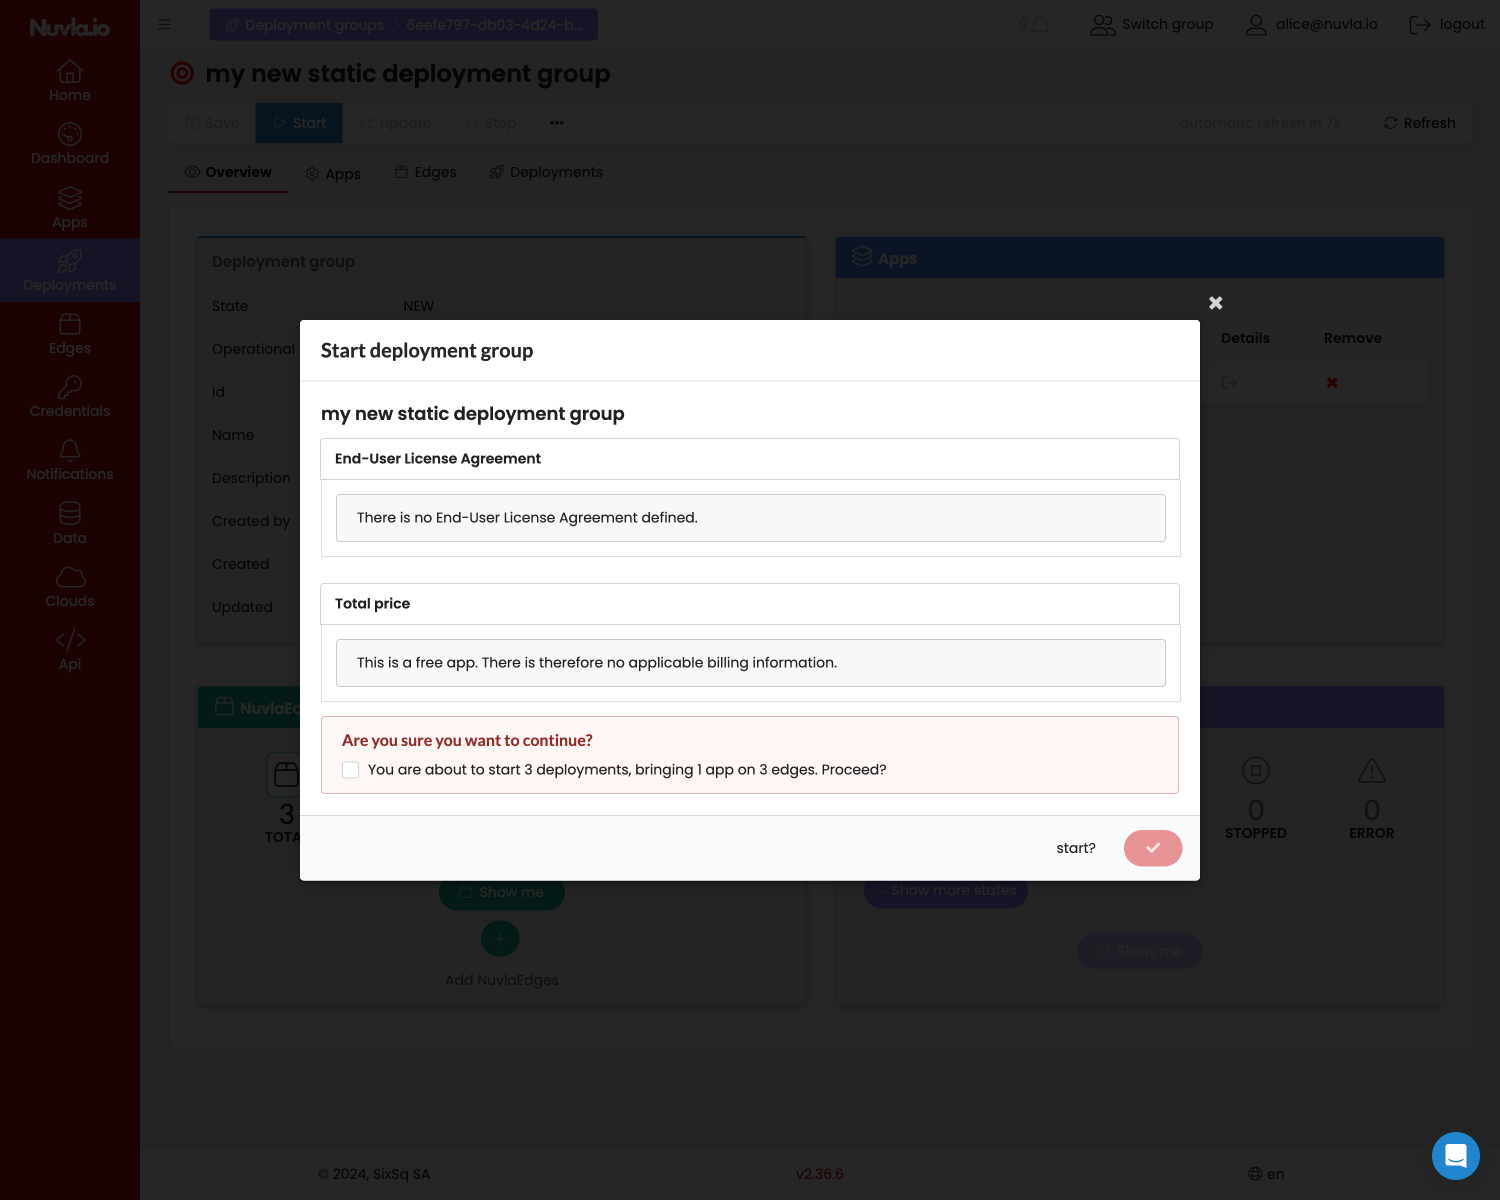
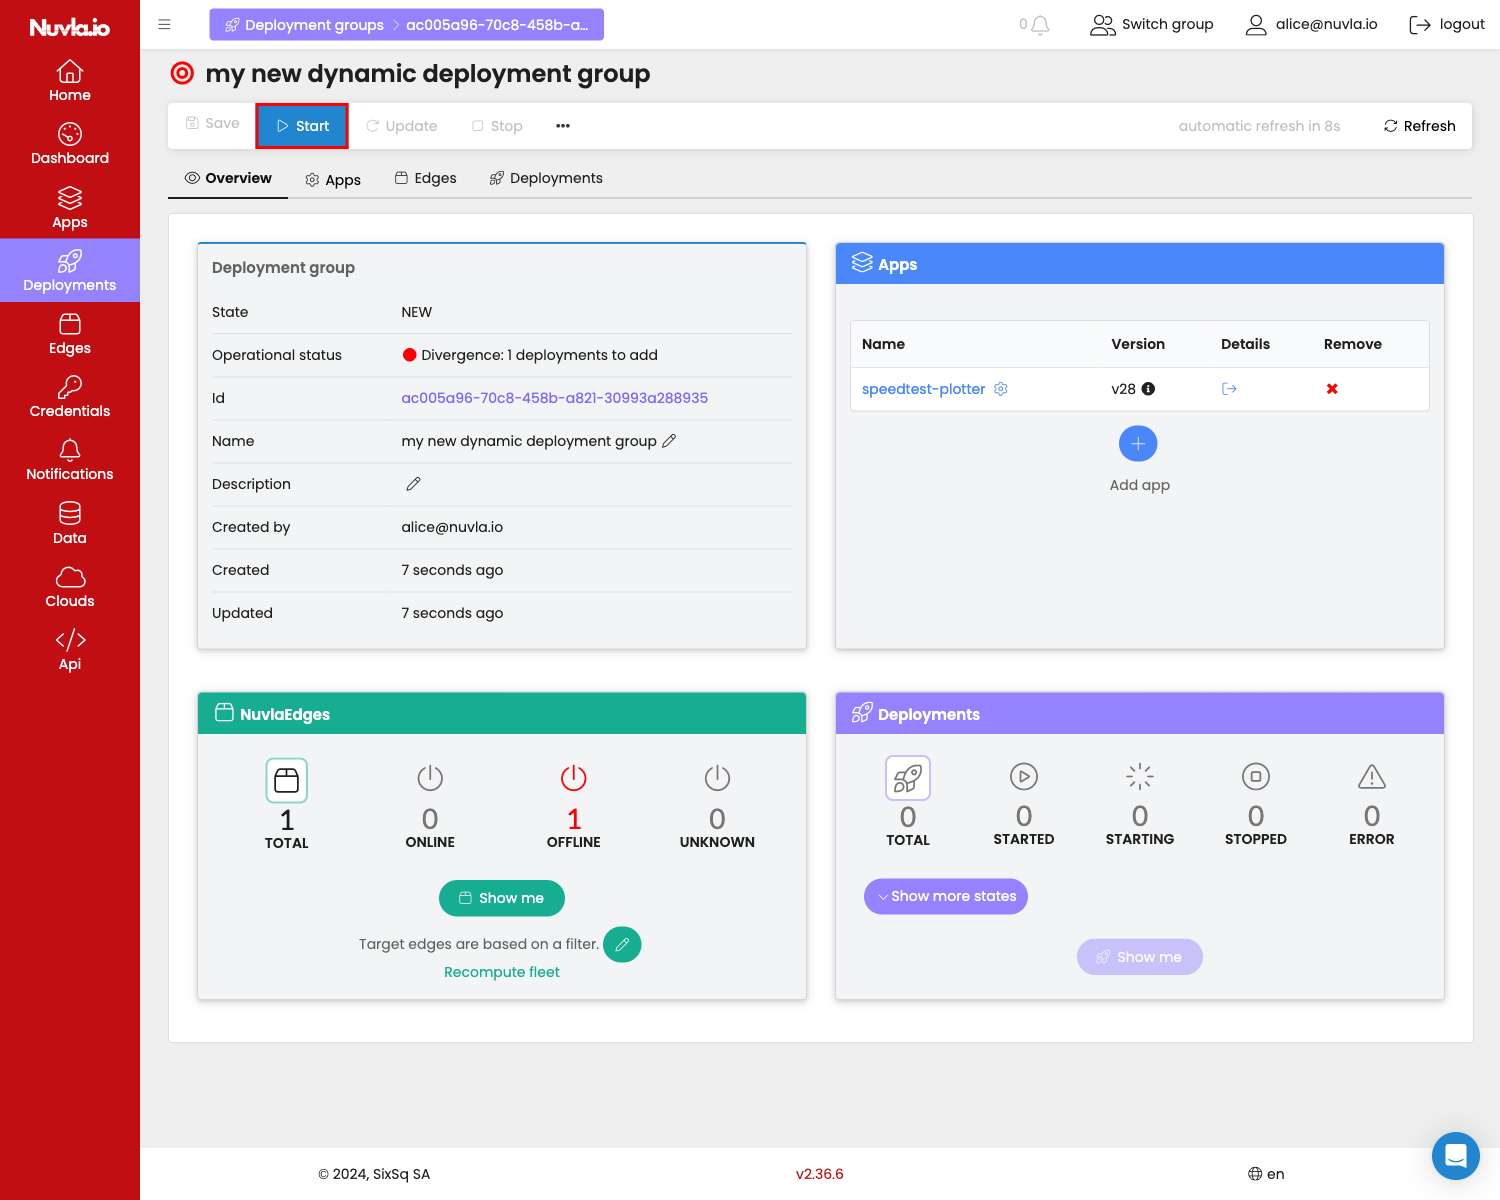
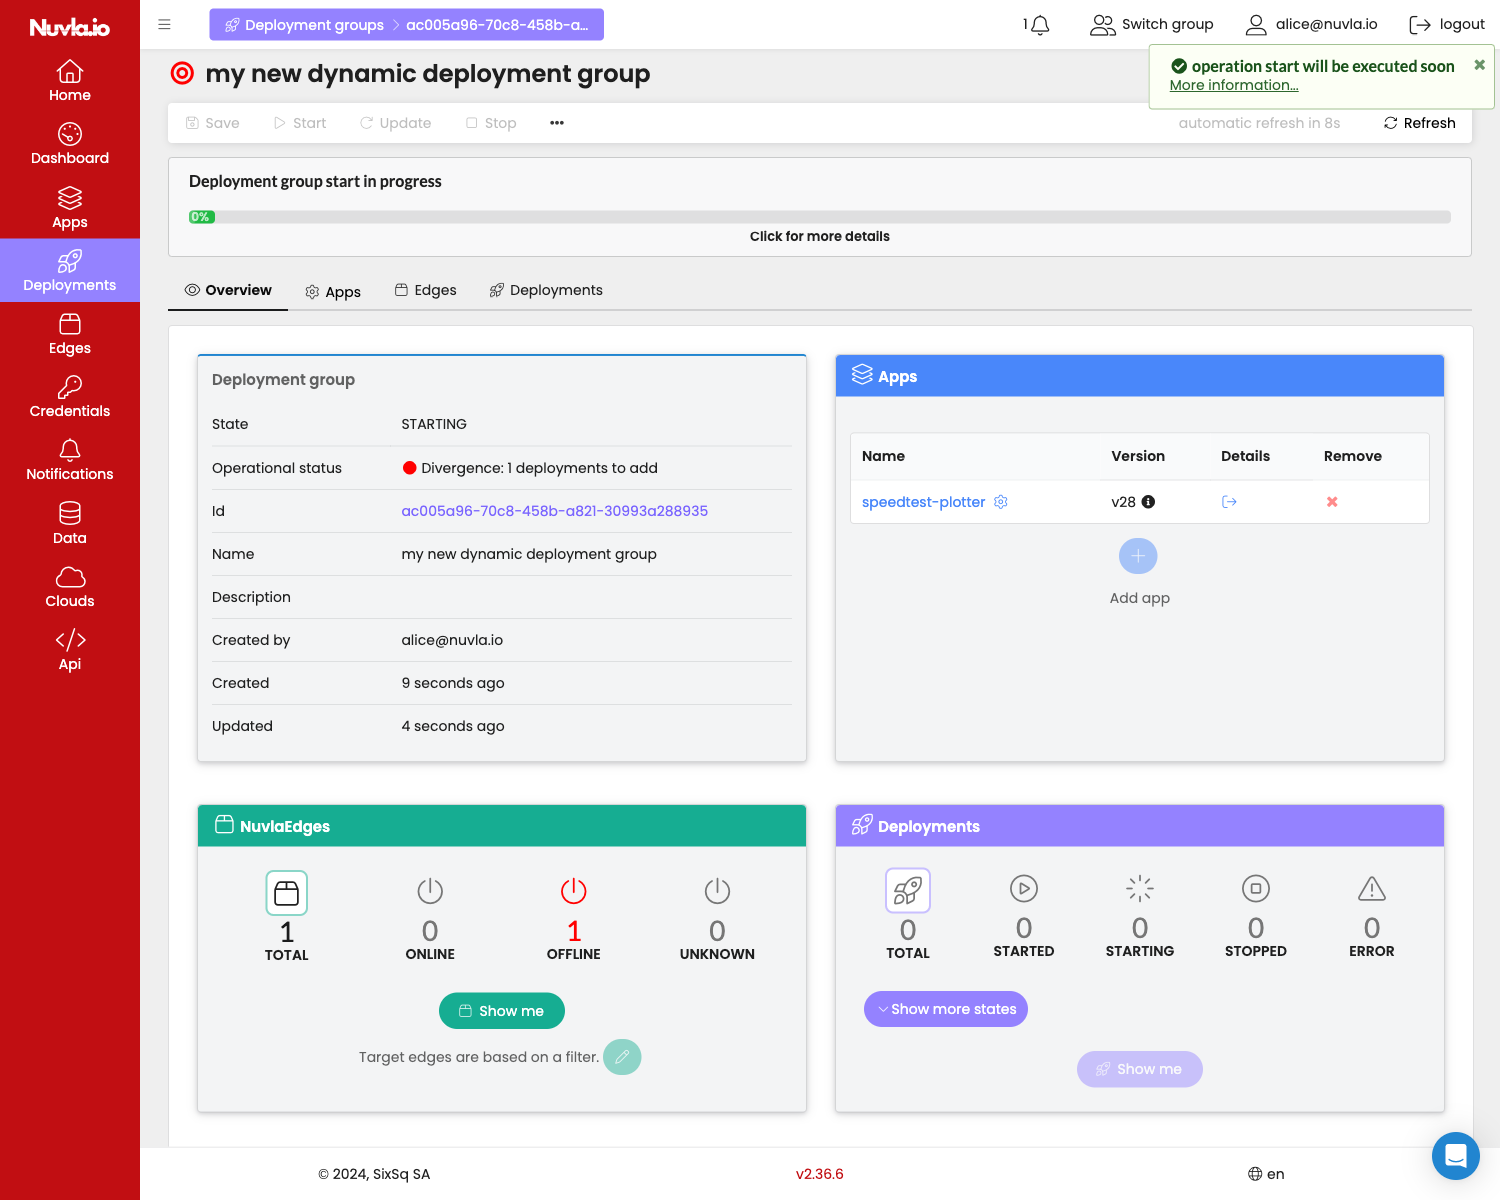
You can now launch this deployment group by clicking on the Start button.

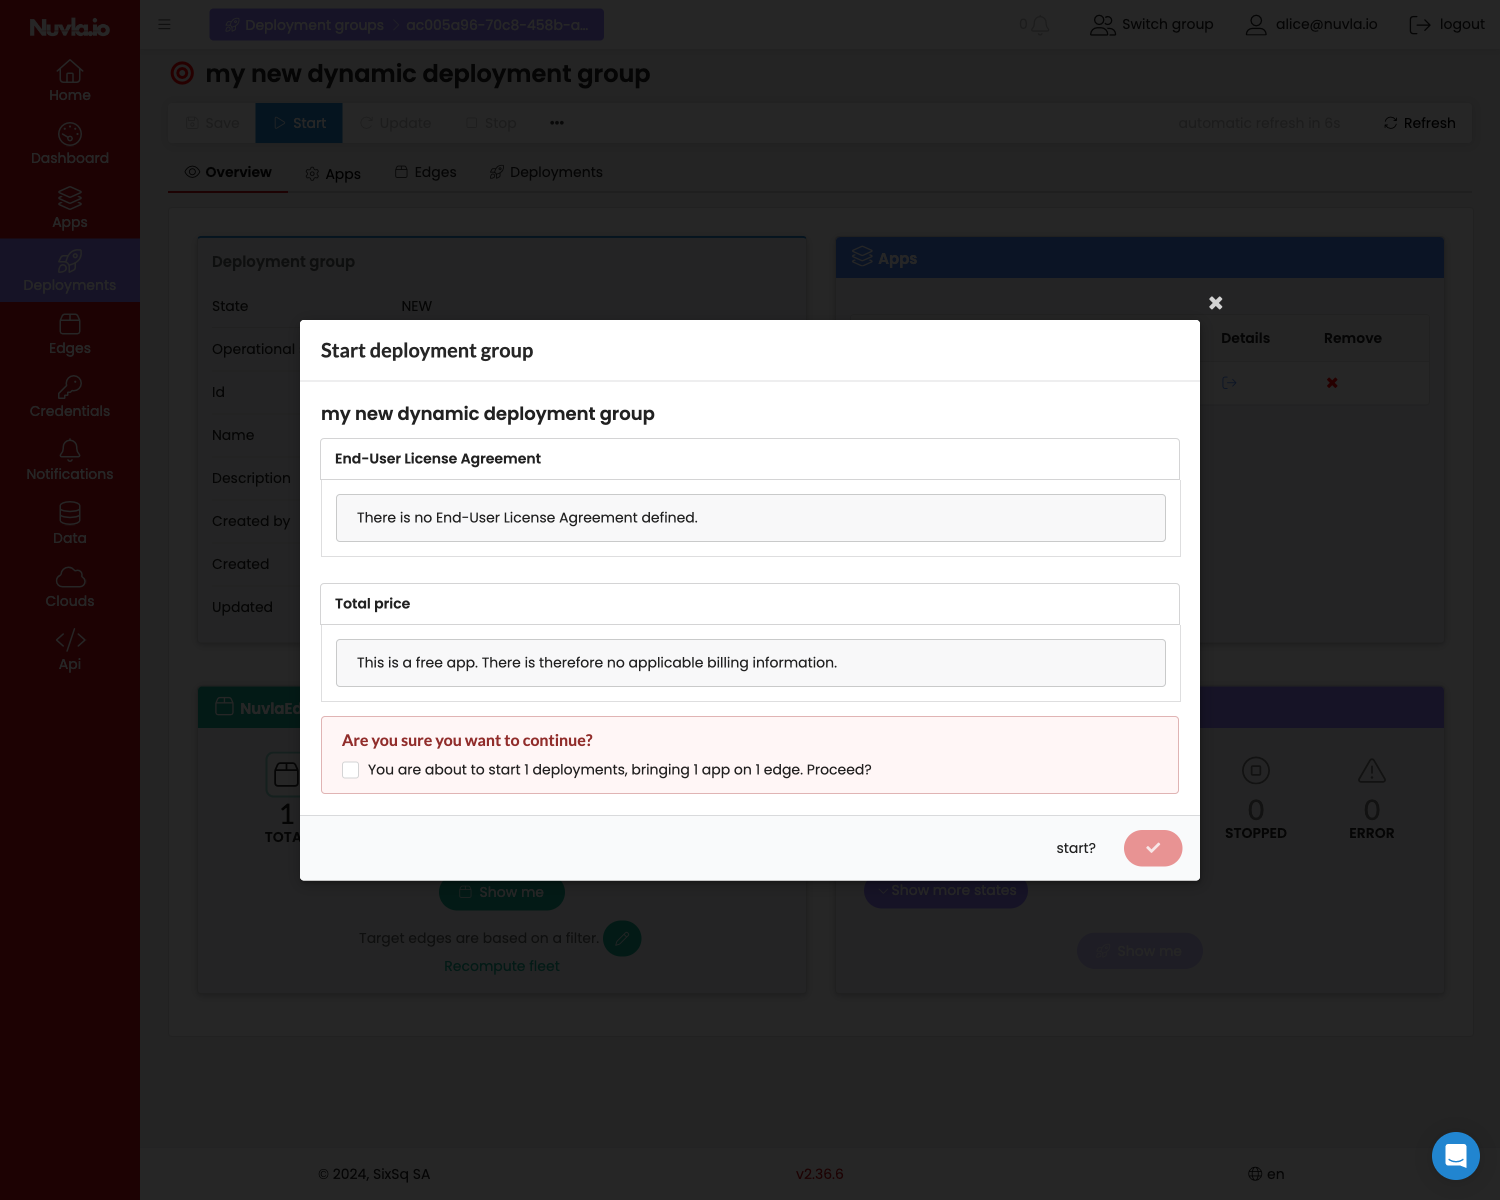
Depending on the app, you might have to accept the terms and conditions and price(s) of the app vendor(s). Then confirm that you want to start the app and start it.
Voilà! You have started your deployment group. From here you will be able to manage this deployment group by changing both the fleet of edge device and the apps, including their version and input parameters.
Using a dynamic fleet of edge devices
The instructions above show how to create a static fleet of edge devices. You can also create a dynamic fleet, which is defined by a filter, which can change over time. For example, you can define a filter that says consider all NuvlaEdges that have a given tag.
Over time, NuvlaEdges with this tag can evolve, and you will be able to update your deployments based on this dynamic fleet.
Note that you cannot convert a static fleet in deployment group into a dynamic one, and vice versa. Therefore, you have to choose at creation time of your deployment group.
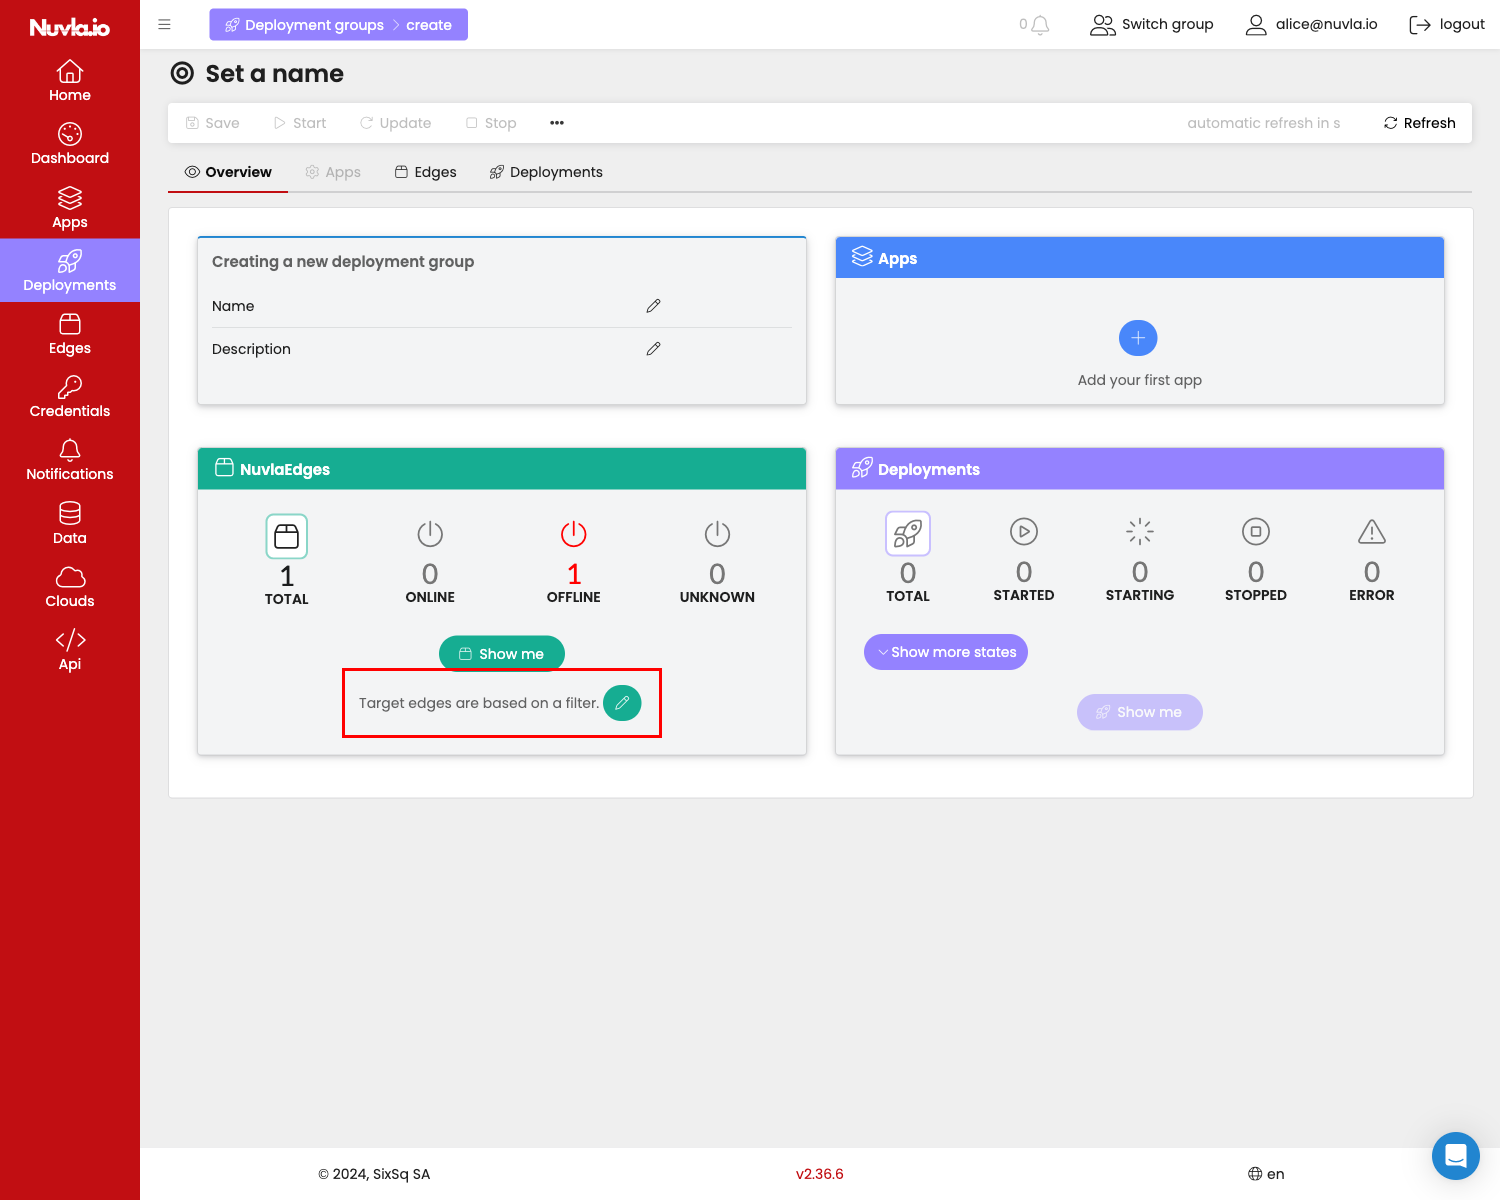
First define the filter you want to define your fleet.
In this example, we choose to select all edge devices that have the tag ‘green’.
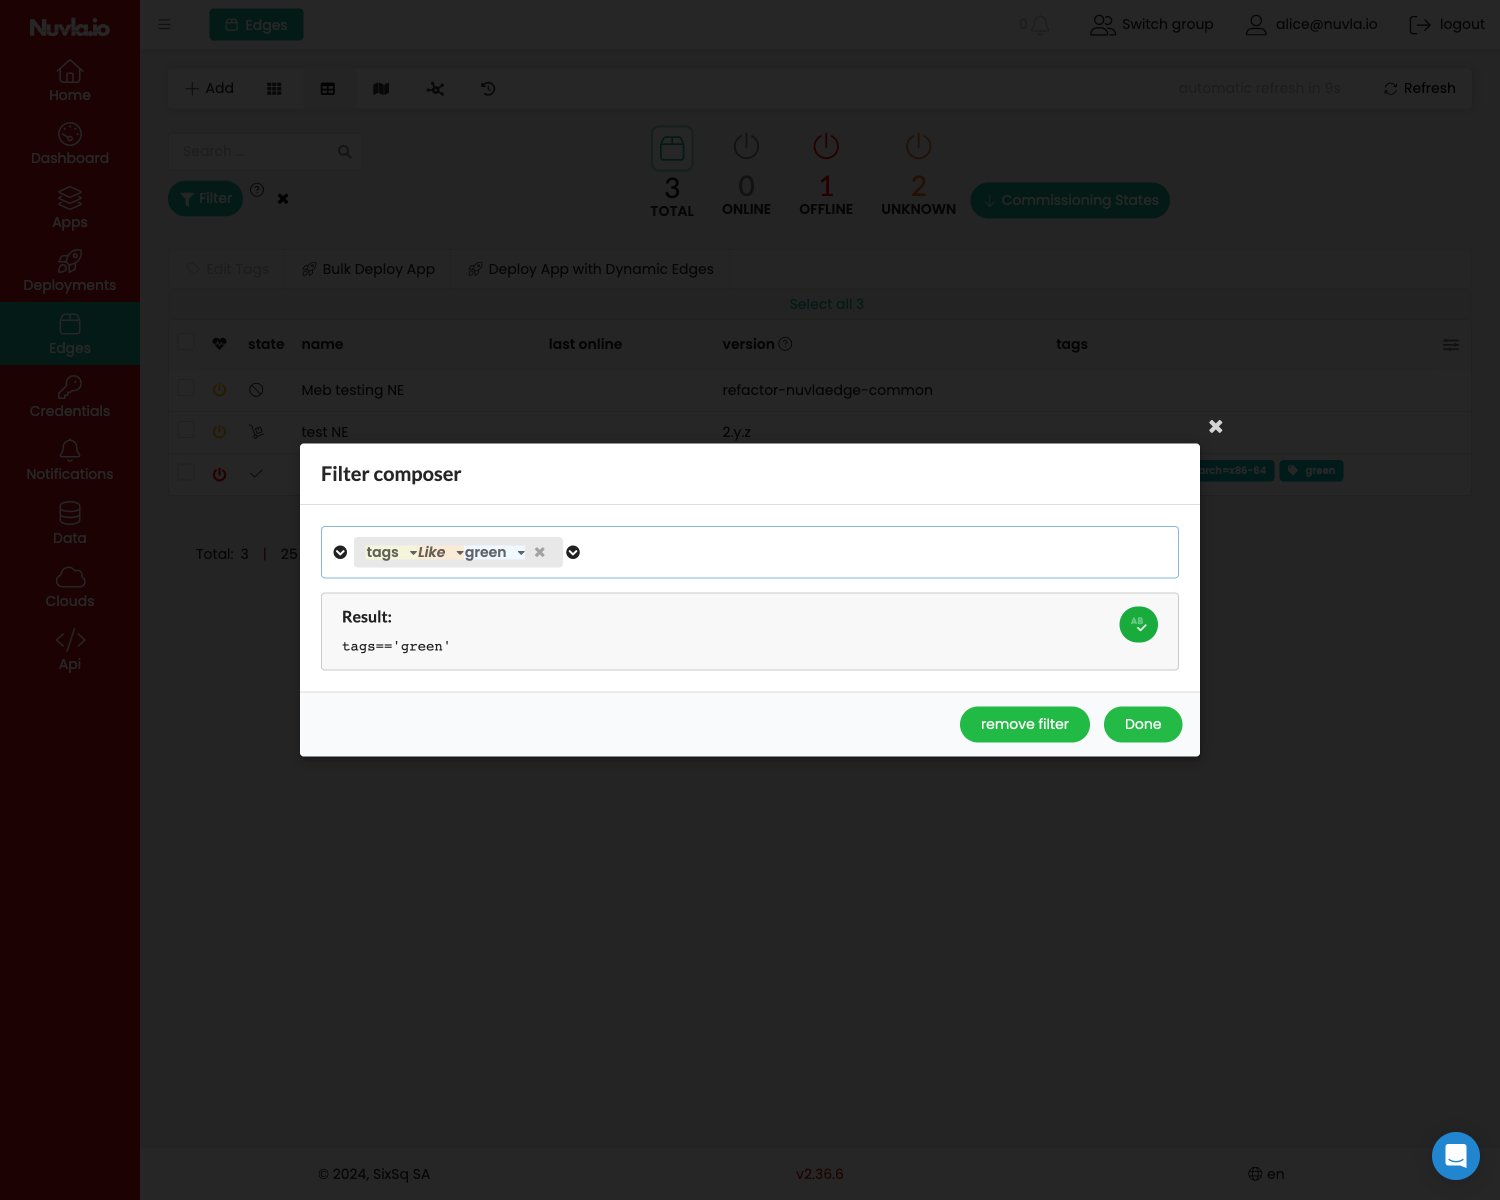
Once our filter is defined (and you will be able to change it later, even after having started your deployment), you can create your new deployment group by clicking on Deploy App with Dynamic Edges button.
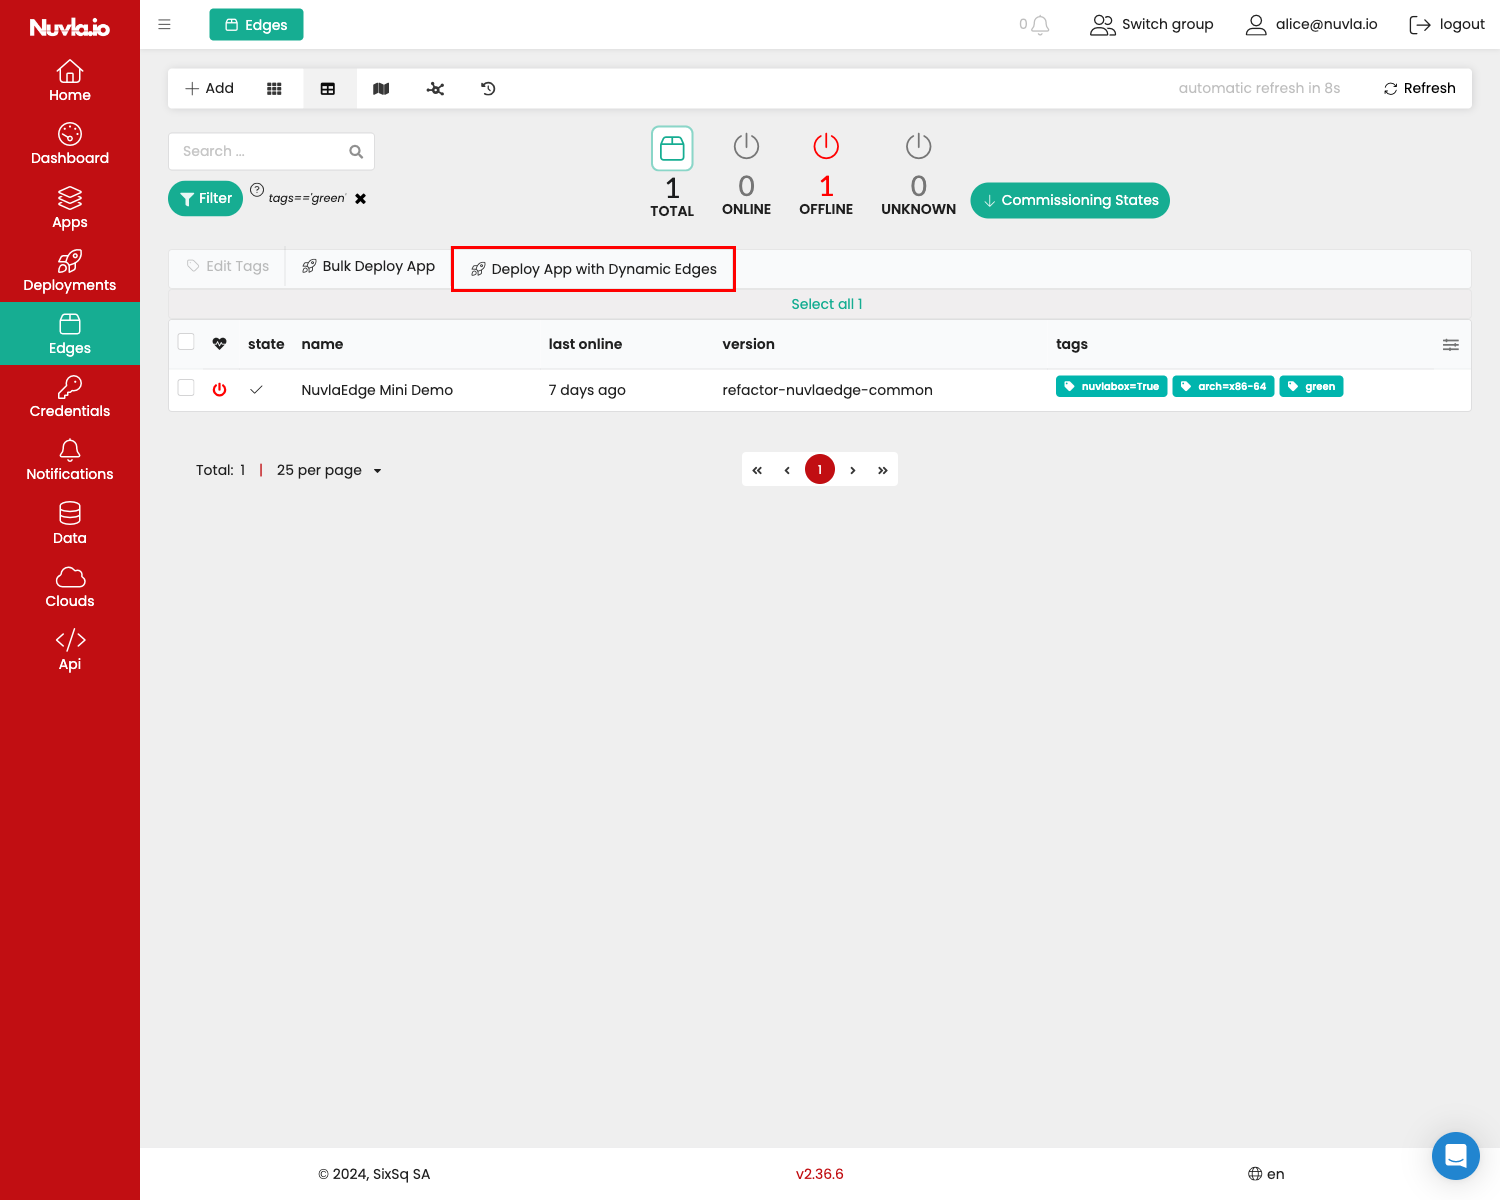
In your new deployment group, the NuvlaEdge widget shows that the fleet of edge devices is defined by a filter. Once you save the deployment group, you will be able to update the filter and get Nuvla.io to recalculate the fleet.
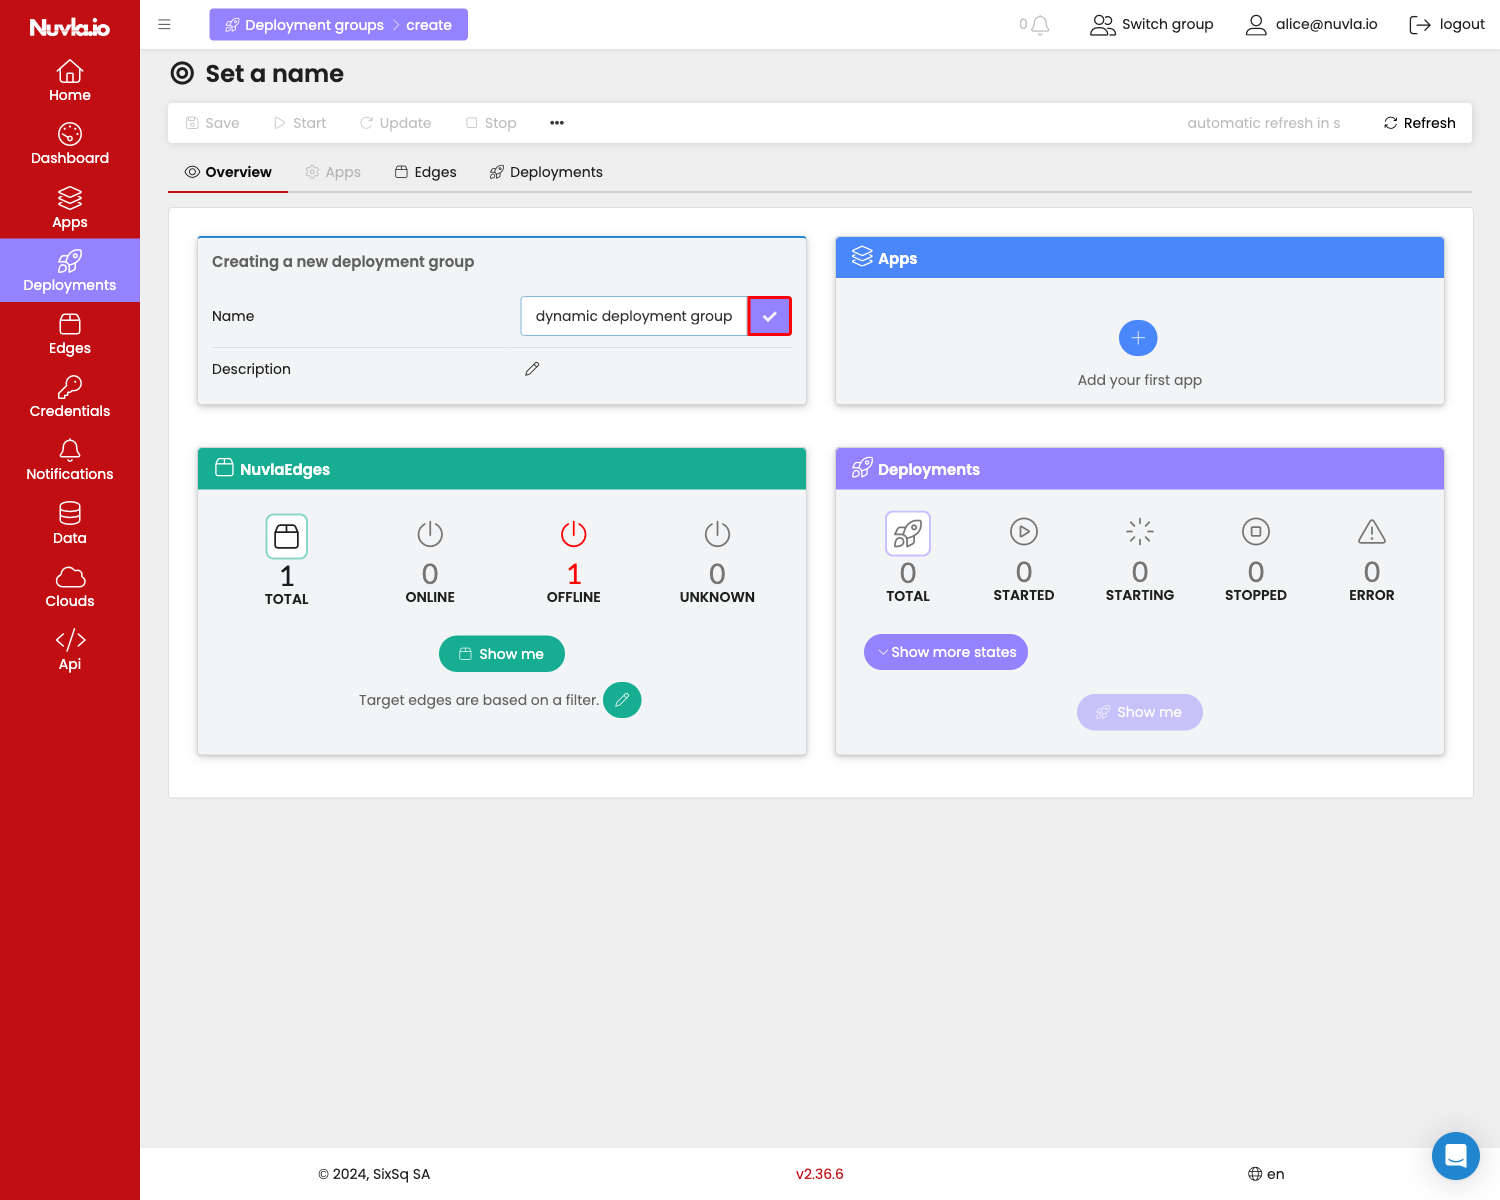
Now set the name and description of your new deployment group.
NOTE: once you’ve entered a name or description, press enter to confirm the value.
The NuvlaEdges section is already filled from the selection you made on the edges page before clicking the Bulk Deploy App.
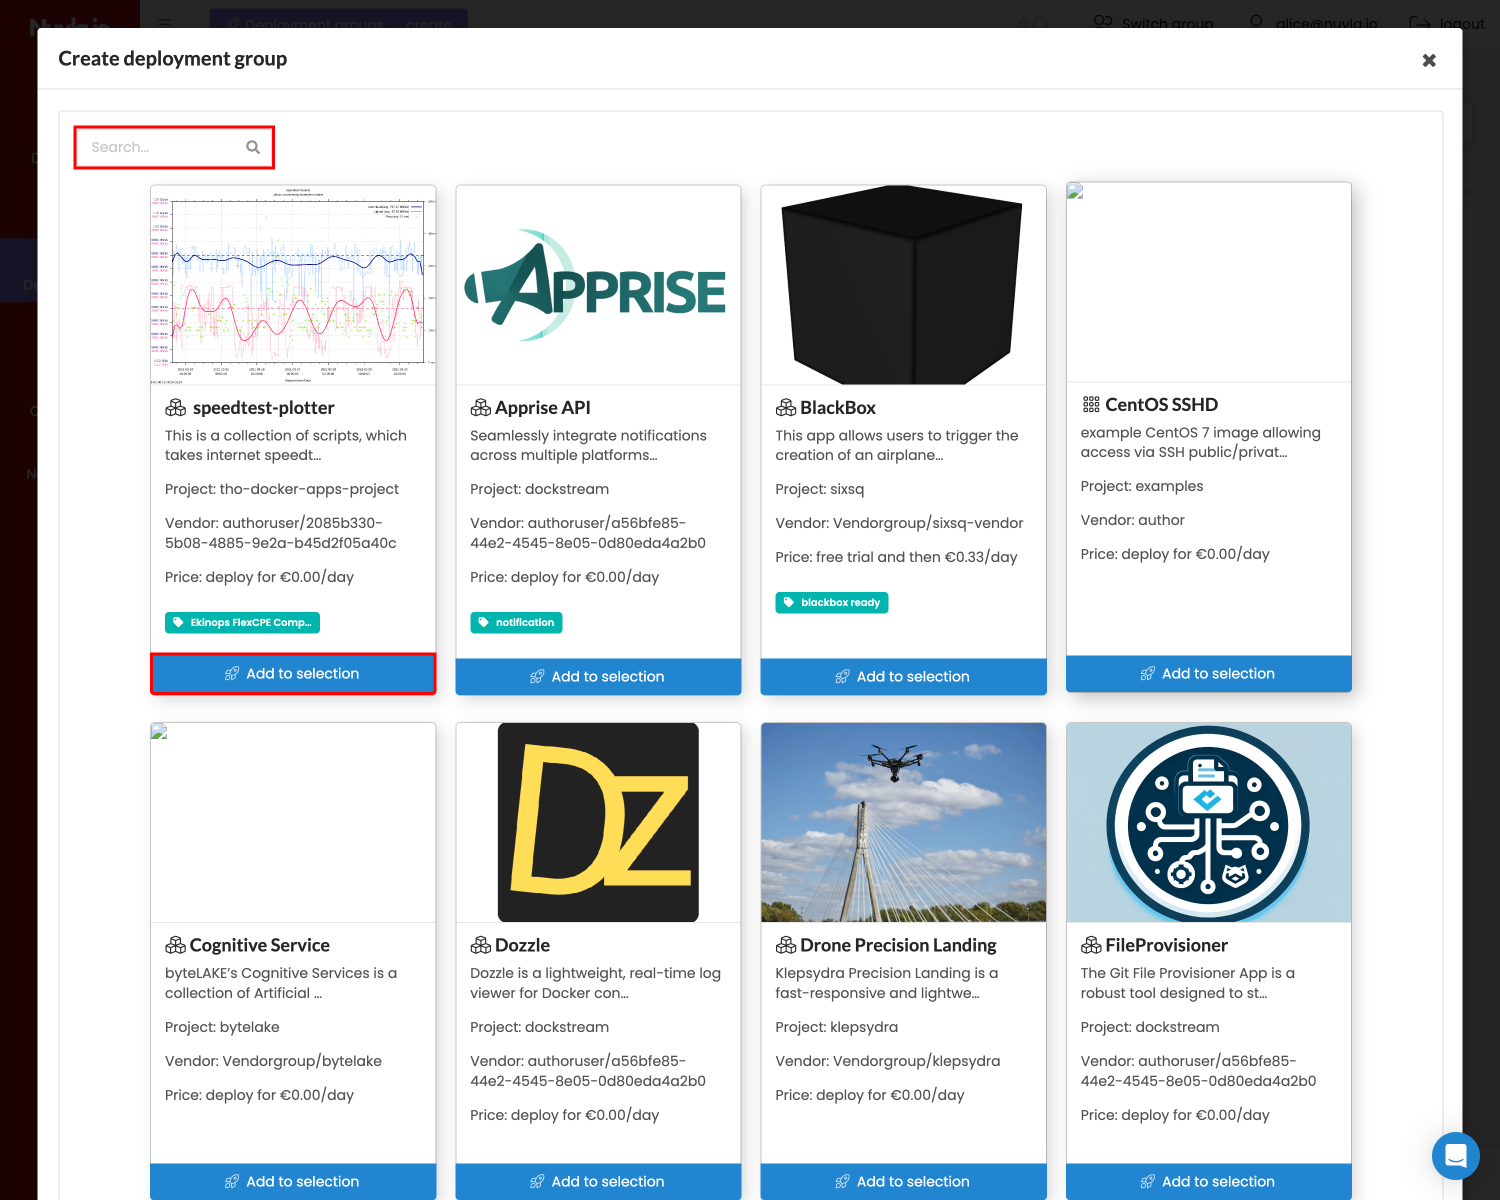
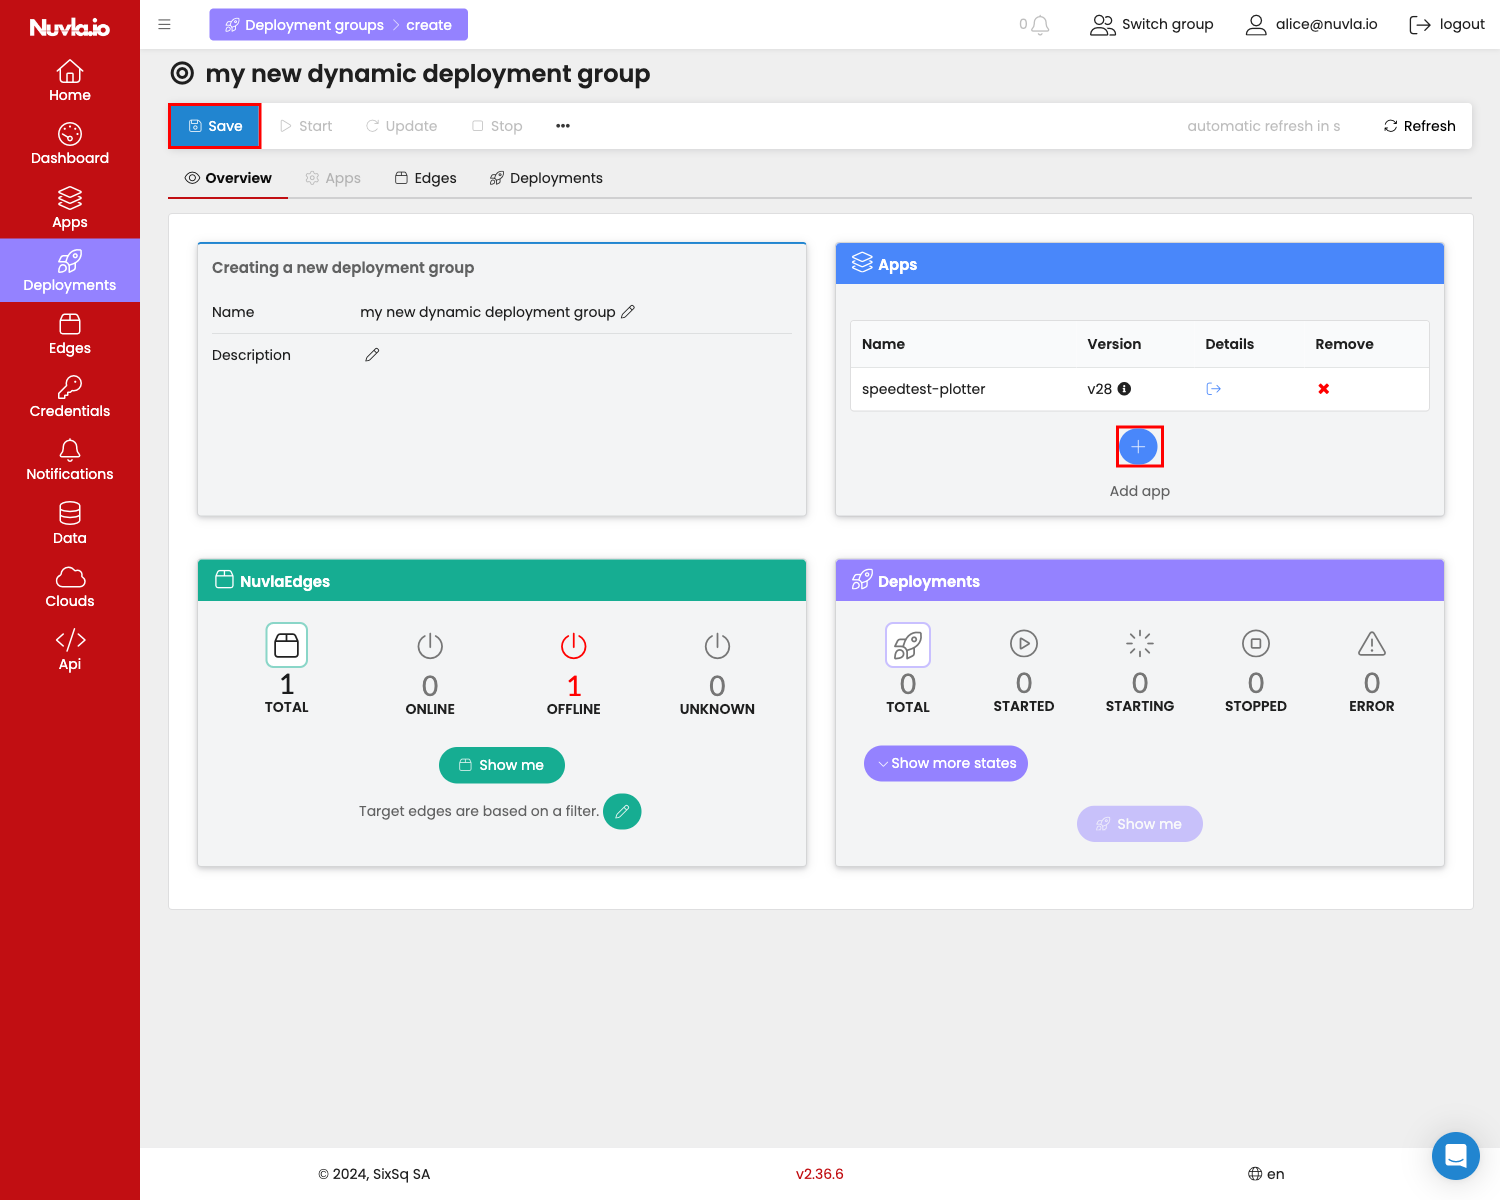
Now you need to select an app or apps to deploy on the fleet of edge devices. For this click on the + button in the Apps card.

Then select an app. You can use the search input field to find the app you are looking for. Once you have found the right app, simply click on the corresponding Add to selection button.
NOTE: that you can either select a single app bouquet, or several single apps.
Now the save button is active and can save your new deployment group.
NOTE: Once the deployment group is saved, before you can start it, you must ensure all mandatory app input parameters are provided. A validation error message will show and the relevant tabs will be highlighted in red.
Now it’s a good idea to review the input parameters for the apps. You can access them by clicking on the Apps tab.
All mandatory input parameters, for each app, must be filled.
You can now launch this deployment group by clicking on the Start button.
Depending on the app, you might have to accept the terms and conditions and price(s) of the app vendor(s). Then confirm that you want to start the app and start it.
Voilà! You have started your deployment group. From here you will be able to manage this deployment group by clicking on Recompute fleet, as well as the apps, including changing versions and input parameters.
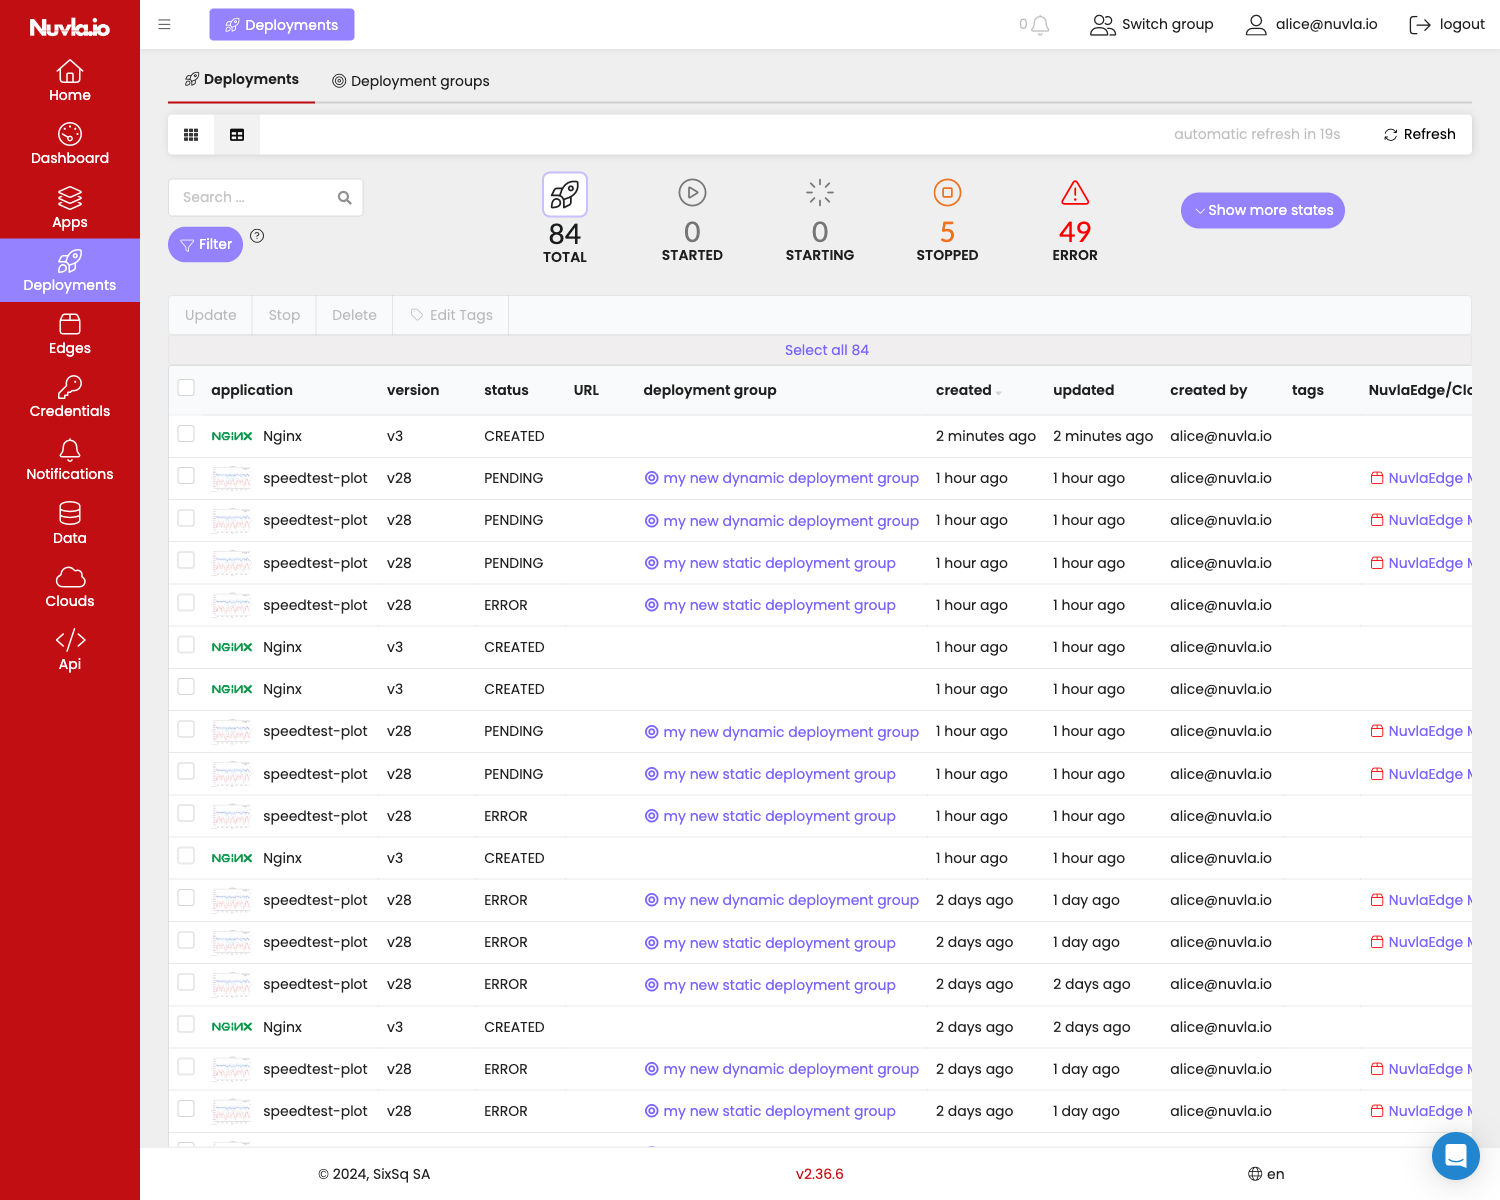
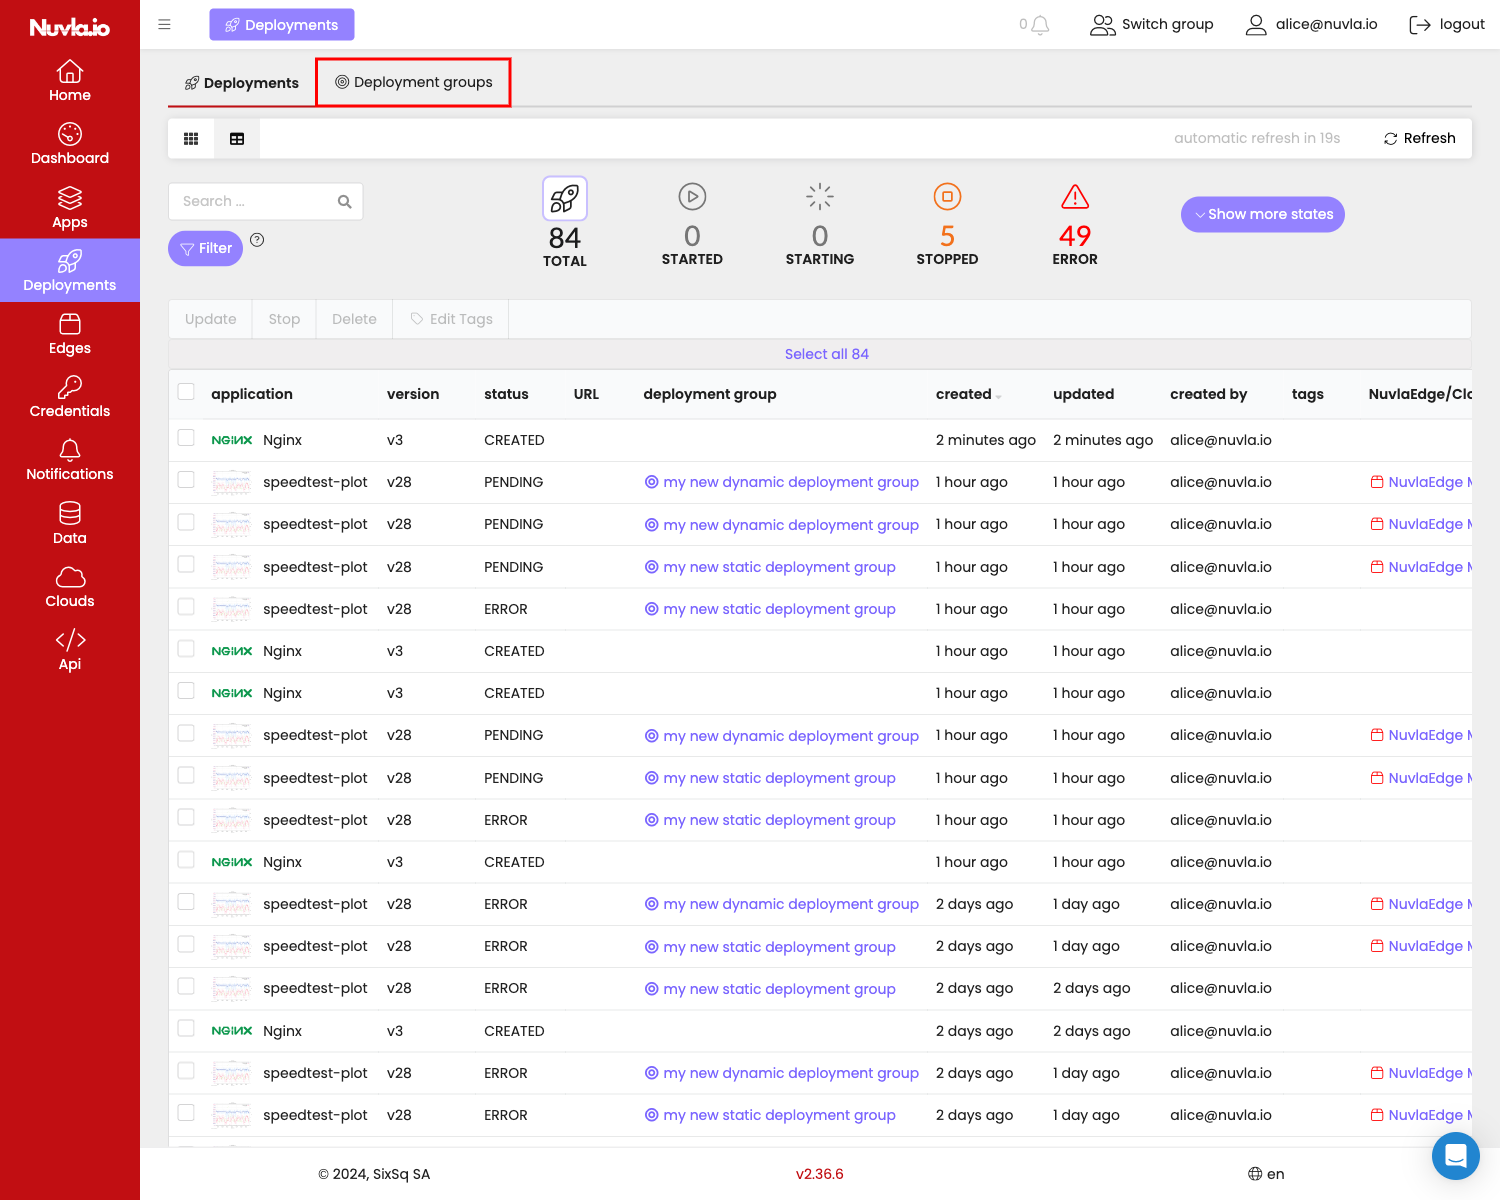
Starting from the Deployments page
On the Deployments page, you can see ‘single’ deployments, as well as deployment ‘groups’.
To deploy an app from this page, click on the Deployment groups tab.
Here, click on the + Add button.
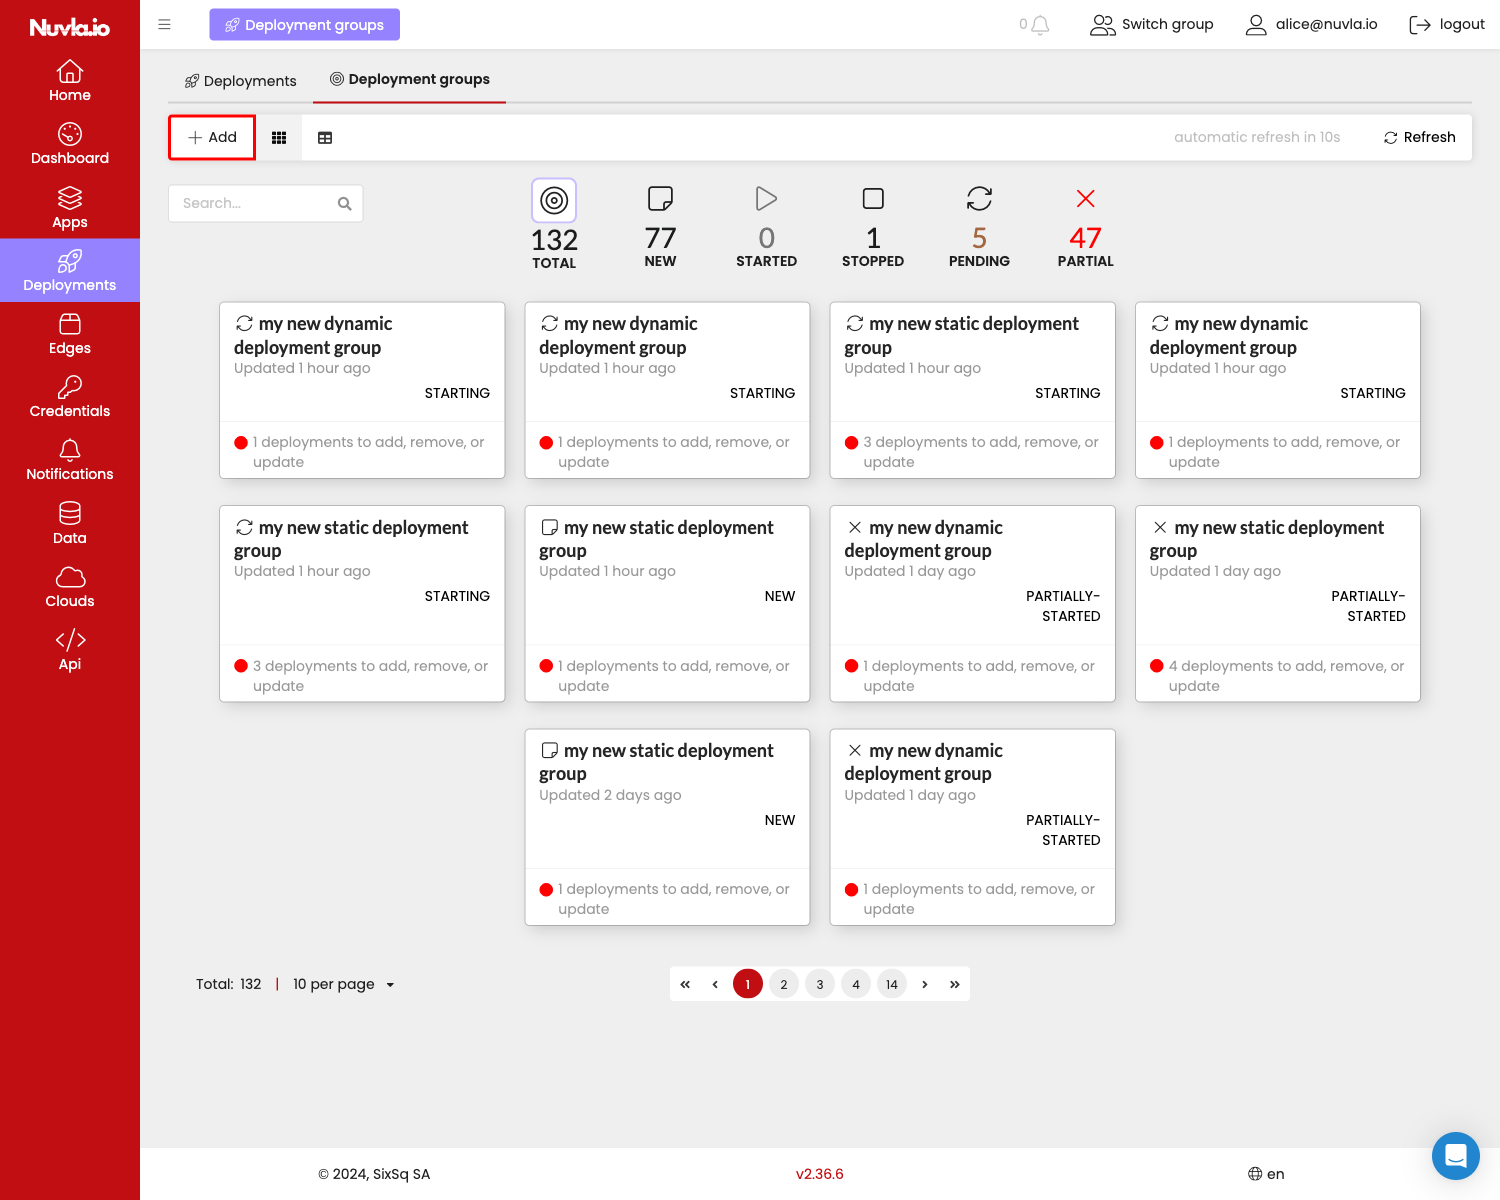
This will create a new deployment group page. From here you will be able to add app(s) and edge devices.
Now set the name and description of your new deployment group.
NOTE: once you’ve entered a name or description, press enter to confirm the value.

Now you need to select an app or apps to deploy on the fleet of edge devices. For this click on the + button in the Apps card.

Then select an app. You can use the search input field to find the app you are looking for. Once you have found the right app, simply click on the corresponding Add to selection button.
NOTE: that you can either select a single app bouquet, or several single apps.

Now the save button is active and can save your new deployment group.

NOTE: Once the deployment group is saved, before you can start it, you must ensure all mandatory app input parameters are provided. A validation error message will show and the relevant tabs will be highlighted in red.
Now it’s a good idea to review the input parameters for the apps. You can access them by clicking on the Apps tab.
All mandatory input parameters, for each app, must be filled.
Starting from the Apps page
There are two types of apps:
- Simple app: a single app, which can be composed of several containers deployed together and described using a Docker Compose file, or Kubernetes Manifest (Helm charts are on their way)
- Bouquet of Apps: a composition of simple apps, potentially provided by different providers, but deployed and managed together
From the Apps page, depending on the type of app, the deployment process is a bit different. Up to know, on this documentation page, we have described the way to create a deployment group. In this section, we will describe the user interface for simple apps deployment. This will be deprecated in the future, replaced by the deployment group approach.
So, let’s deploy a Nuvla App into your NuvlaEdge:
-
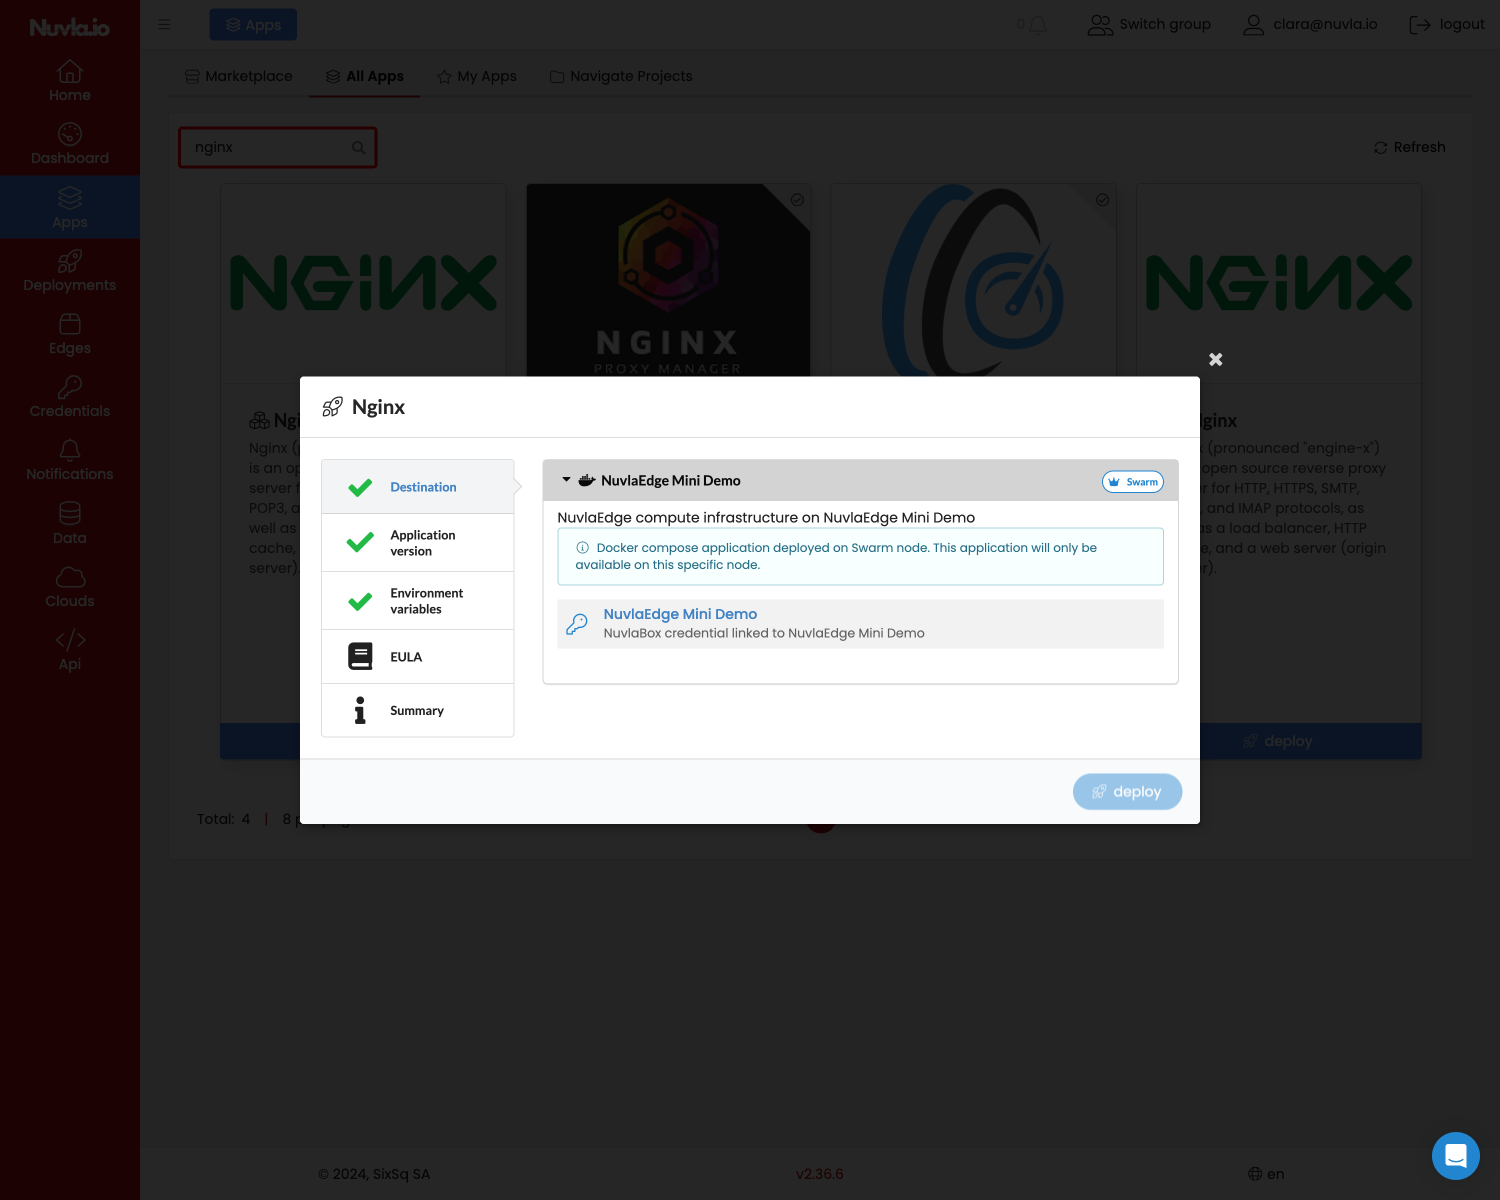
login into Nuvla and go to the All Apps tab of the Apps page
-
find your desired app (let’s say Nginx for example). Then, click on the deploy button of the corresponding app
-
select a NuvlaEdge to deploy this app to. Notice that Nuvla will automatically check the availability of the NuvlaEdge and that you have the right credentials
-
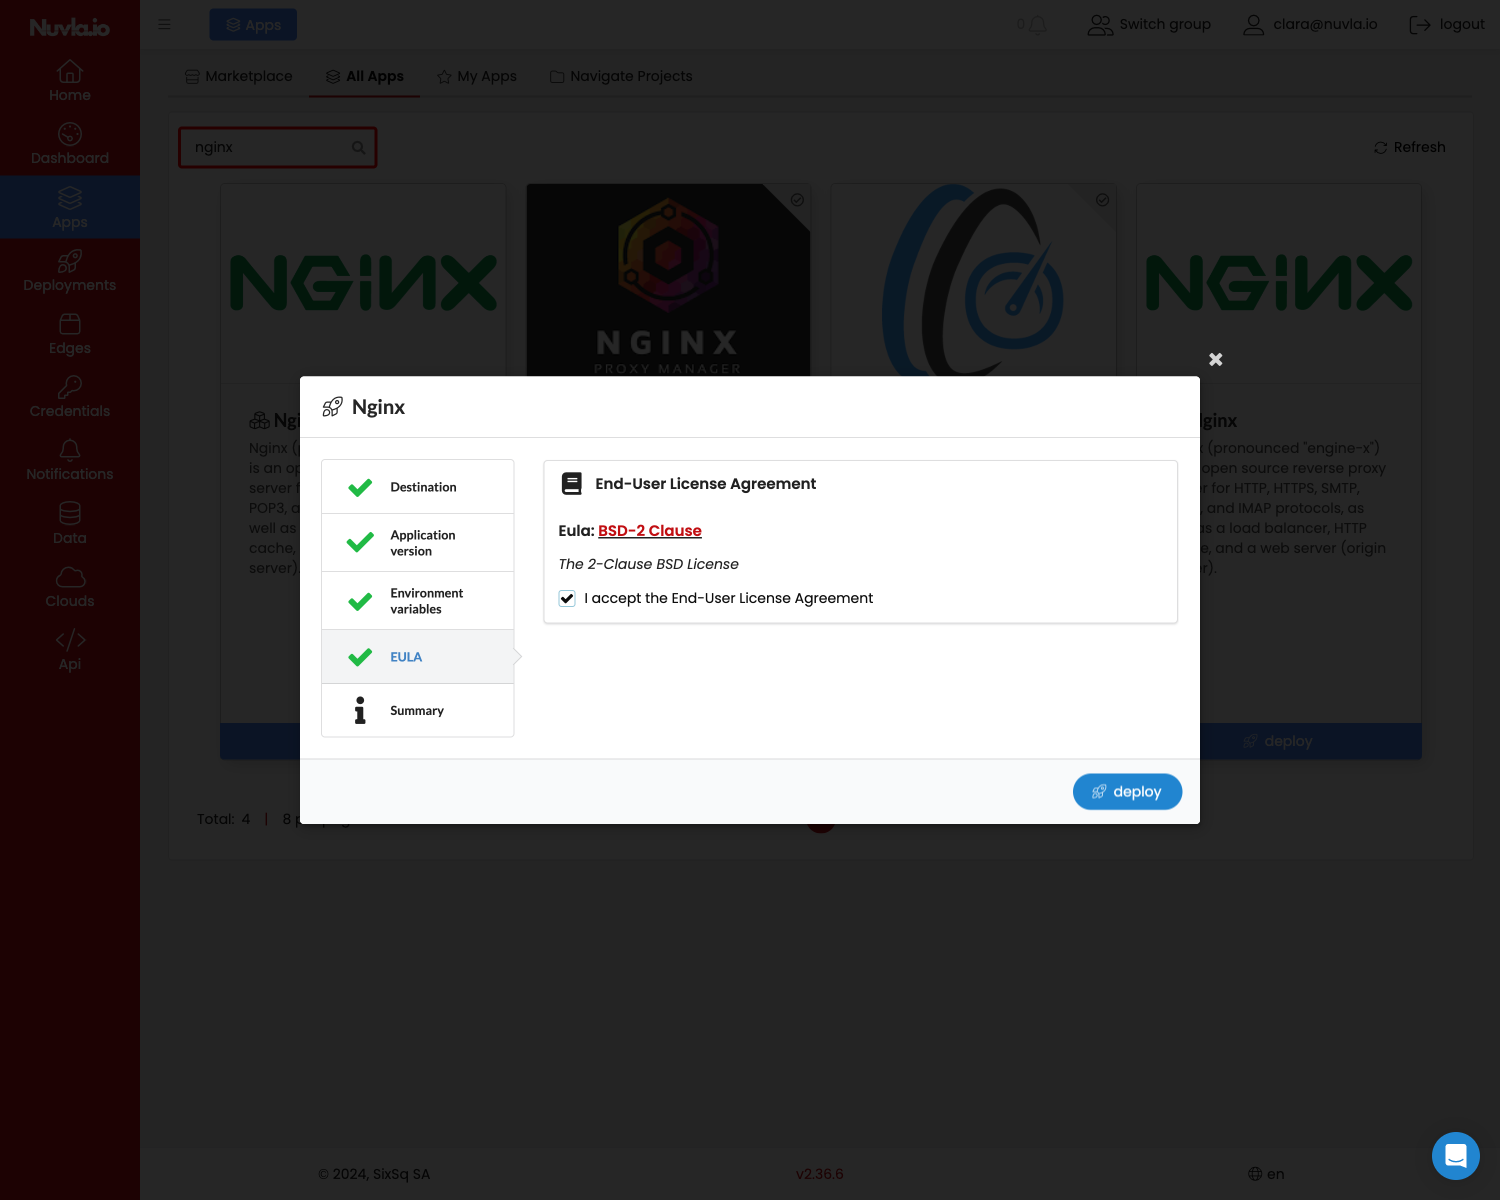
If the app has an End-User License Agreement (EULA), read it and if you accept it, tick the accept box
-
if applicable, define any environment variables, configuration files and/or other runtime parameters that might be required by your app (this NGINX example application doesn’t)
-
and if the app is a paying app, you will also have to accept the fees (this Nginx example application doesn’t)
-
click deploy, and you’ll be redirected to the page of the new deployment, where you can follow the state of your deployment, and interact with it.