Install via USB stick
If you are looking to streamline and automate the installation of the NuvlaEdge in your edge devices, then this is probably the best choice for you.
The advantages of this installation method are:
- NO need for an external display
- NO need for SSH access to the device
- The same USB stick can be used as many times as needed
- NO technical expertise required
Unlike the Compose file bundle, the USB stick installation method does not require manual user intervention, and thus does not support manual configuration of the NuvlaEdge environment variable. NUVLABOX_UUID, NUVLA_ENDPOINT and NUVLA_ENDPOINT_INSECURE are automatically defined for you by Nuvla, during the installation process.
It is not yet possible to define variables like HOSTNAME and VPN_INTERFACE_NAME with this installation method. All possible NuvlaEdge configurations for this installation method are set from Nuvla, at the time of creation of the USB stick file.
Additional requirements
This installation method requires a specific NuvlaEdge plugin to be installed in your Operating System, which will trigger the USB-based installation whenever you plug the flash drive.
-
if your devices are running a NuvlaEdge OS, then you’re good! You can jump straight to the installation procedure below
-
if your devices are NOT running a NuvlaEdge OS, then you must first prepare your operating system as follows:
- make sure you are running a Linux distribution with
systemdinstalled (we recommend using Debian or Ubuntu) -
get the latest version of the NuvlaEdge USB Auto-installer plugin from GitHub:
git clone https://github.com/nuvlabox/nuvlabox-os.git /tmp/nuvlabox-os cd /tmp/nuvlabox-os -
you’ll find different NuvlaEdge OS distributions here. These are enclosed within folders like
raspberrypi(for a Raspbian-like NuvlaEdge OS) orgeneric(for generic amd64 Debian-like NuvlaEdge OS). Navigate to the folder that it closer to your own distributioncd /tmp/nuvlabox-os/<your-distro> -
inside you’ll find a
99_usb-auto-installerfolderls 99_usb-auto-installer -
for all distros, inside the
99_usb-auto-installerfolder, you’ll find an.howToInstallfile. Run itsudo sh .howToInstall
- make sure you are running a Linux distribution with
You can now automate the installation of the NuvlaEdge software into your fleet of edge devices.
Procedure
If the OS of your edge device meets the requirements, then all you have to do is to prepare your USB flash drive.
Just follow these steps:
- go to Nuvla and login
-
on the Edges page, click
+addand select the USB stick installation method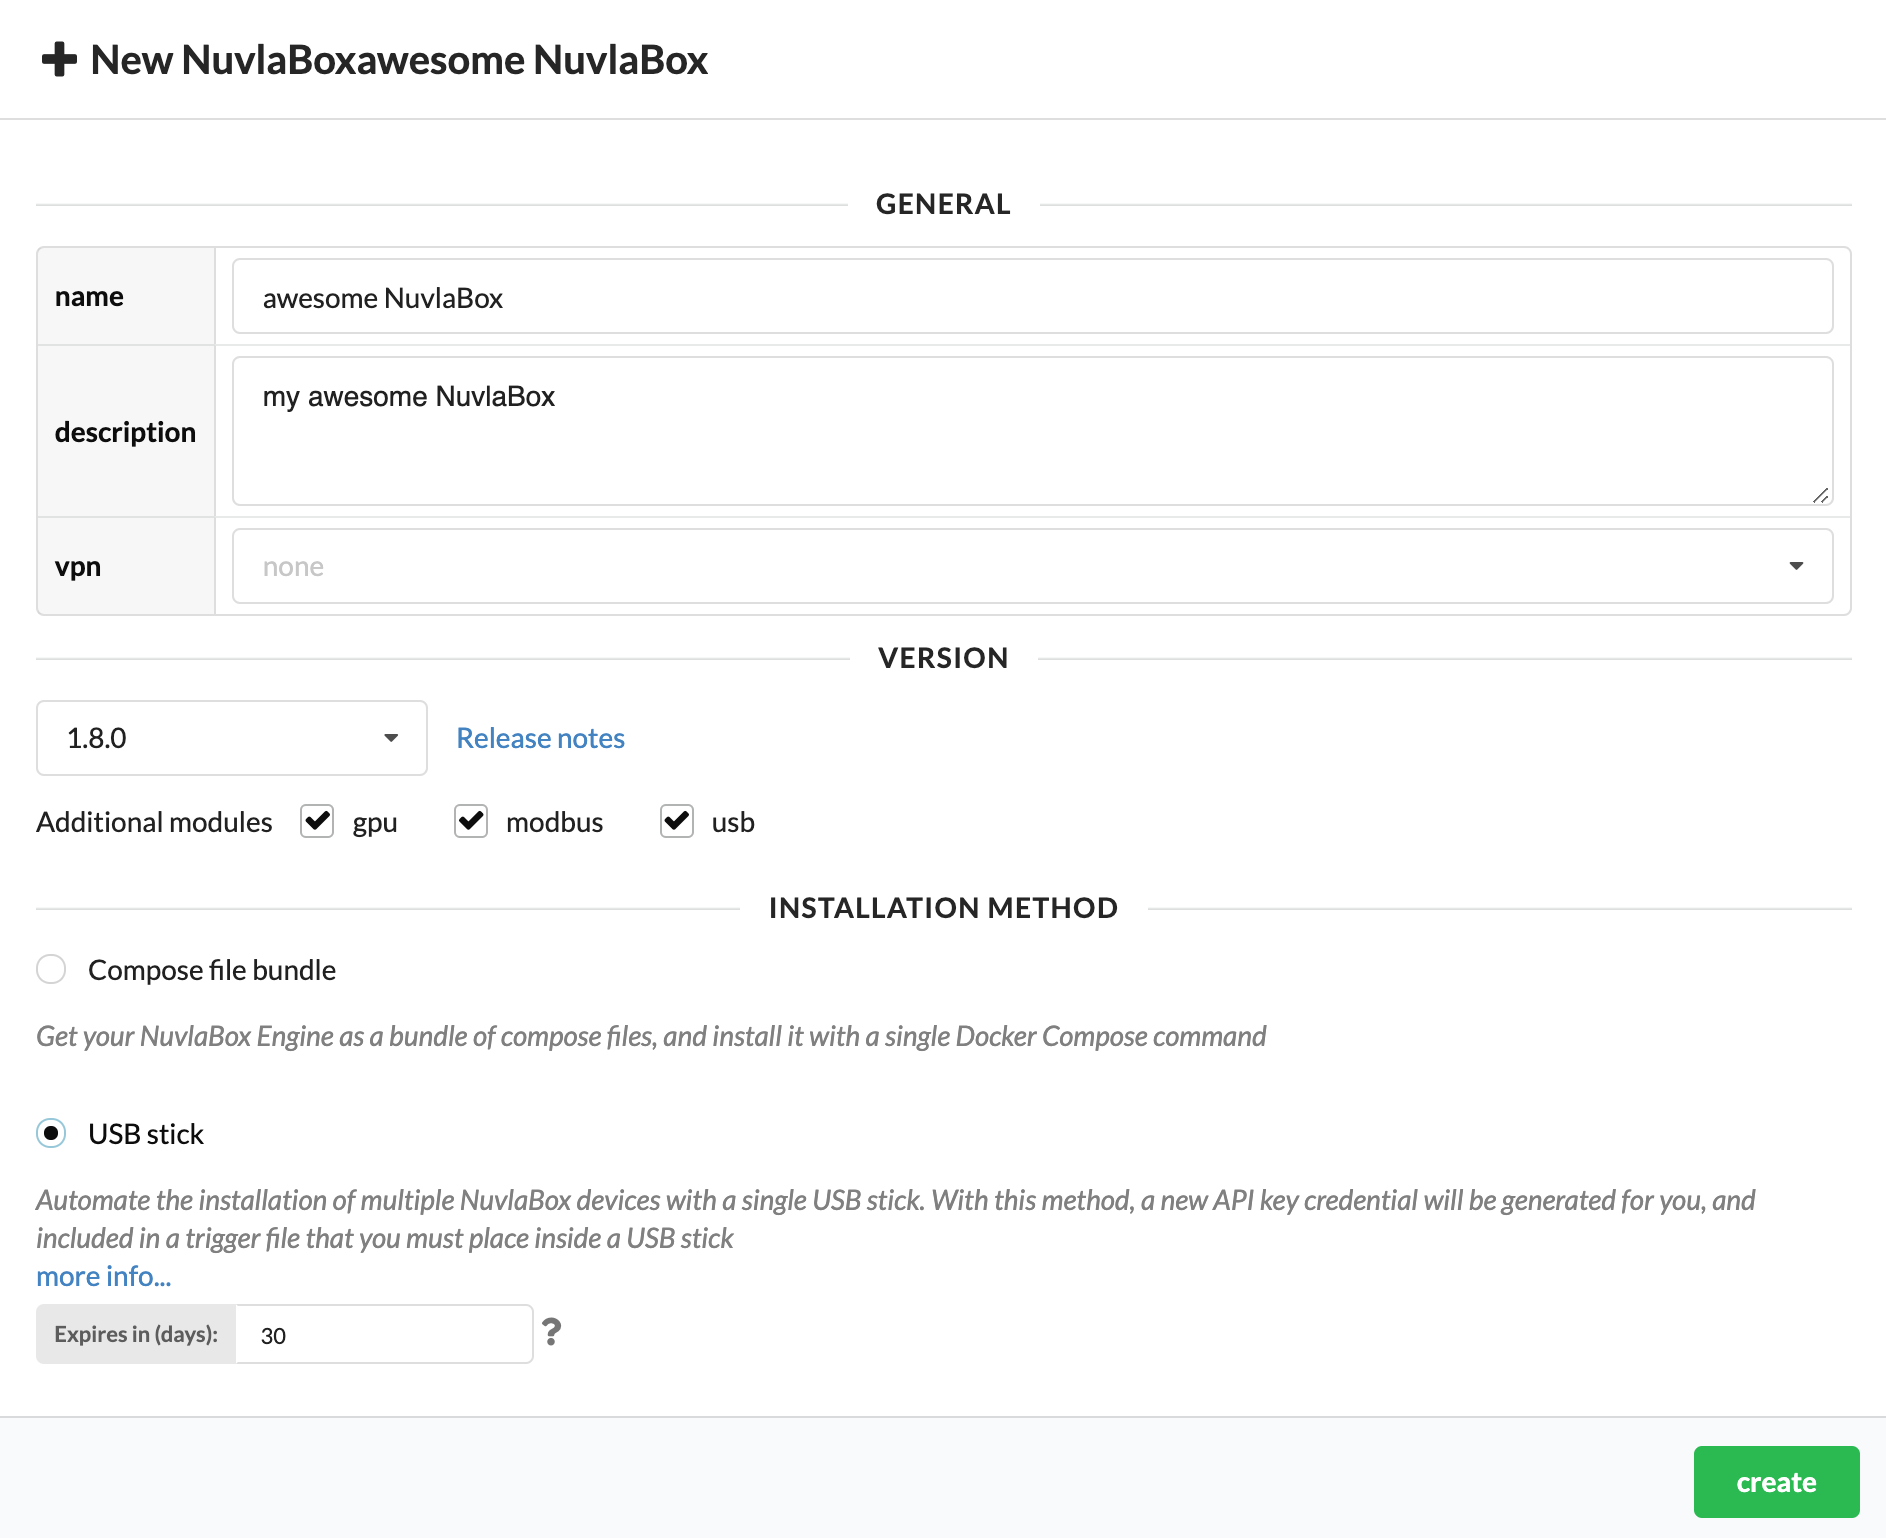
With this method, a new API key credential is generated for you, and embedded into your USB stick. You can choose for how long this credential should be valid for. By default, this value is set for 30 days. After that, the credential expires and the corresponding USB stick becomes invalid.
-
click
createand wait. A new API key credential will be created and you’ll be given a “trigger” file to download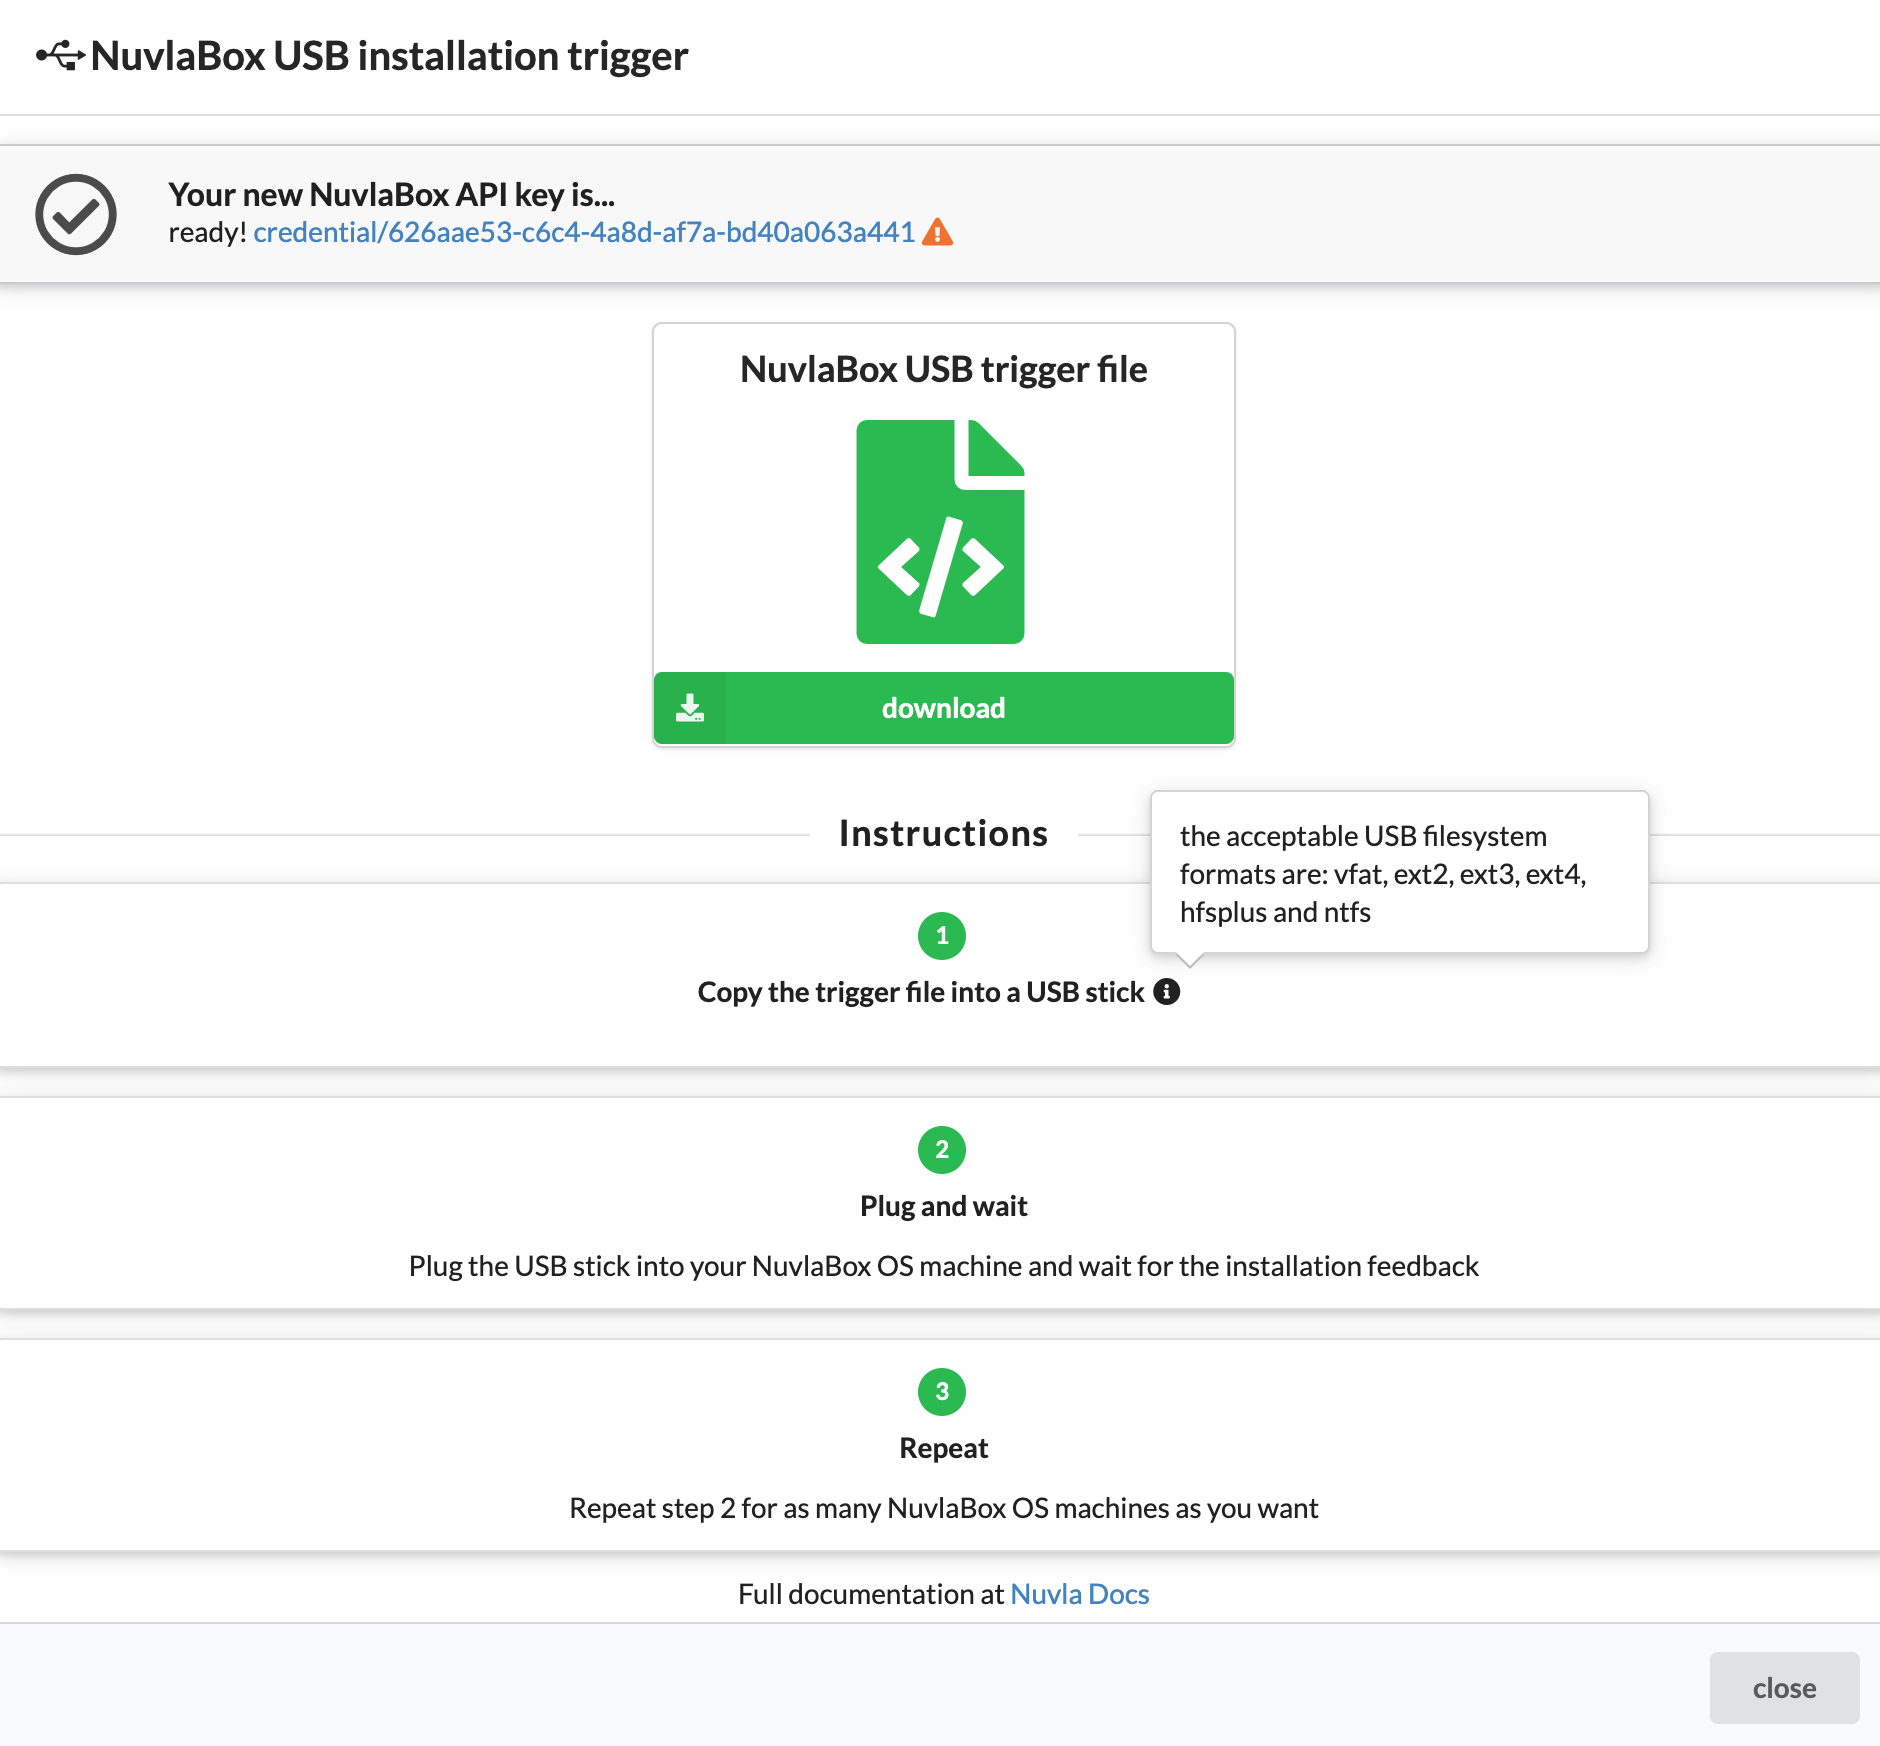
-
download the trigger file, and copy it into your USB stick. You can place it anywhere within.
IMPORTANT: make sure your USB stick’s filesystem is formatted as one of the following: vfat, ext2, ext3, ext4, hfsplus or ntfs.
-
plug your USB stick into your edge device.
-
the NuvlaEdge Auto-installer plugin that is installed in your device’s OS will automatically be triggered by the USB stick, and kickstart the installation of the NuvlaEdge software. At this stage, all you need to do is wait…
It shouldn’t take more than a few seconds for the process to start. Depending on your hardware, you might be able to get some external feedback on the progress of the installation. This feedback signal works for the following machine types:
raspberrypi:-
CONSTANT GREEN LED for 10 sec. This means the NuvlaEdge installation process has started and you can safely remove your USB stick
-
HEARTBEAT GREEN LED for 10 sec. This means the NuvlaEdge installation process has finished successfully
-
PULSING GREEN LED for 10 sec. This means the NuvlaEdge installation process has failed
-
- go back to the Edges page in Nuvla and your new NuvlaEdge resource will appear.
Upgrade NuvlaEdge
It is also possible to use the USB stick method to upgrade your NuvlaEdge installation.
The procedure is the same as described above. If in Nuvla, you select a different NuvlaEdge version than the one you have already installed in your devices, then, when you plug the USB stick into the device, the NuvlaEdge Auto-installer will upgrade all the outdated NuvlaEdge components, according to your desired version.
NOTE: You can also upgrade NuvlaEdges directly from Nuvla.
Overwrite an existing installation
It is also possible to use the USB stick method to completely delete and re-install your NuvlaEdge installation. However, in order to avoid damaging an existing installation, this process can only happen if the following conditions are met:
- your previous NuvlaEdge installation is misconfigured, or
- your NuvlaEdge resource is DECOMMISSIONED or in ERROR in Nuvla, or
- your NuvlaEdge resource does not exist anymore in Nuvla,
then the NuvlaEdge Auto-installer will completely remove the existing NuvlaEdge installation from your device, and install a fresh new one.
Detailed configuration
See the NuvlaEdge configuration page for more details.