Adding Apps
Before we start, there are a couple of terms that you need to get familiar with:
- project, means a folder that contains apps and sub-projects. You can nest projects as you want
- Docker app, meant to be used for Docker Compose and Docker Swarm applications, and expecting a Compose file as the deployment recipe, and
- Kubernetes app, meant to be used for Kubernetes applications, and expecting a Manifest as the deployment recipe.
- App bouquet, is a bundle of ‘simple’ apps, such that they can be deployed and managed together.
On this documentation page, you will learn to:
- Add a new project
- Add a new simple app (Docker or Kubernetes)
- Add a new app bouquet (several apps bundled together to facilitate deployment)
- Share your projects and apps
- Prepare your app for publishing (optional)
Apps are contained in projects. So you need a root (aka first level) project to contain sub-projects and apps. If you already have a root project you can skip the Projects section and go straight to the Applications section.
Projects
It all starts on the Apps page. Let’s create a new root project.
-
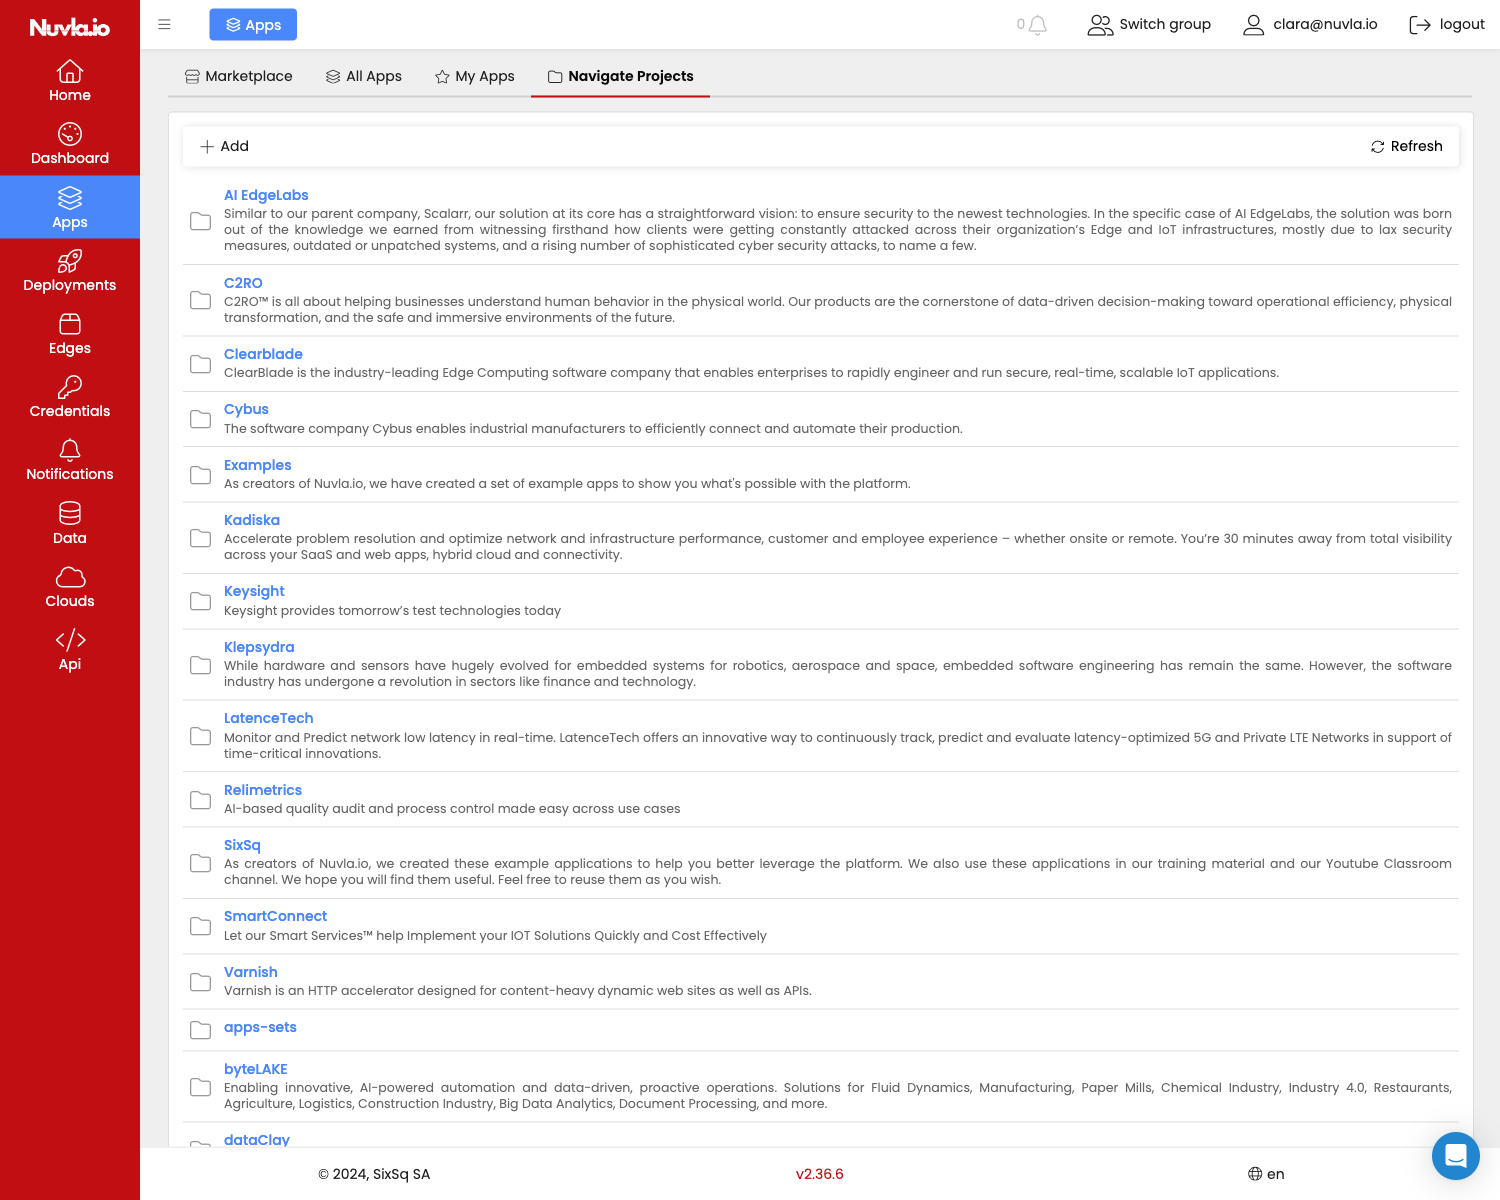
First navigate to the “Navigate Apps” tab.
-
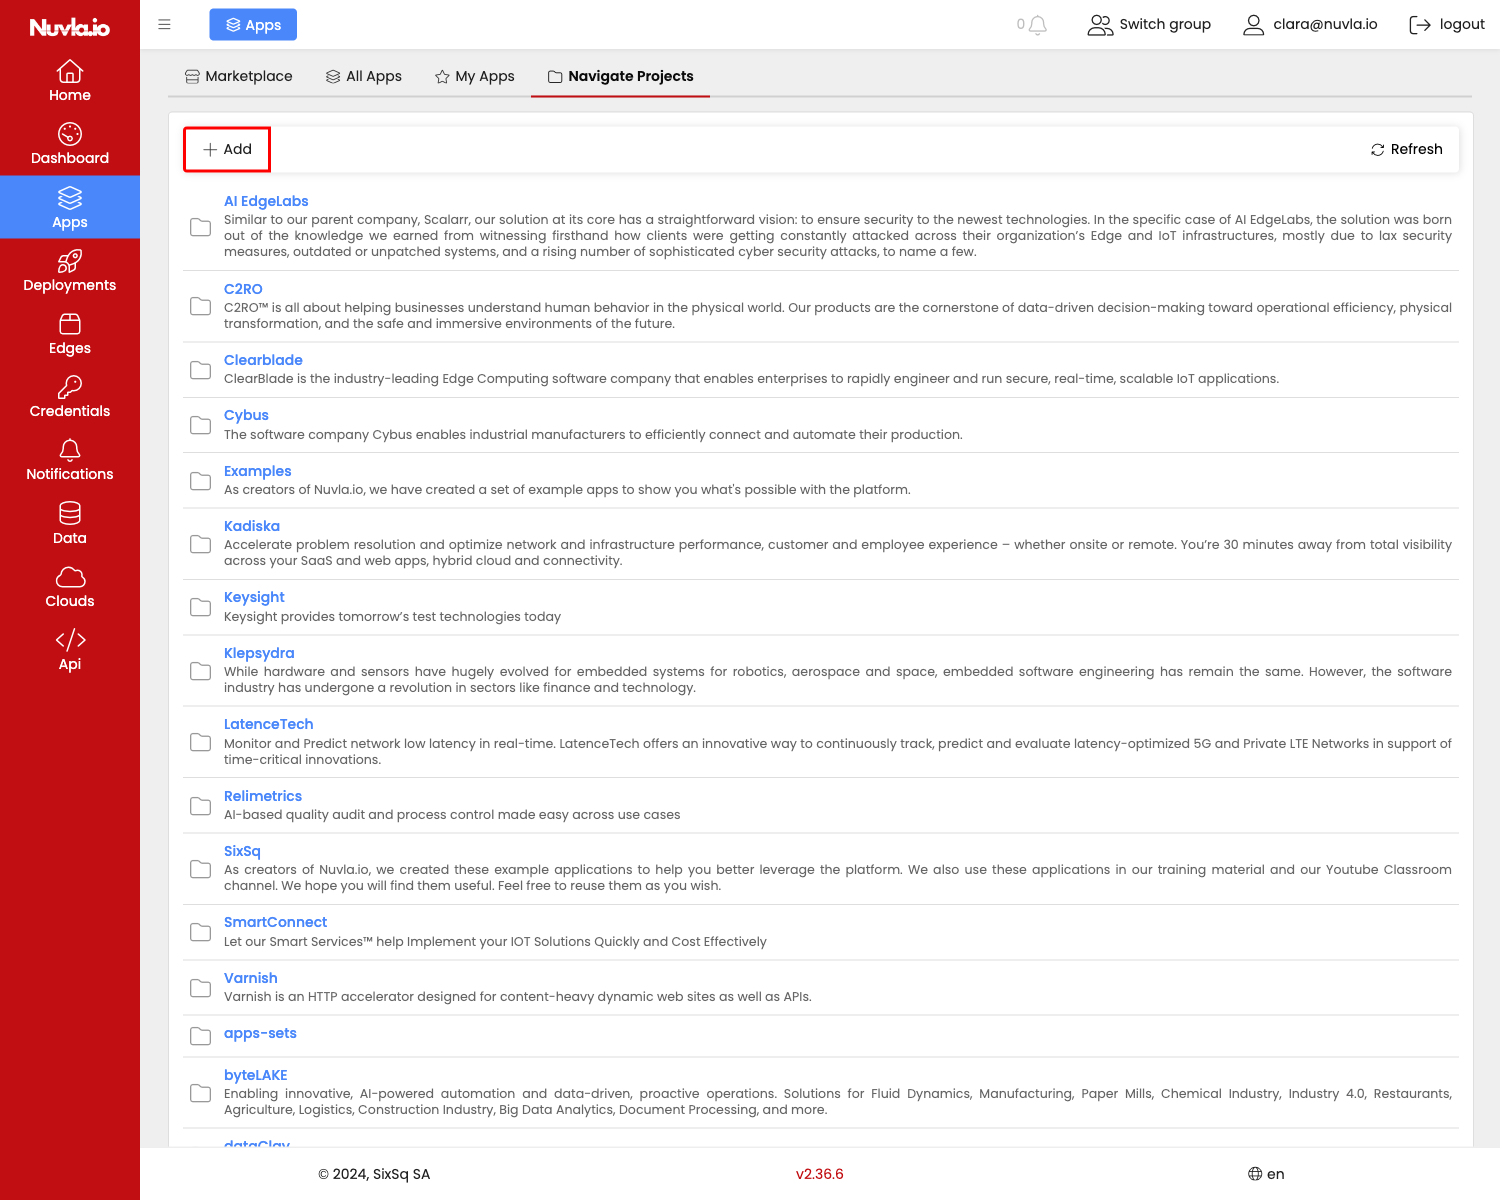
click “+add”
-
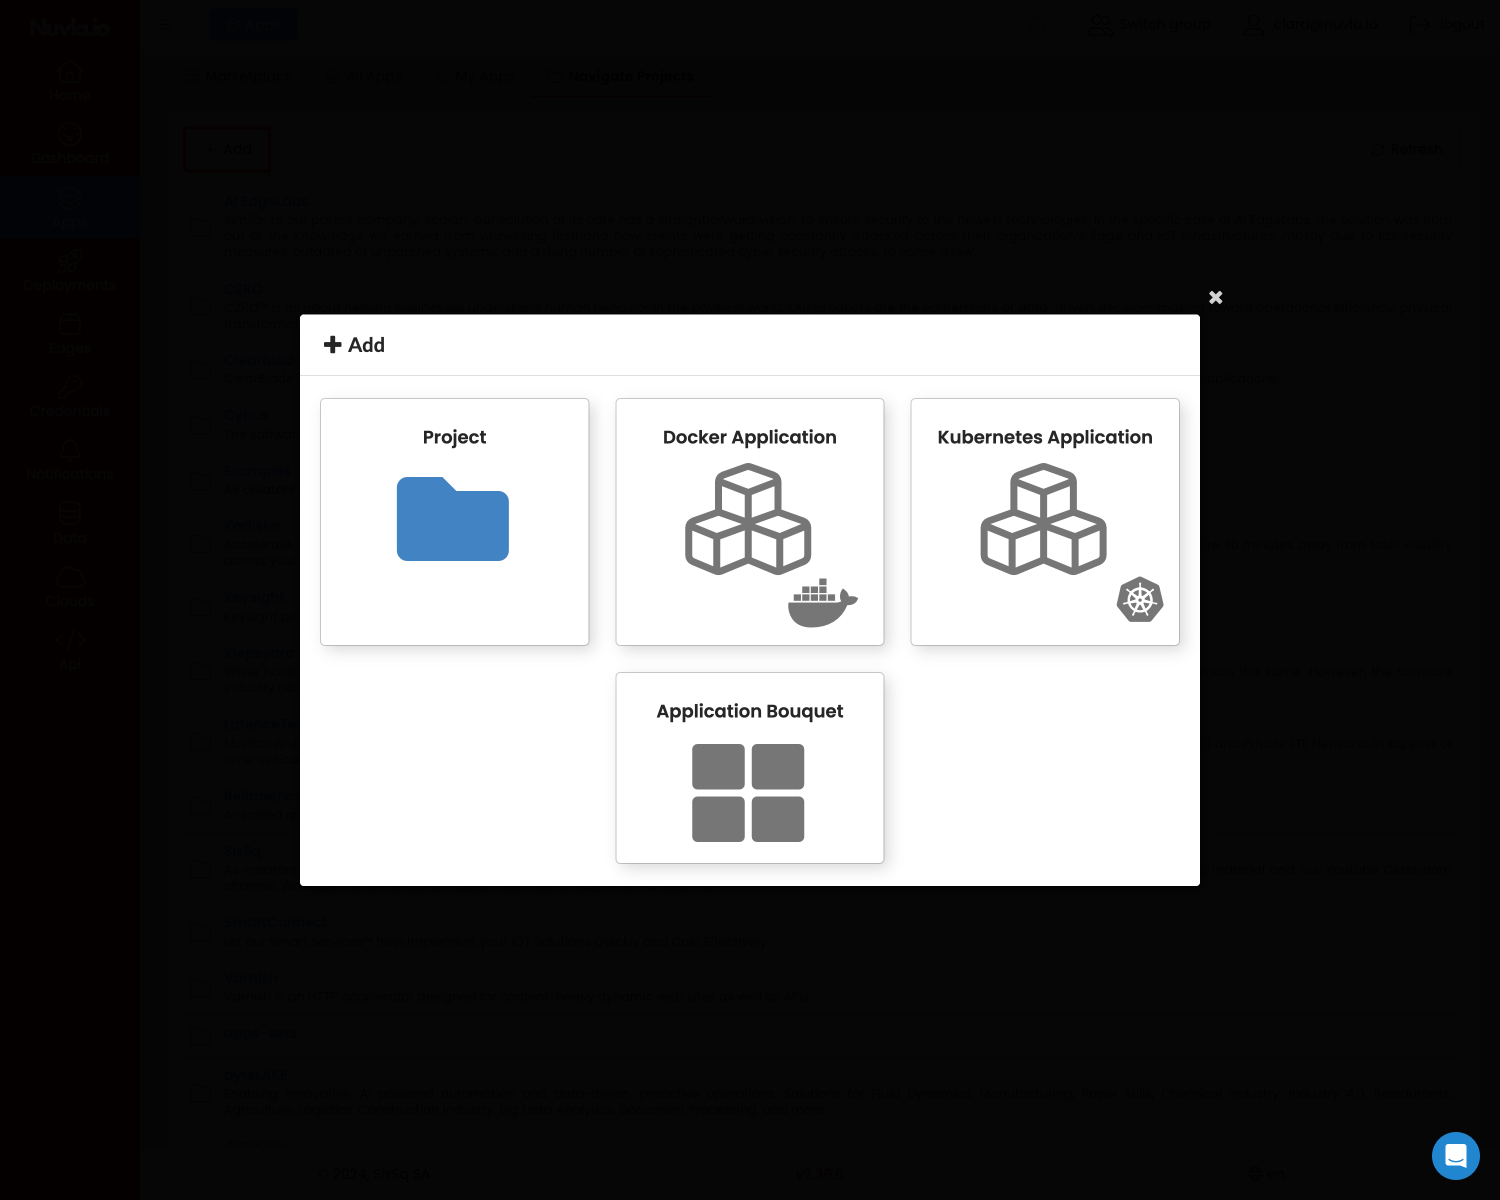
click on “Project” to create a new project. Note that the buttons for creating applications are greyed out, since a root project must be created to contain applications and sub-projects.
-
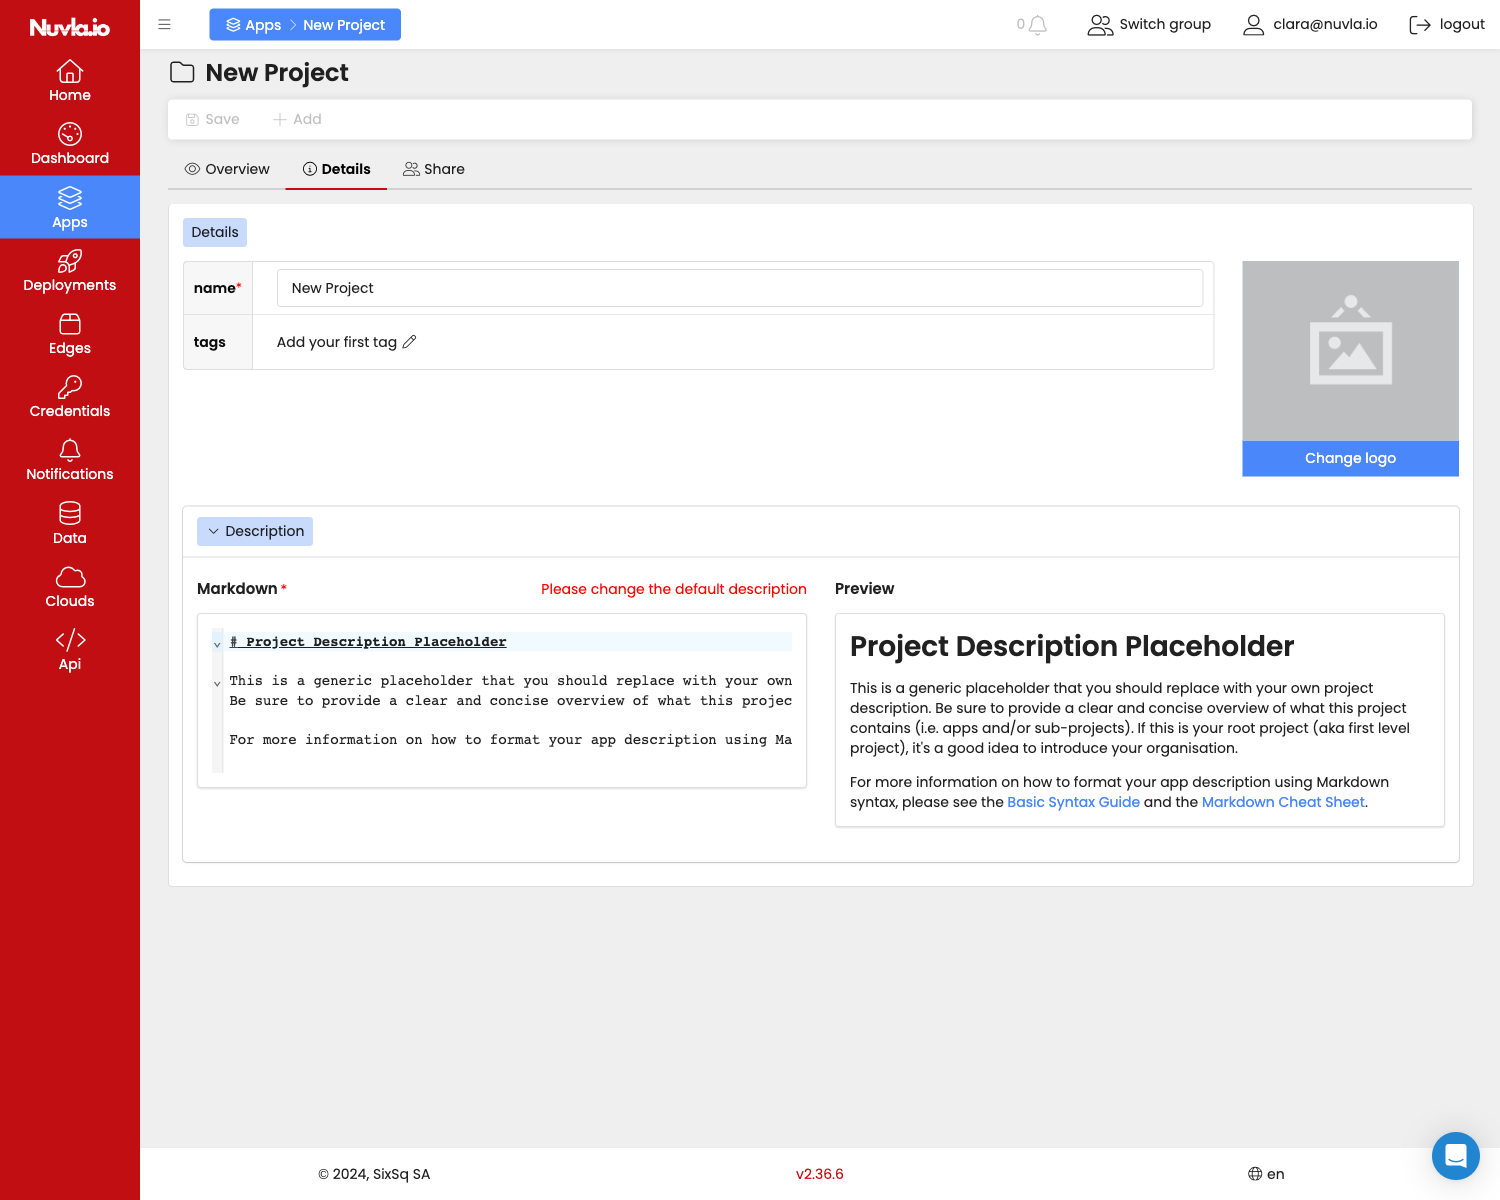
In the new project page, fill Name and Description. The description can be defined using markdown, which provides you with a great way to document your projects and apps using text, images, etc.
A logo should also be added. We recommend an image of size 284px x 200px for best result. This image must be available over the internet.
Then save (top left).
NOTE: You can also create new projects inside an existing project. Simply navigate to the project on the ‘Navigate Apps’ tab, and repeat the above procedure.
Simple Apps
Let’s register a new containerised app.
-
To register a new app, first navigate to the “Navigate Apps” tab of the “Apps” page.
-
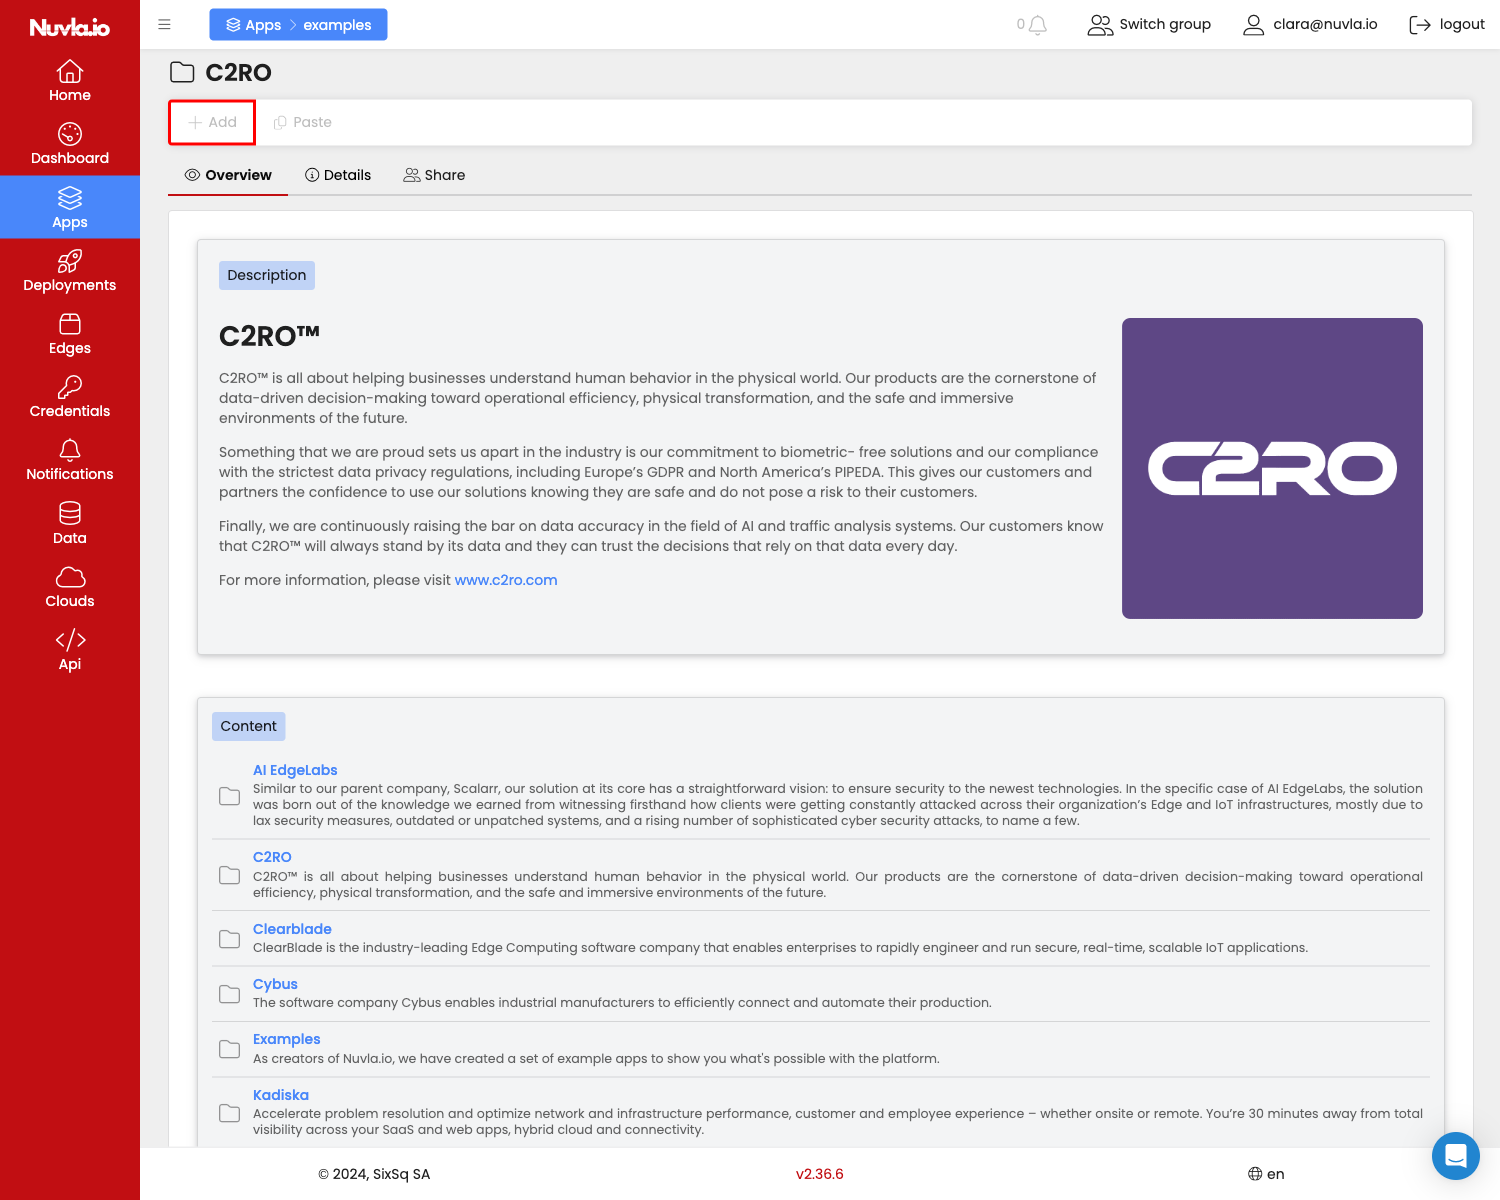
From there navigate down the projects to where you want to add the new app. If you have nested projects, click on a project to see its children. Then, click “+add”.

-
Here you have a choice to register a Docker or Kubernetes app. For now we will create a Docker app. A Kubernetes app is very similar. Then, click “+add”.
-
This will take you to the app editing page.
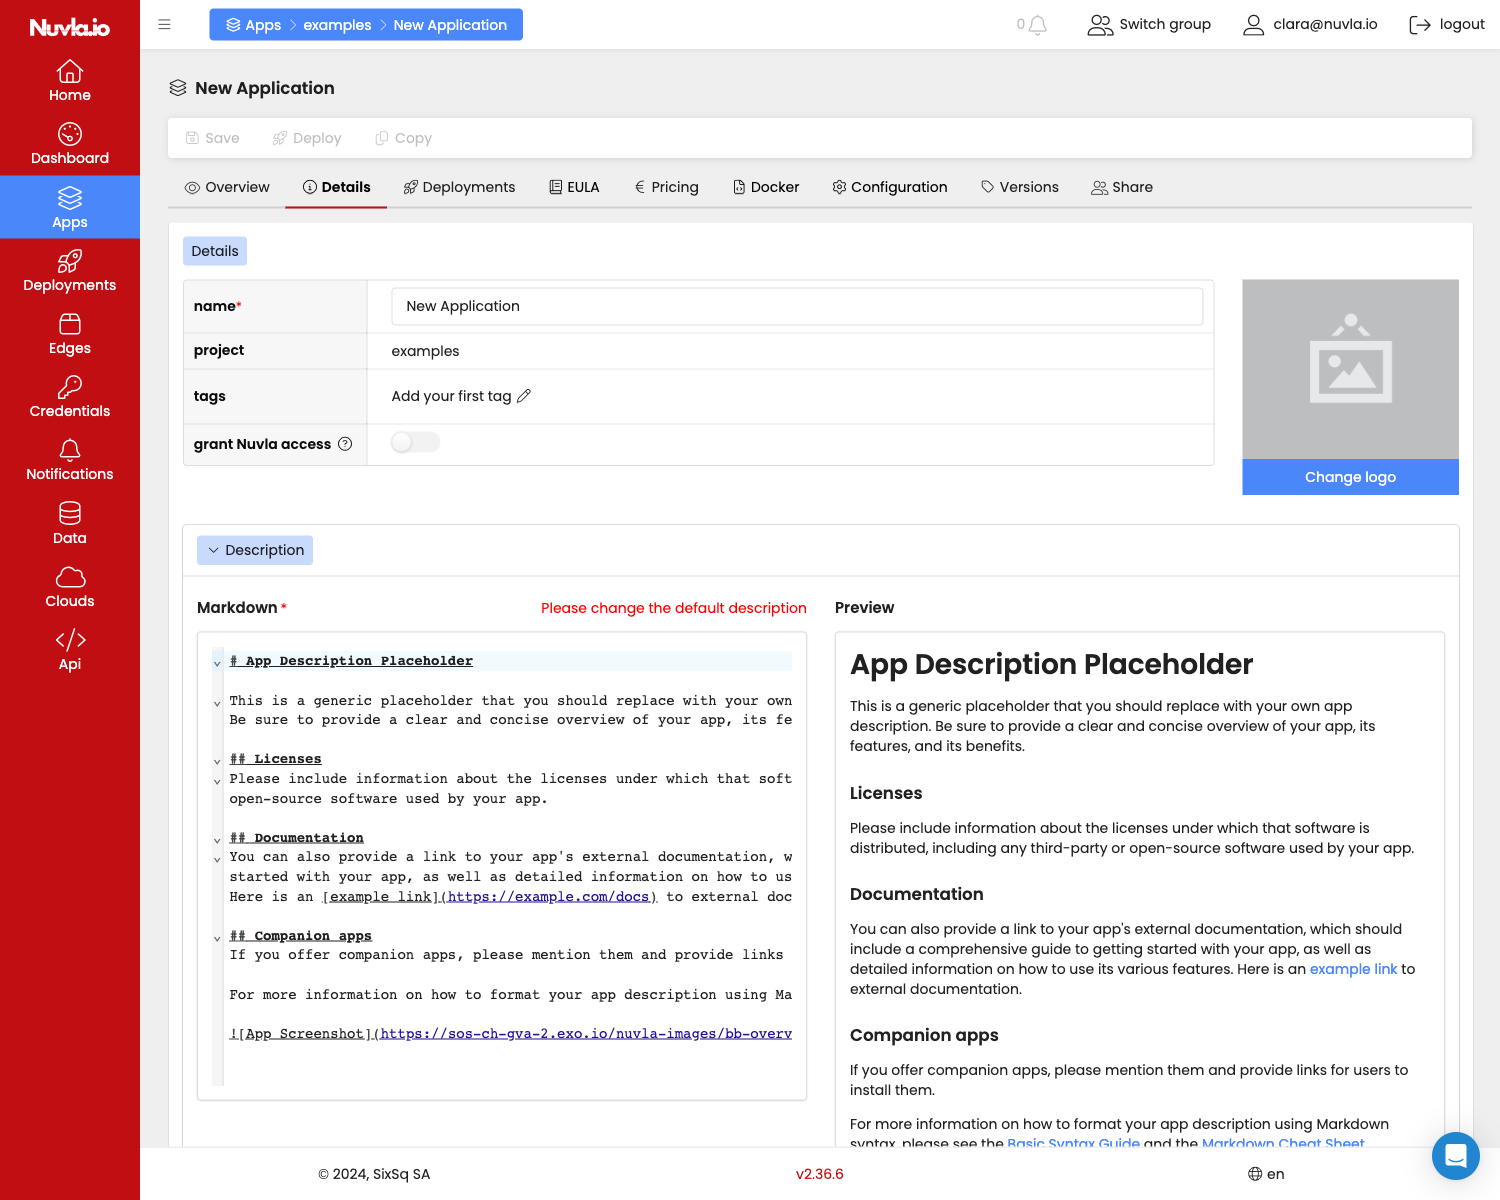
For most fields, you’ll find help text to help you configure you app properly.
Here’s a quick guide of most relevant fields:
- EULA: see the Publishing section for details
- Pricing: see the Publishing section for details
-
Docker
The Docker tab is where all the Docker related information is stored.
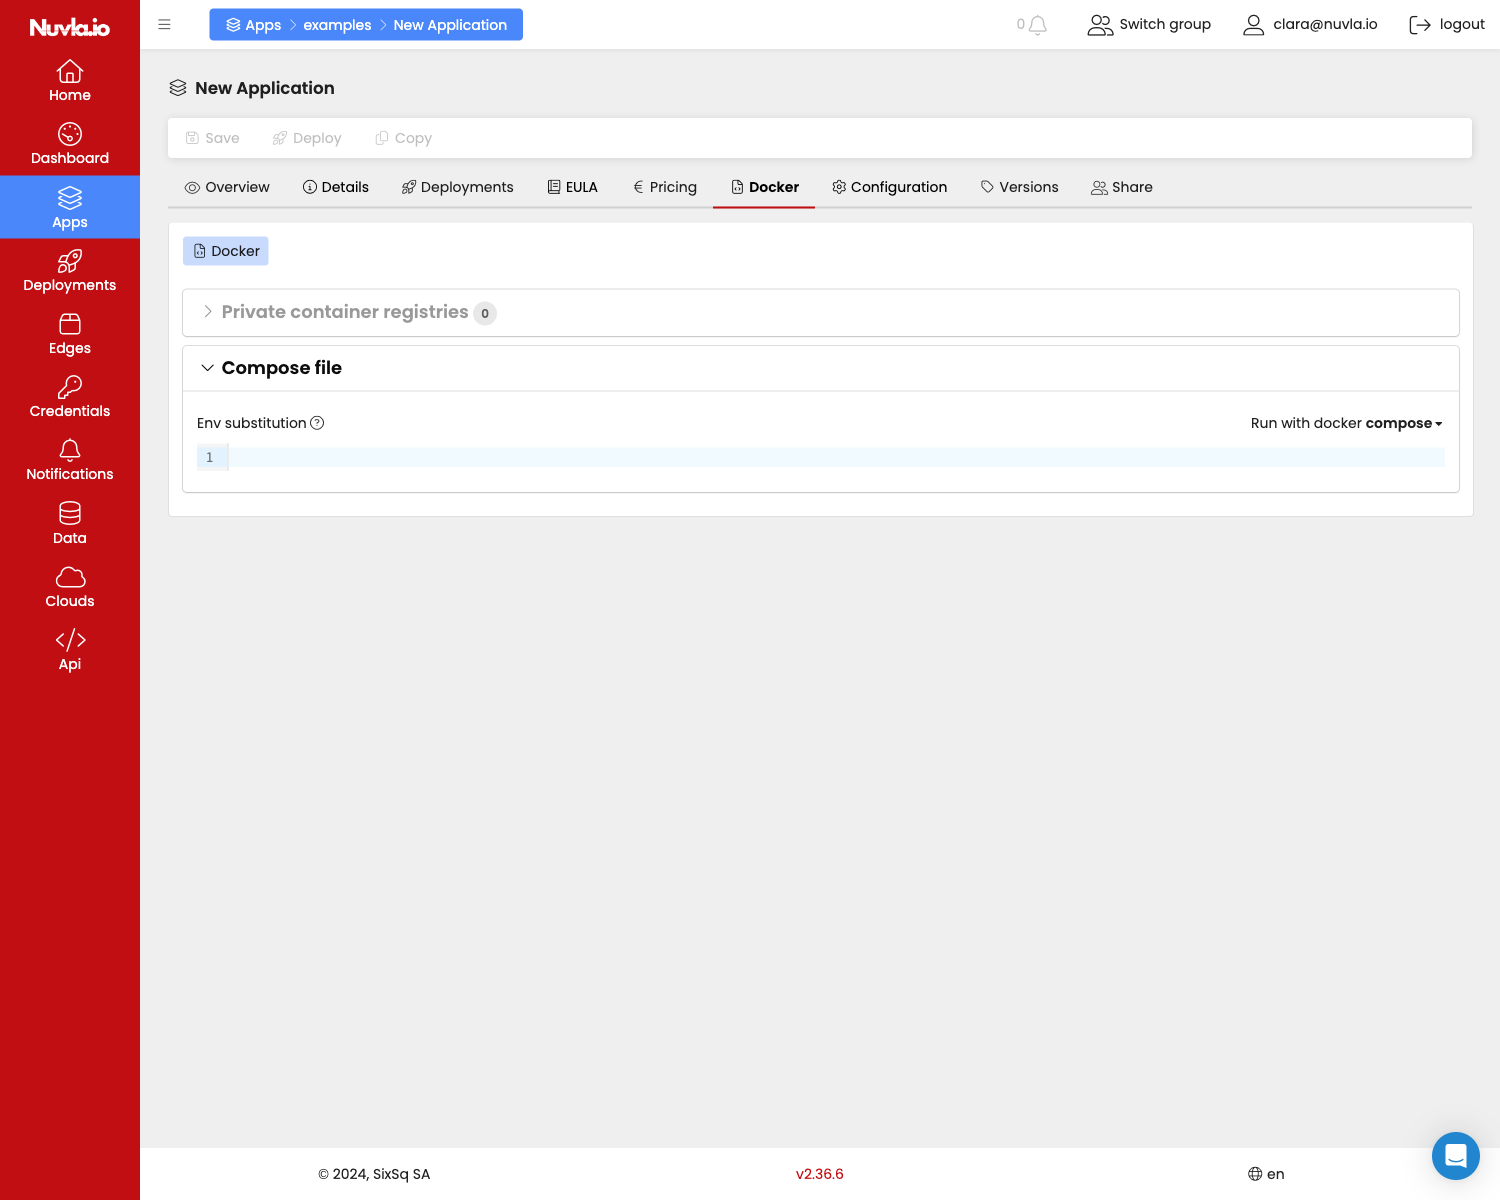
-
Private registry: if your Docker image(s) are stored in a private registry, you have to register the Docker registry (see Managing Docker Registries for details). As the owner of this registry, you must also select credentials that you want Nuvla to use when deploying the images on behalf of the user. See Managing Docker Registry Credentials for details.
To associate a Docker registry to your app, expand the Private registries section
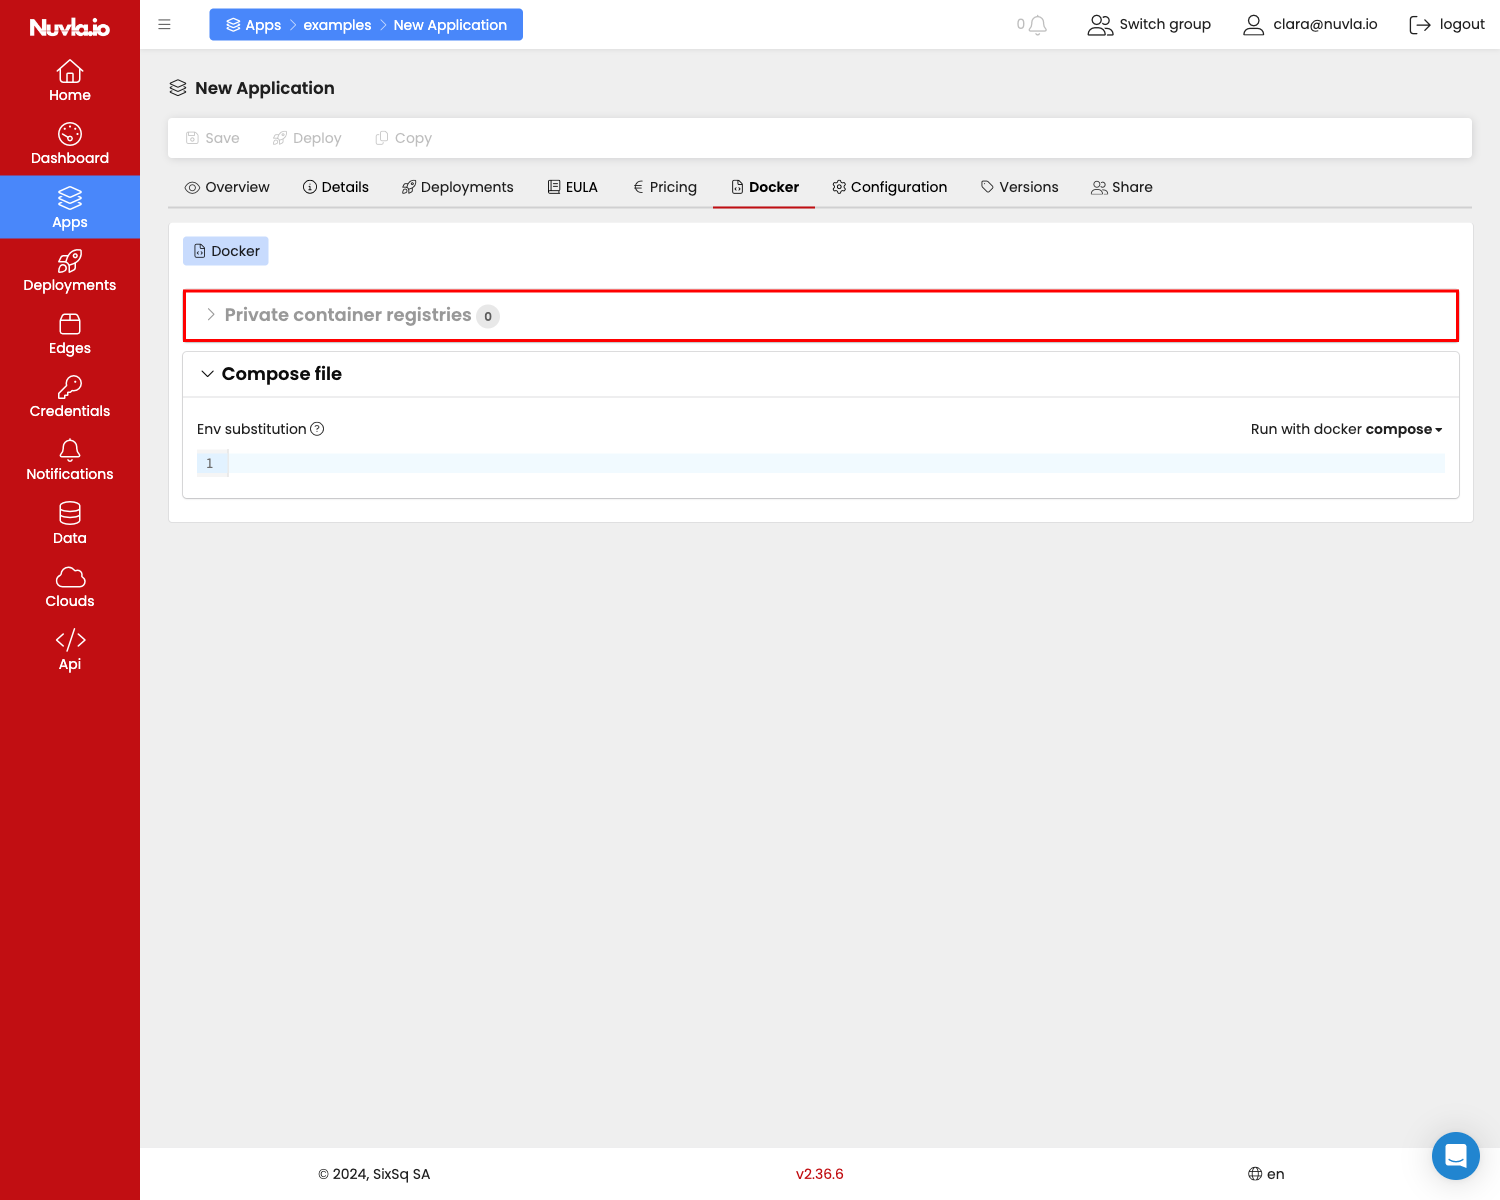
Then click on the “+”
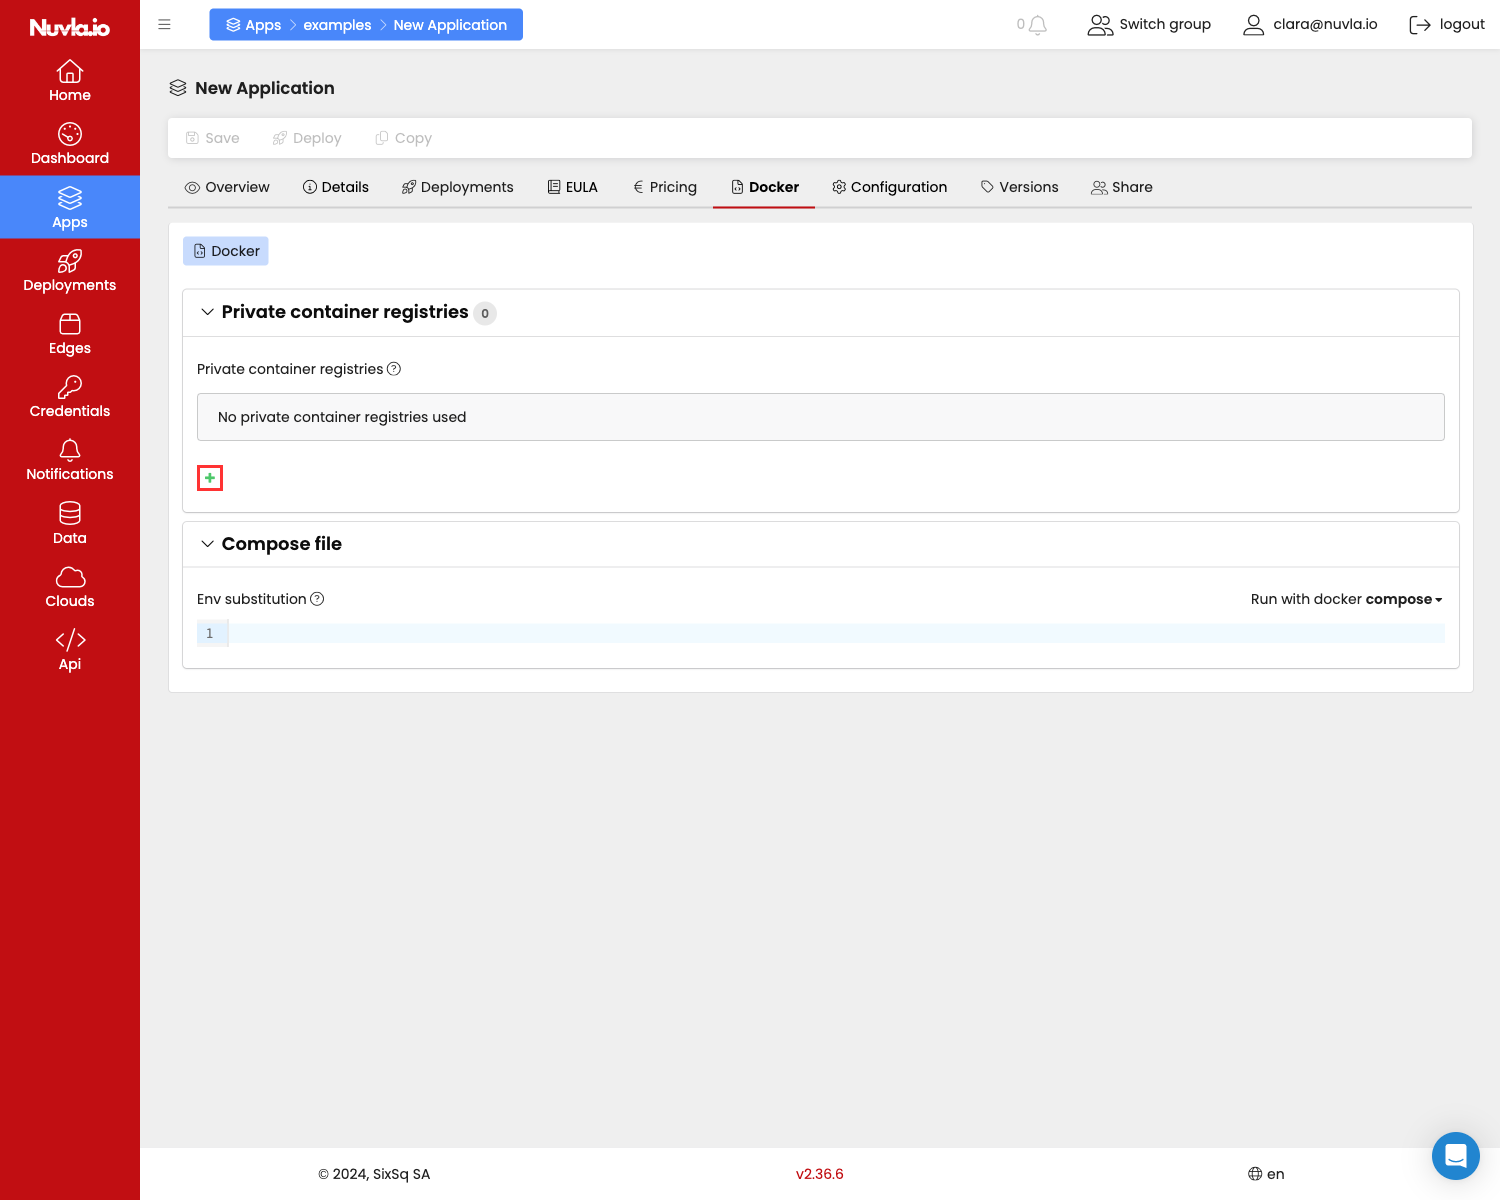
From here you can select the Docker registry and the corresponding Docker Registry Credential.
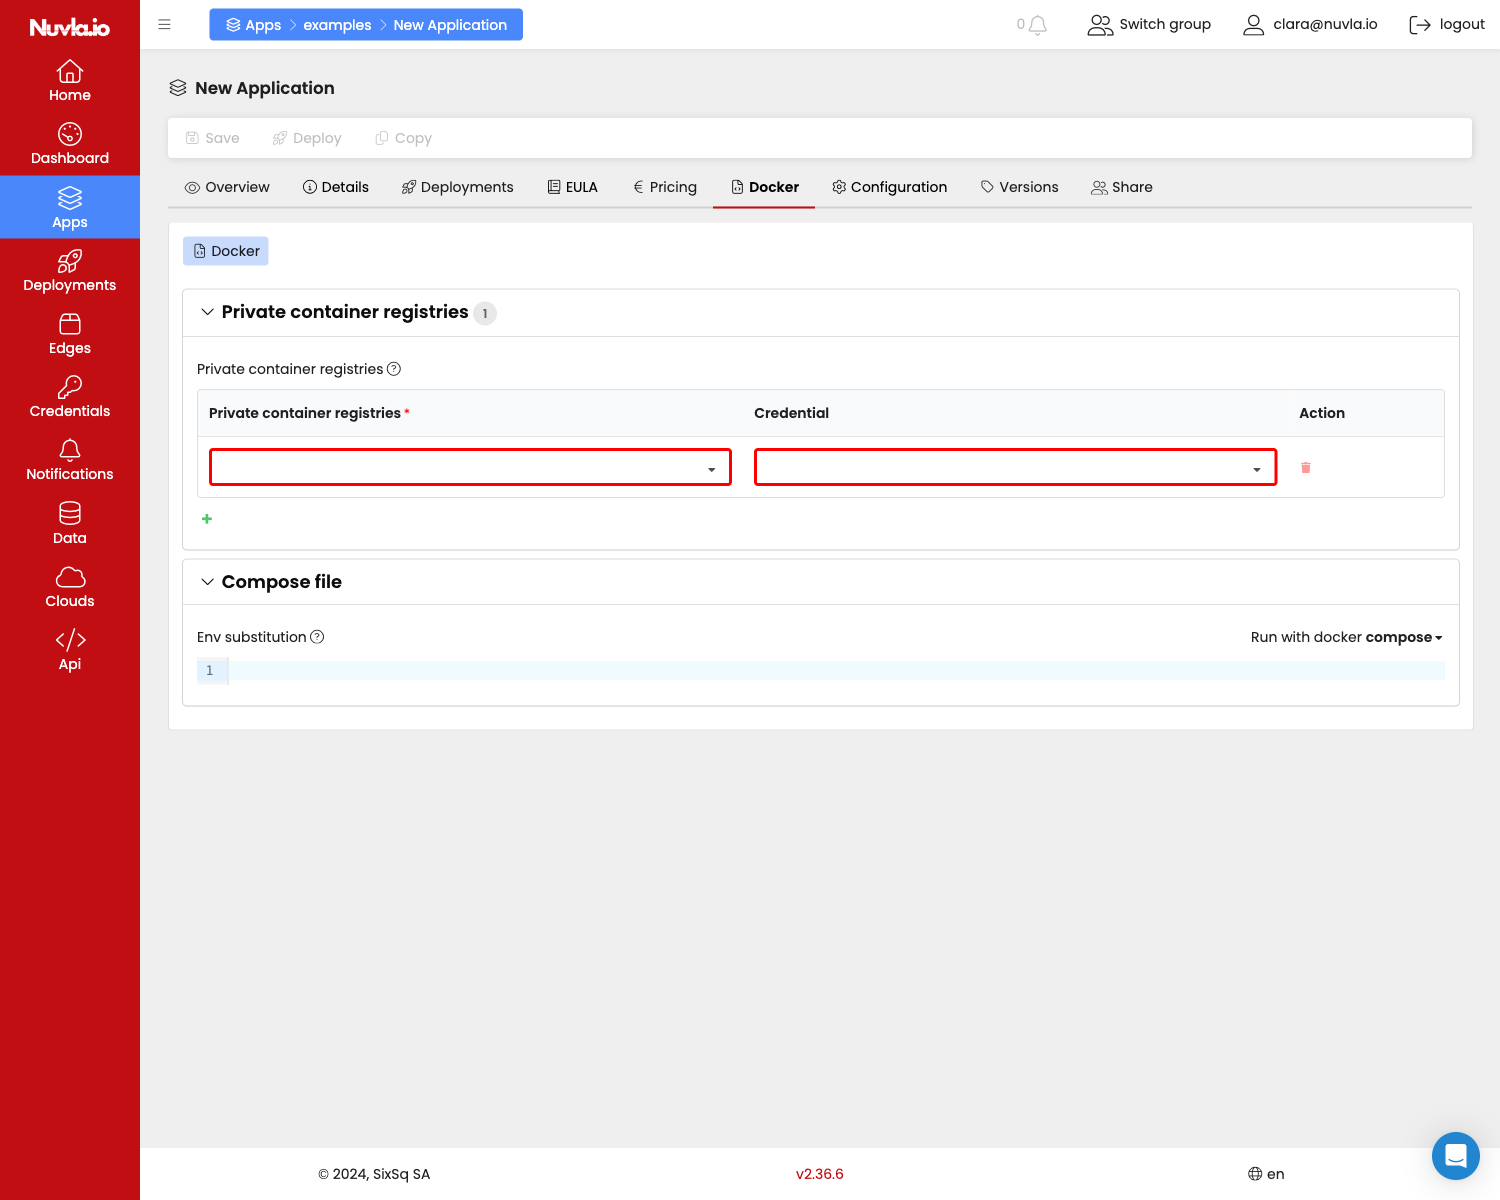
NOTE: When deploying your app, users will not have access to the Docker Registry Credential. And you can also rotate these credentials to ensure higher security, if a user was to hack the edge device on which they are deploying.
-
-
Configuration
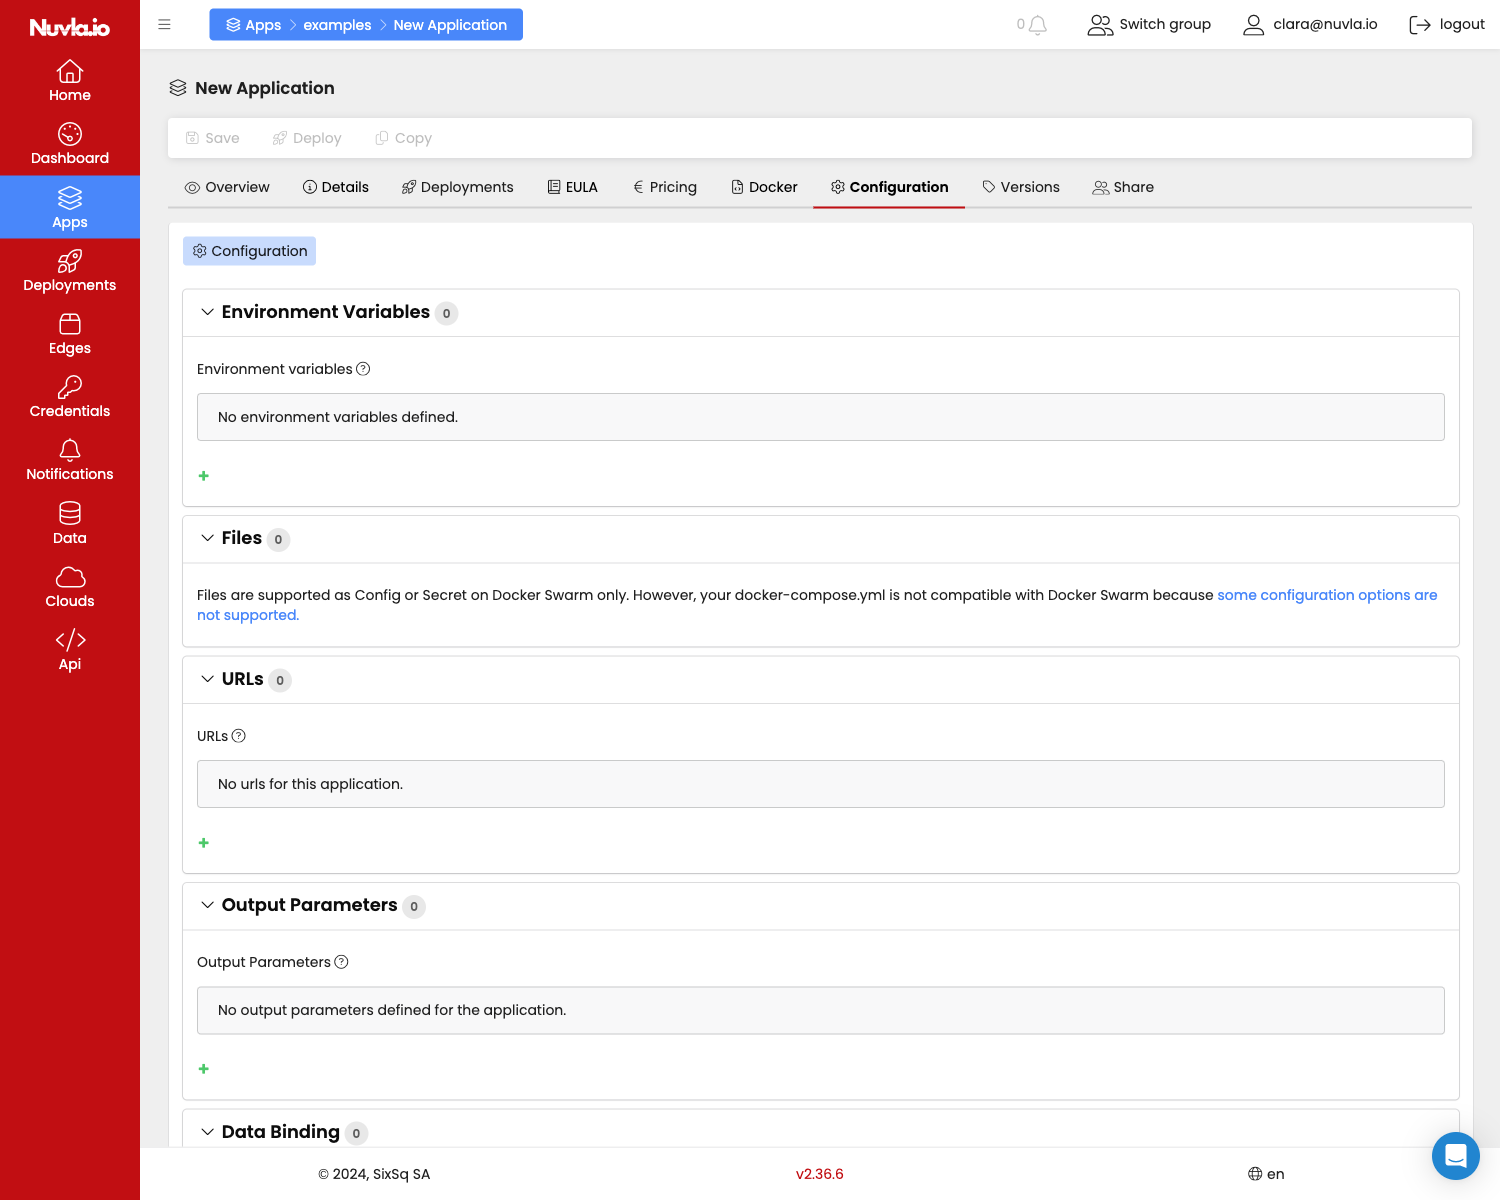
- URLs: URLs to help you access the Component after it has been launched, remotely. These URLs can contain variables that are dynamically substituted once your deployment has been started. Things like:
${hostname}for getting the endpoint where your Component has been started${portProtocol.containerPort}for getting the published destination port corresponding to your port mapping${envVar}for getting any environment you might have defined above${outputParameter}to map to any of the available output parameters that are dynamically filled it after launching your Component
- Output Parameters: allows you to add custom output parameters that your container can push back to Nuvla, and thus be used as any other deployment output parameter, like the ones used in your URL above
- Data Binding: to bind your Component to a Data set. See Managing Data for more info.
- Files: you can create secrets and configuration files to be used by the containers in your application. This is where you defined those. Make sure the file name matches the one referenced from within the Compose file/Manifest
- Environment Variables: same as for setting environment variables for a Docker container, here you can define environment variable to be passed to your container. In addition, you can also define a default value and tell whether the variable is mandatory for launching the Component. When launching the Component, you’ll also be able to edit this. However, these variables can also be used from within your Compose file/Manifest. Example: if you define a new env var called
myVar, you can use it in you Compose file like this:
environment: - ENV_FROM_NUVLA=$myVar - URLs: URLs to help you access the Component after it has been launched, remotely. These URLs can contain variables that are dynamically substituted once your deployment has been started. Things like:
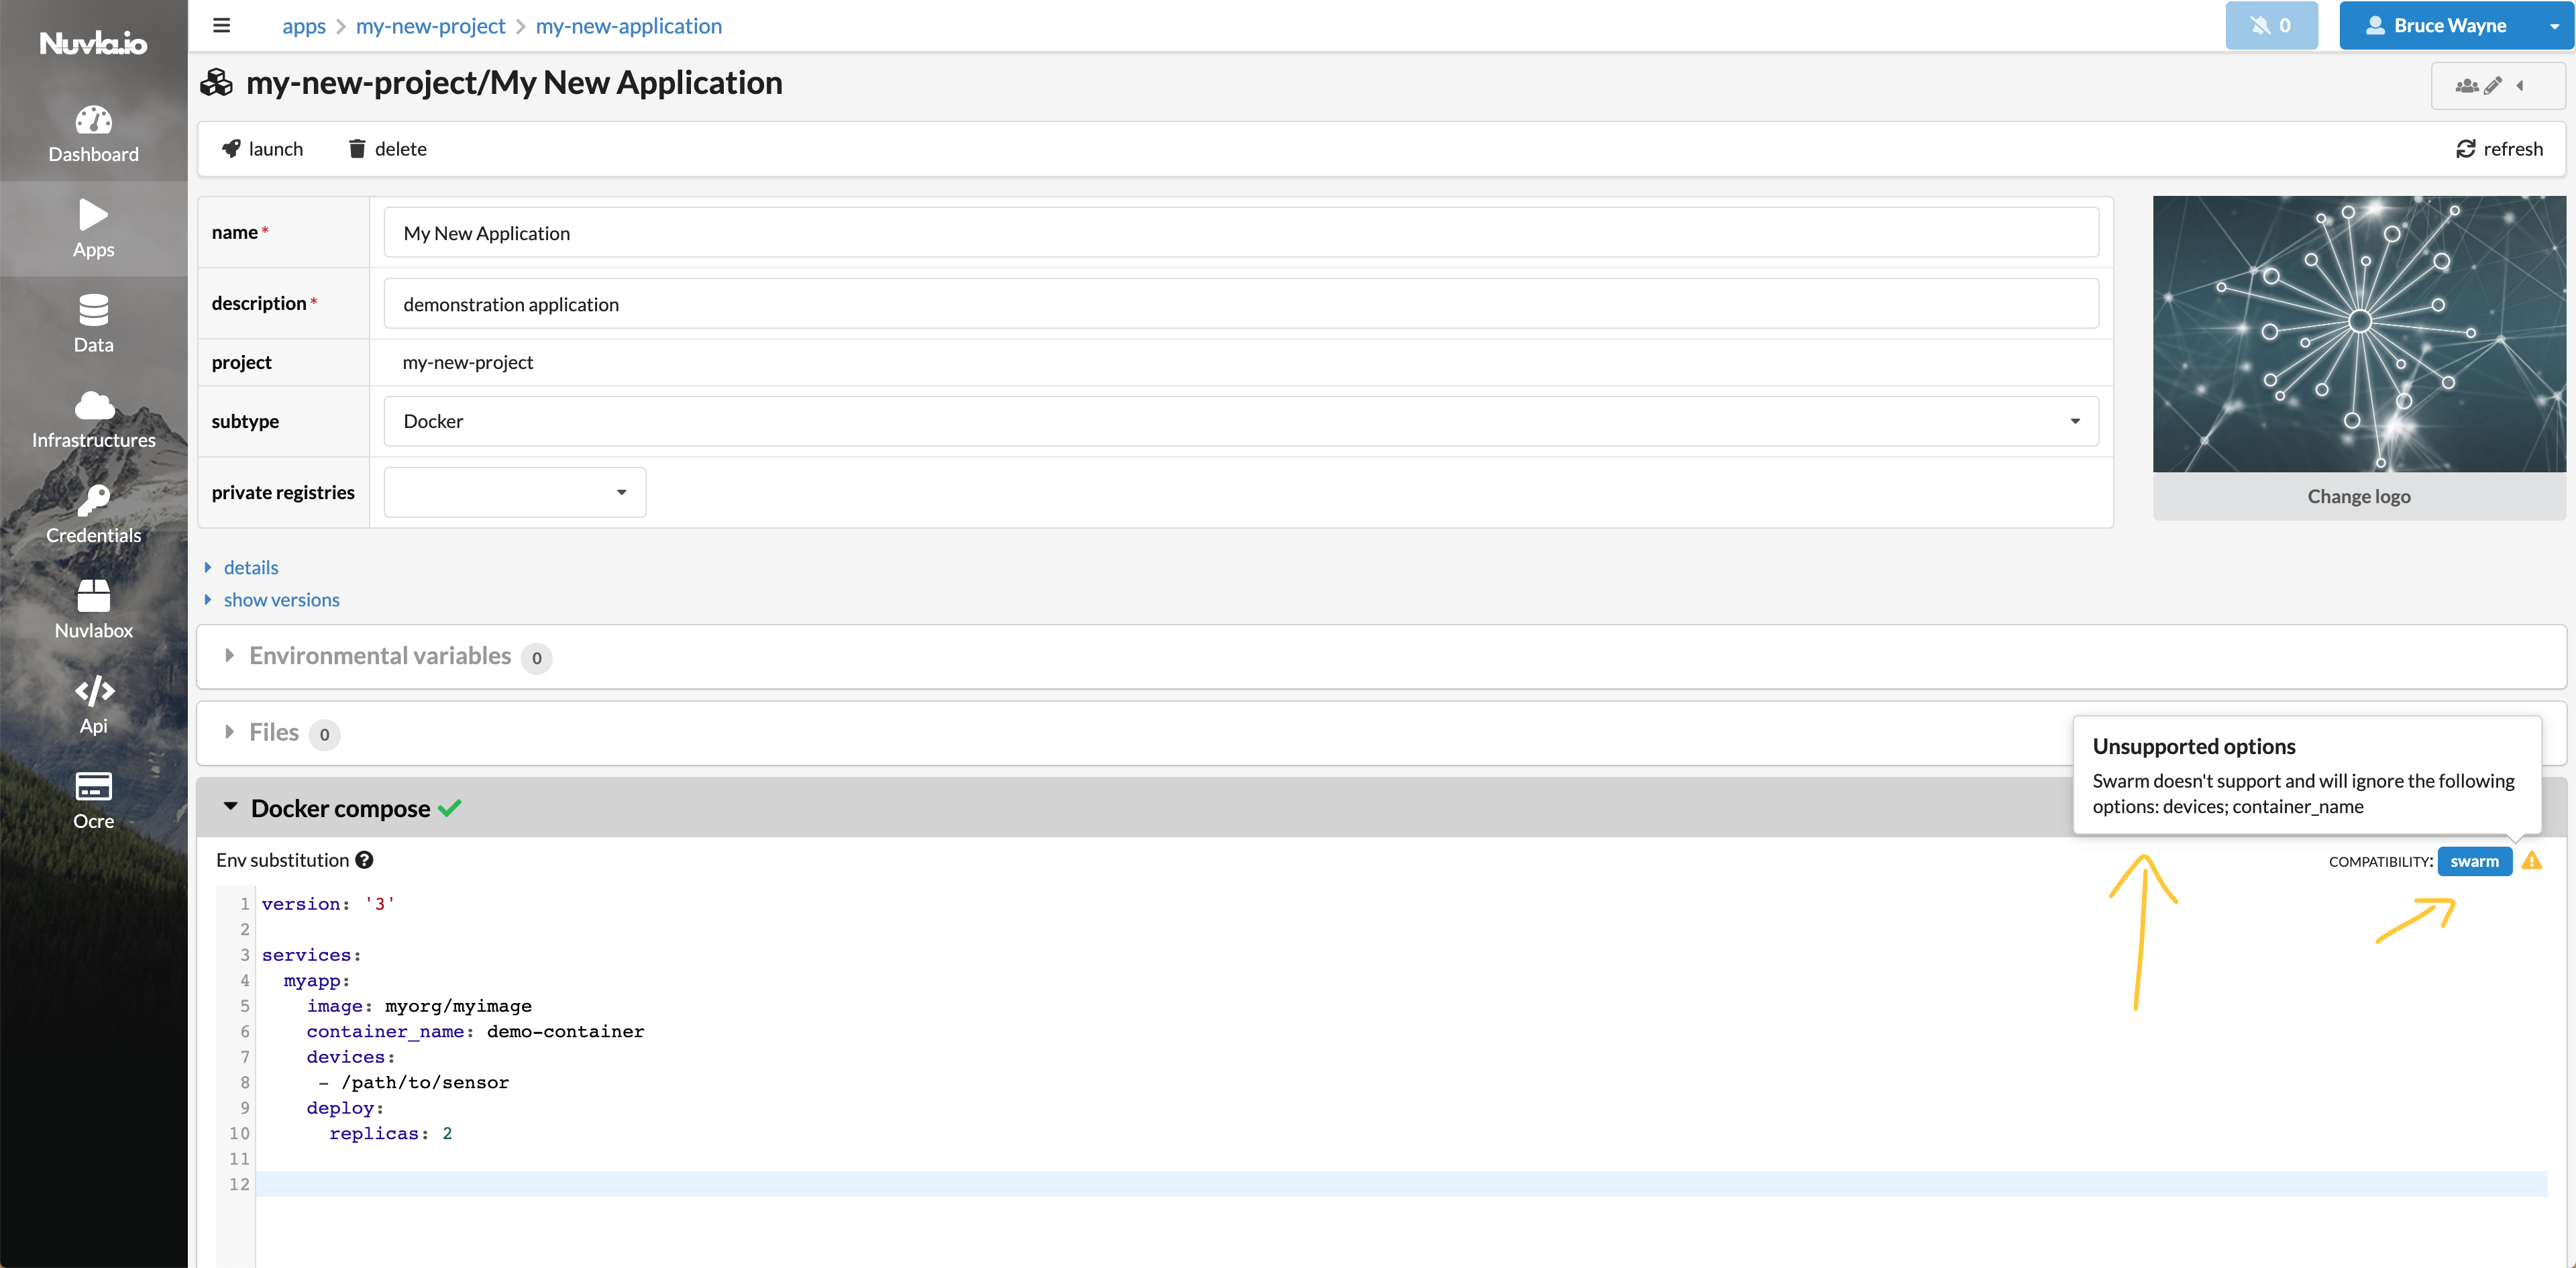
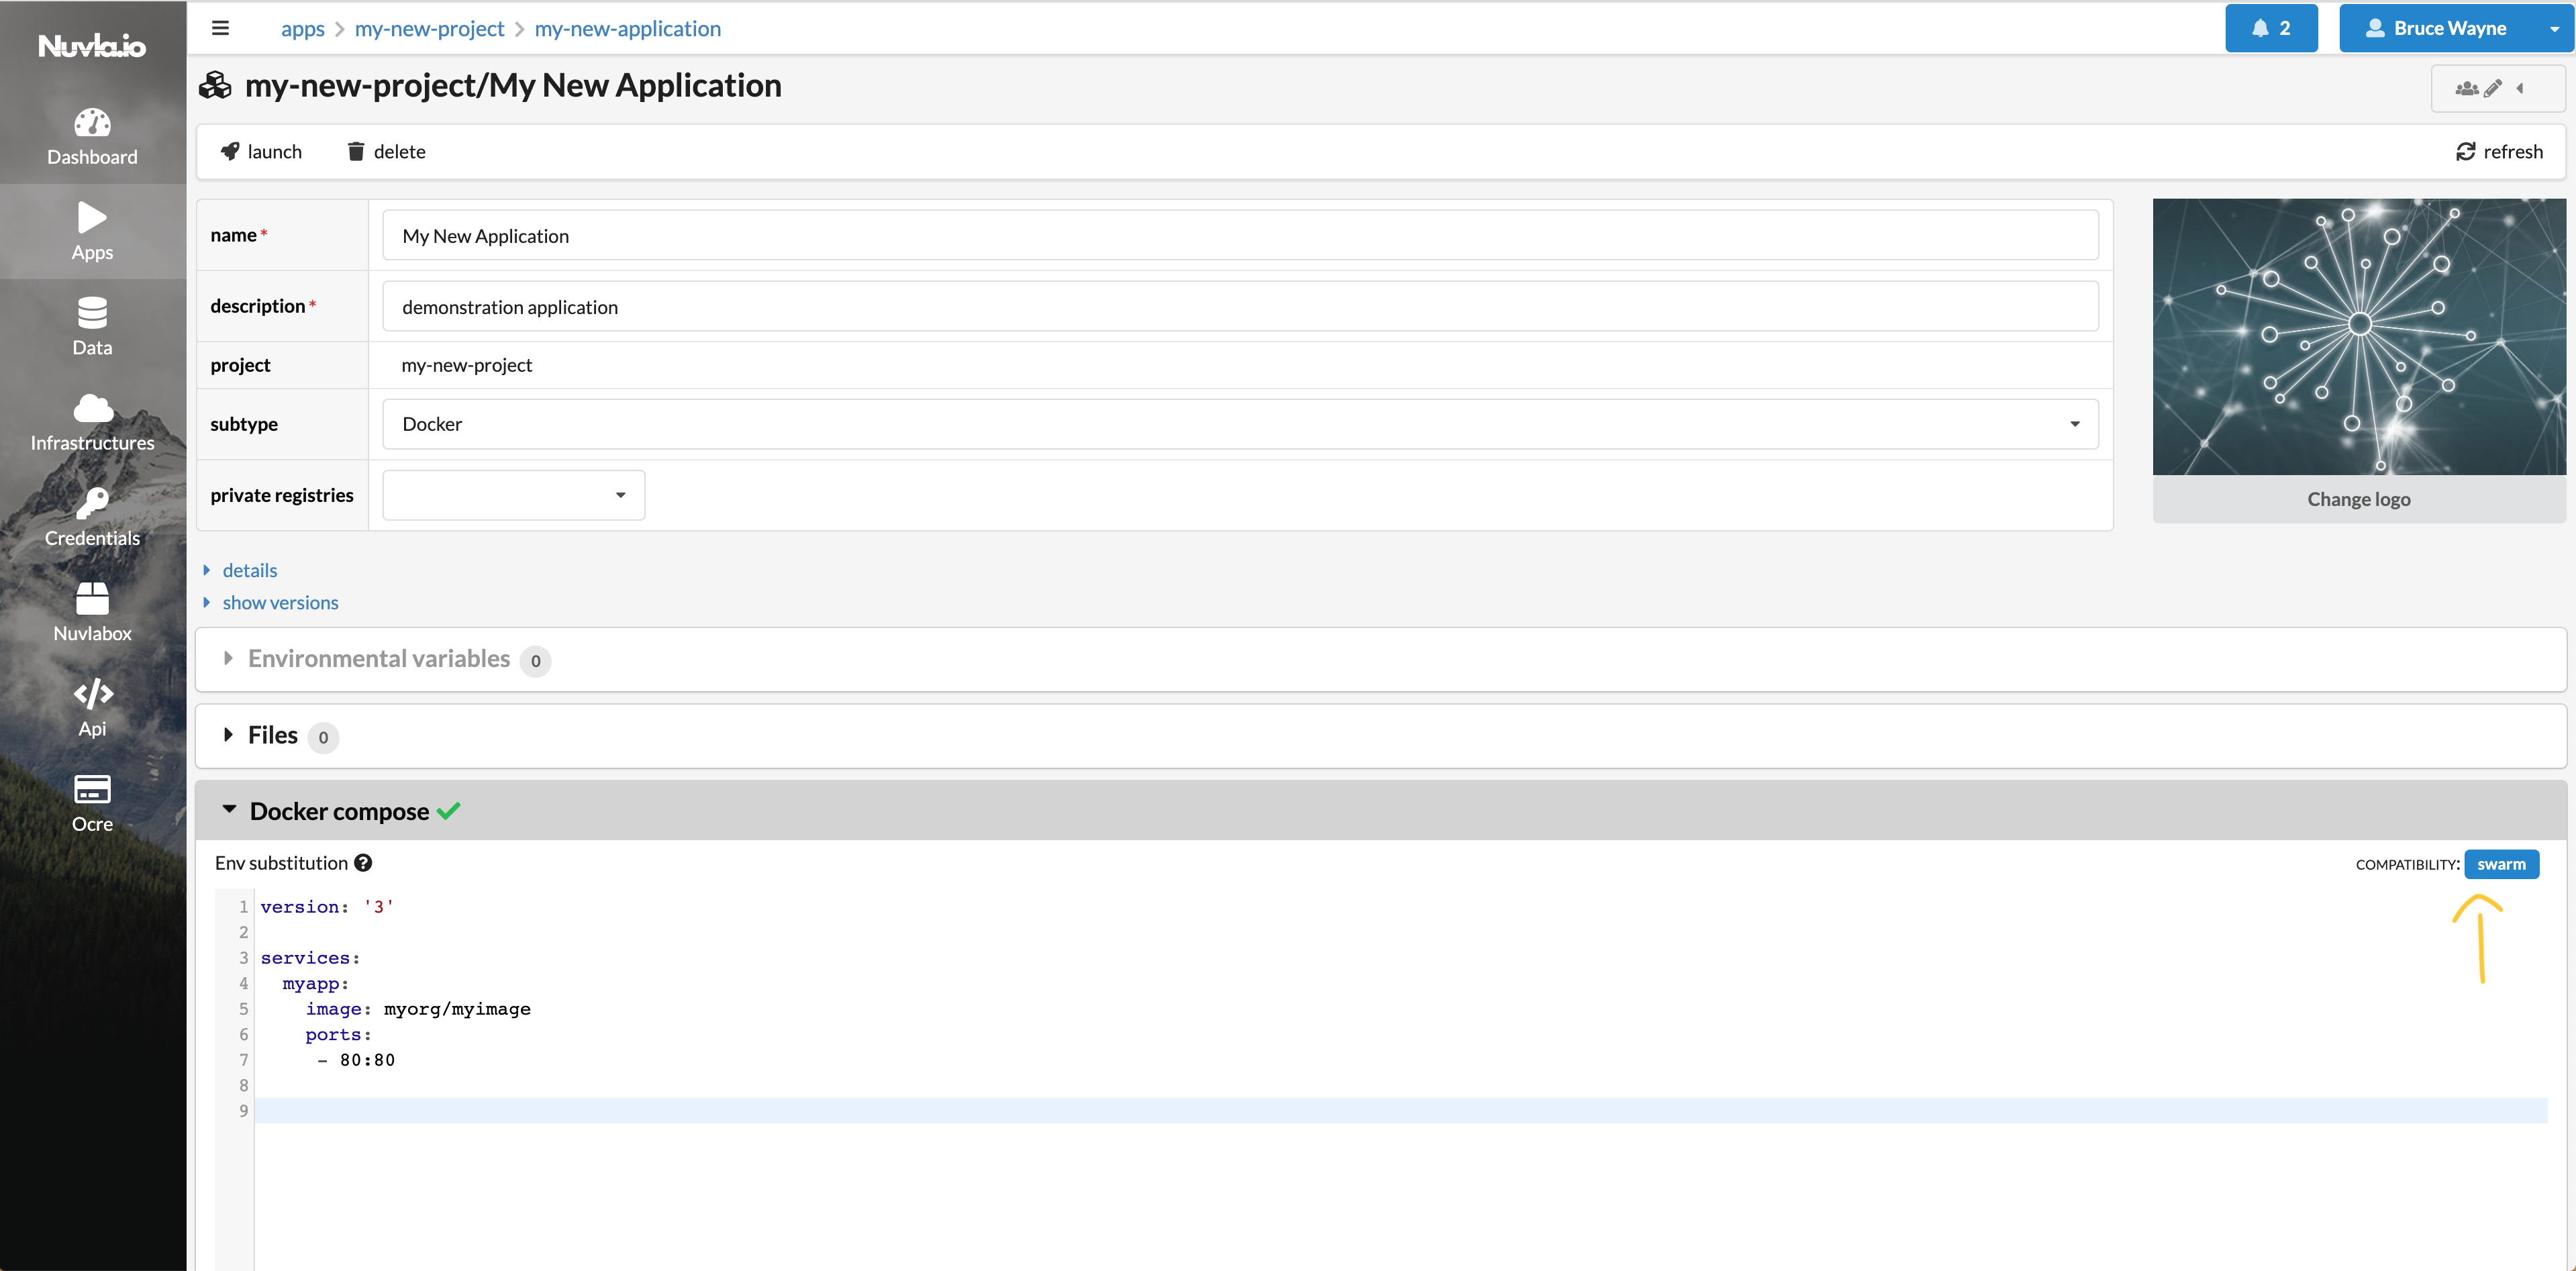
Docker subtype compatibility: Docker Compose vs Swarm?
Nuvla allows you to launch Docker applications both as native Docker Compose projects or Docker Swarm stacks.
Depending on your Compose file, Nuvla will automatically infer whether any of your containers requires Docker Compose-specific options or not.
This is how it works…does your application:
-
have Swarm-specific options (like
deploy)? Then it will be launched as a Swarm stack
-
have Docker Compose-specific options (like
devices)? Then it will be launched as a Docker Compose Project
-
have both Docker Compose and Swarm-specific options? Then it will default to a Swarm stack, and the Docker Compose-specific options will ignored upon launch
-
do not have any Docker Compose or Swarm-specific option? Then it will be launched as a Swarm stack
For more information about which options are Docker Compose and Swarm-specific, please consult the original Compose reference documentation.
Publish and Share your Apps
If you want your apps to appear in the Marketplace (first tab on the Apps page), you must Publish the app.
However, this doesn’t mean that everybody will ber able to see you app. To make your app public, or share it with groups and other users, go to the Share tab of your app. There you will be able to control how you want to share. To make your app public, add the Nuvla Authenticated Users group, with the TODO…. If you want to
Become an App Vendor
To sell your apps on the Marketplace, you will need to provide the following:
- End User License Agreement (EULA)
- Pricing
Once this information is provided, once your app is published, users will be able to purchase it.
NOTE: SixSq provides a generic app EULA. Fee free to use it if you do not have yet your own and if it fulfils your requirements.
NOTE: in order to be able to receive payments, you need to register as an app vendor. Please get in touch if you are a new app vendor.